
Contents
Mugs are a very collectible home essential. We keep buying and gifting mugs because they’re practical to have and lovely to look at. And if you want to do DIY mug printing for personal use or produce them in bulk for selling, we will show you how to print on mugs, from the simplest to the most advanced method.
What are ways to print on mugs?
To create unique mugs with your own creative ideas and artwork, you can try a variety of mug printing methods. Different printing options require different tools and skills. Each of them also has pros and cons. Before finding out what these printing techniques are and the best way to utilize these methods, let’s take a look at a short comparison between printing methods in the table below:
| Printing methods | Color options | Durability | Level of detail | High-volume printing capability | Suitable application |
| Sublimation | Unlimited | Very high (no peeling) | High (sharp image) | Very good (easy to print large quantities) | Suitable for POD, retail businesses |
| Screen Printing | Limited | High | Medium (limited colors) | Very good (low cost when printing large quantities) | Suitable for large businesses |
| Pad Printing | Limited | High | Medium (limited colors) | Good (for industrial production) | Print logo, simple design on the cup |
| Vinyl Decals or Stickers | Unlimited | Low (easy to peel) | Medium | Poor (not durable, difficult to print in large quantities) | DIY, personalized gifts |
| Ceramic or Glass Painting | Unlimited | Low – Medium (depending on paint type) | High | Poor (cannot print in large quantities) | Handmade, exclusive products |
Sublimation Printing
Sublimation printing is no stranger to people who are familiar with the printing world. This technique is widely applied to not only print on mugs but also apparel printing and many other products like tumblers, bags, shoes, and more.
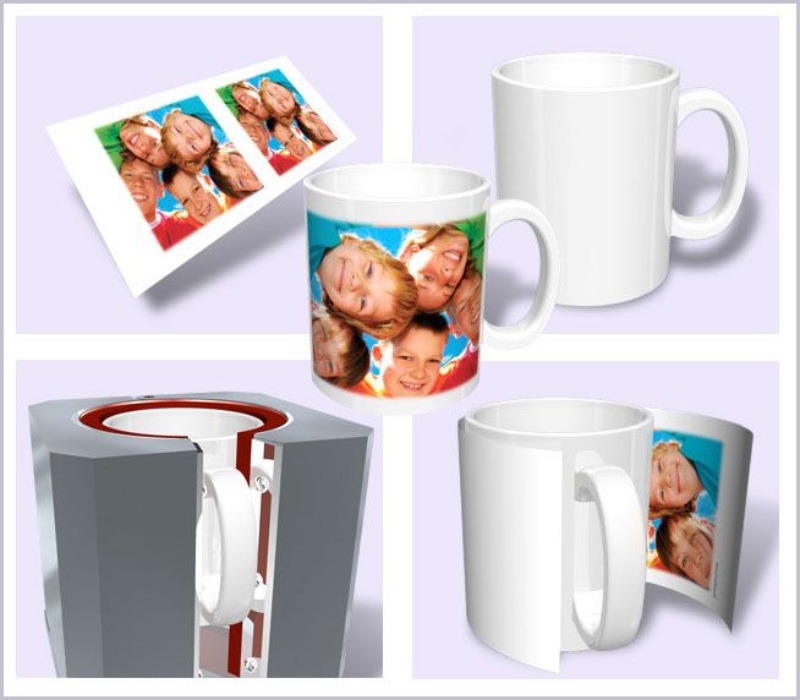
For people who are not in the know, this printing method uses a heat press and sublimation paper to transfer designs onto the printing surface. The special ink used in sublimation has the ability to penetrate the surface of the material, creating enduring, permanent prints.
When using sublimation on mugs, you won’t have to worry that the frequent uses would sweep away the beautiful colors and details.
Besides the ability to create long-lasting, persistent print, sublimation is also known for its precise, intricate portrayal of colors and details. It can transfer your beautiful graphics, illustrations, or photos onto mug surfaces with a high level of precision.
For all of these peaks, it comes as no surprise that sublimation is the top choice for printing on mugs.
Screen Printing
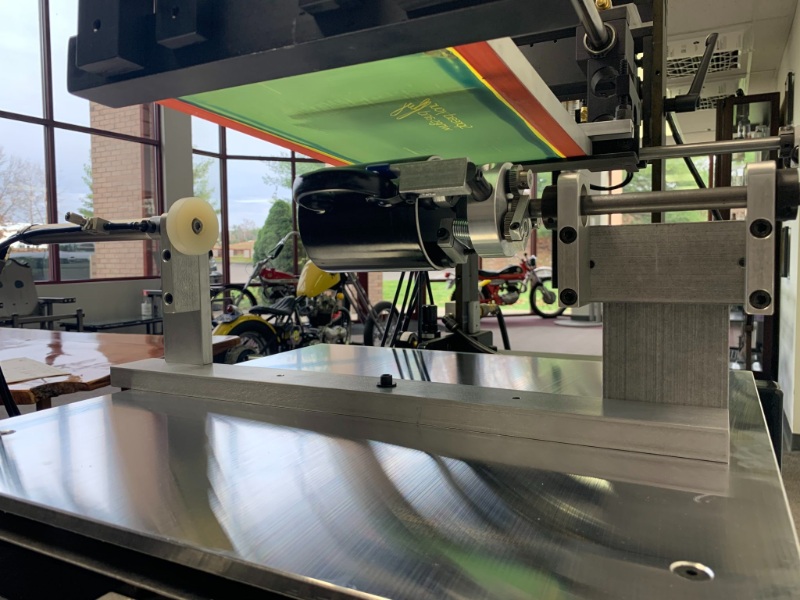
Screen printing is a popular printing method that has been around for a long time. It is frequently used for printing onto flat products like T-shirts, hoodies, sweatshirts, tote bags, and wood prints, yet not many people know that this technique is also compatible with circular products like mugs.
The screen printing process is super simple and easy to set up. With a few simple tools, you can turn your creative ideas into real prints.
The underlying principle of this printing method is to use a special silkscreen to transfer inks onto the printing surface. For circular surfaces like mugs, there will be some special tactics to make sure your print turns out great.
Pad Printing
Pad printing is a special printing technique developed specifically for printing on irregularly shaped objects. In order to allow print ink to grab onto any surface, a silicone pad is used to transfer ink onto the mug’s surface.
Silicone is a highly flexible and elastic material that molds and bends easily into any form, which allows it to distribute the ink evenly across surfaces despite its shape. Other than printing mugs, pad printing is a highly versatile printing option that can be used to print different products.
Vinyl Decals or Stickers
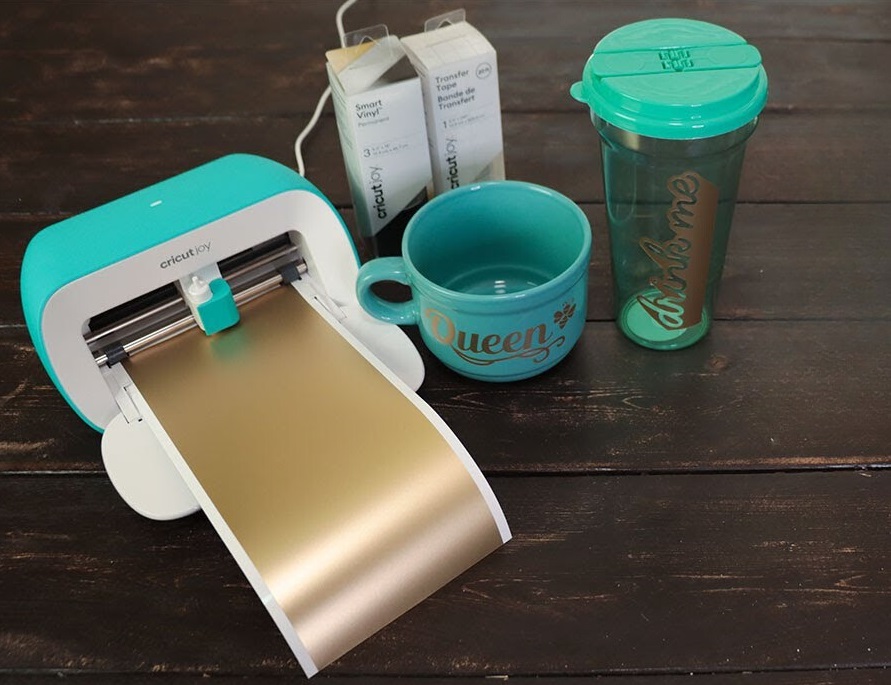
For a cost-effective and easy-to-do option for mug decoration, you can also go with simple vinyl decals or stickers.
The process is straightforward. However, this option has a lot of limitations. It can easily peel off and lose its colors. The durability of decals or stickers depends on the quality. It might not come off for months or years. But in any case, this type of mug decoration doesn’t mean to last. Mugs with vinyl decals or stickers should always be washed by hand, and not dishwasher-safe.
Ceramic or Glass Paints
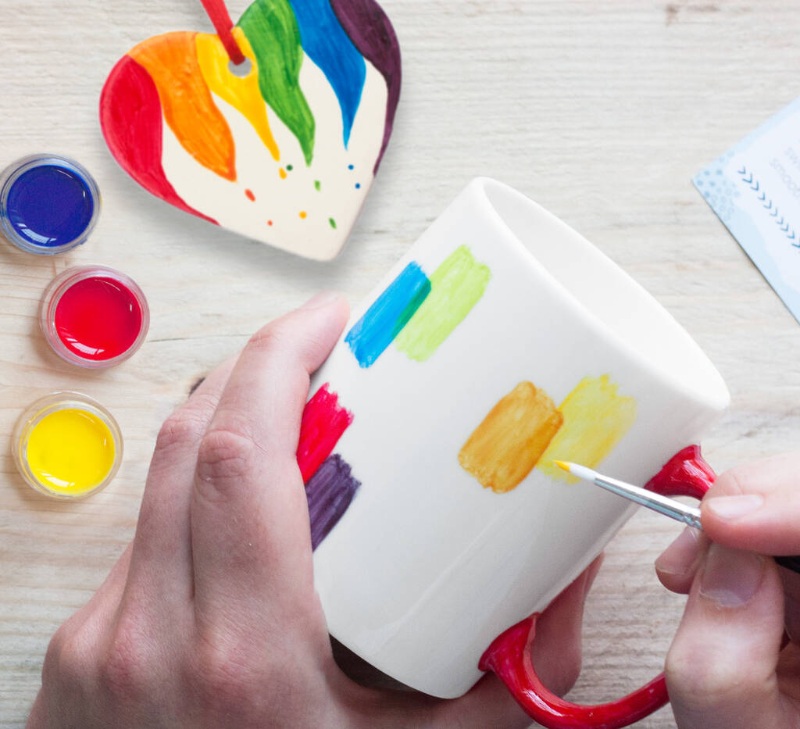
If you want to unleash your creativity and make something unique, one-of-a-kind, ceramic and glass painting by hand is an ideal option to try.
With specific ceramic/glass paint, you can turn any ideas from your imagination into beautiful mug prints. It allows you to express your artistic self with no limitations. Moreover, each piece made is a unique piece that wouldn’t be duplicated.
However, the biggest disadvantage of this printing option is that you can’t print mugs in bulk. If you want to print a certain design in large quantities, it would take you forever to complete and make sure that the design looks consistent.
Above are all the popular options on how to print on mugs. Depending on your preferences and goals, you can select the right methods to print on mugs, either for your personal use or for your business.
How to print on mugs
1. Select your mugs
The first step before you want to print a design on a mug is to find the right mugs. Just like selecting the canvas for painting, you should pay attention to the size, the surface material, as well as other factors like colors and shapes. If you are doing print on demand, check out this list of all mugs available at Merchize.
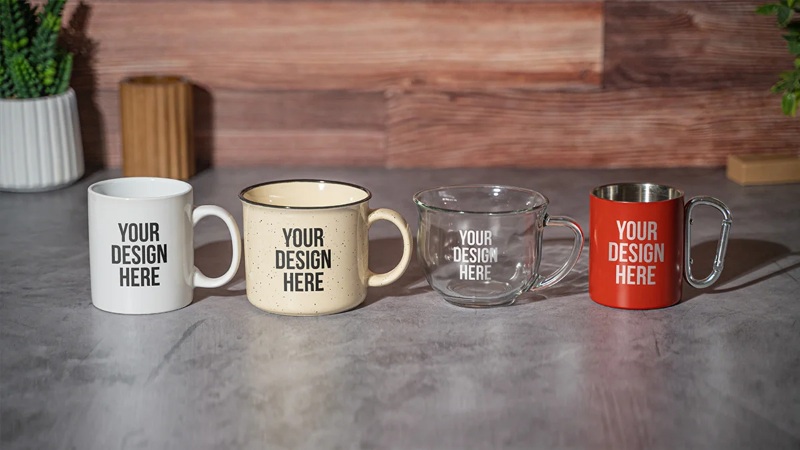
Here are some basic mug types that you can select from:
- Mug material: Ceramic mugs are the most popular type in the mug market. But there are also plenty of other options, for example, enamel, stainless steel, or glass.
- Surface material (Ceramic mug): Coated or uncoated. Coated mugs are usually ceramic mugs that are coated with a layer of plastic-based material. This coating layer is white so that it won’t interfere with other colors. On the other hand, uncoated mugs keep the original true ceramic surface without additional coating. Unlike coated mugs, this type of mug comes in many colors.
- Mug shape: The two most popular mug shapes are cylindrical and conical. Among these two, cylindrical mugs are easier to work with. Other than these two options, there are also many other less common shapes for you to experiment with, for example, Heart-shaped mugs. For these uncommon shapes with irregular print surfaces, it would require specific methods to create quality prints.
- Mug sizes/capacity: Common mug sizes usually range from 6oz to 15oz. The size of the mug is also a factor to consider when choosing the right printing method. Always find the right mug size to fit the printing area allowed by the printing method. 11oz mug is the standard mug size in the market.
- Colors: Black and white are the two most popular colors found in the market. Of course, you can find many other colorful mug options, but these are quite rare and not easy to find.
Also read: Things You Need To Know Before Selling Custom Enamel Mug
2. Create your designs
Depending on your selected printing methods, you should prepare your printing file accordingly. If you want to hand paint or screen print/pad print your design, just limit your designs to a few colors and keep them simple.
If the printing method allows you to print as many colors and details as possible, you are free to create whatever types of art you want. Design software like Photoshop, Adobe Illustrator, Canva, and Procreate are some of the best tools that help you create digital art with ease.
Here are a few tips for making mug designs:
- Save your file in PNG format. This format will keep the background of your designs transparent and not visible when printing.
- Coordinate your designs with the color of the mug. The mug color will be the base of your designs, so don’t leave it out of the picture when creating the mug design.
- Keep your main design within the printing safe zone. Depending on the mug size and the printer’s print area, you should create your file accordingly.
- Make sure your images are at least 300 DPI for clear, sharp, high-quality prints.
- Mirror format or not. If you print your mugs with a mug press or transfer method, you should save your designs in a mirror format that reads backward. After transferring from the paper to the mug, the designs will show up in the right direction.
3. Print your designs
Once you’ve got your design file right, it’s time to transfer these designs into the mug. For each printing method, you will follow different steps to print the designs. Here’s how to print on mugs with sublimation and screen printing techniques.
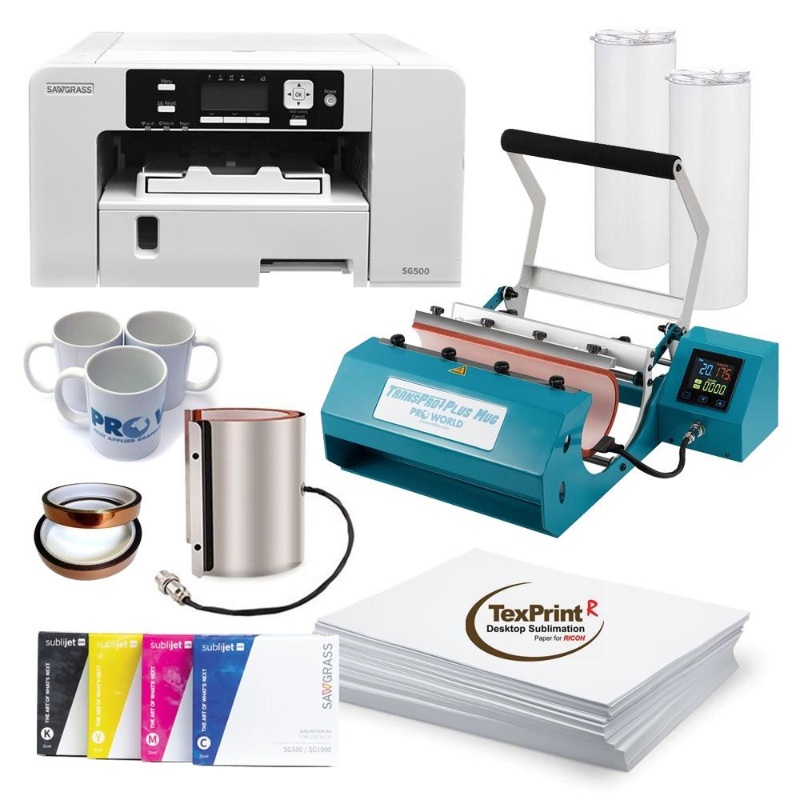
How to dye sublimation mugs
With this print option, you must prepare the following:
- Dye sublimation printer
- Sublimation ink
- Transfer paper
- Press or convection oven
- Heat tape
Here are the steps to sublimation print your mugs:
- Print your designs onto the transfer paper using a sublimation printer and sublimation ink
- Trim the transfer paper to fit the size of your mugs
- Tape the transfer paper into the mugs using the heat tape
- Set up the press with the right heat and pressure
- Place your mugs into the press
- Wait for around 10 to 15 minutes.
- Take out the mugs. Be careful with the mugs and remember to wear gloves to protect your hands from the heat.
In case you don’t have a press, you can use other alternatives like a convection oven to heat the mugs so the ink will be infused into the surface. Using iron for heat pressing is also a viable option. However, these options can not assure even press distribution and consistent prints.
How to screen print mugs
If you want to process a large order of mugs, screen printing could be a cost-effective and time-saving option to try.
- Screen printing frame with mesh
- Screen printing ink. Choose an ink type appropriate for ceramics.
- Squeegee
- Masking tape
- Design stencil (pre-made or self-made)
- Transparency film or vellum paper
- Printer and ink (for printing the stencil)
- Light source or exposure unit
You can do the following steps to screen print your designs:
- Print your design onto transparent film or vellum paper with your printer. Make sure that you have the right paper size for your mugs.
- Place the design stencil (printed transparent film or vellum paper) and use masking tape to keep the stencil in place.
- Expose the screen to a light source or exposure unit (could be a light table or UV lights) for a required time.
- Rinse the screen with water to remove any uncured emulsion. Let the screen completely dry before moving to the next step
- Position the mug and the screen. To secure the perfect alignment, you must set up the mug and the screen with a rotary machine. It helps you to hold the mug in place and distribute the ink evenly and smoothly. For a small print size, you can do without the rotary machine.
- Apply ink at the top of the screen and spread the ink evenly across the design area.
- Put the screen down on the mug and use the squeegee to transfer ink onto the mug.
- Allow the ink to dry for a few hours.
- Lastly, do the necessary to cure the ink. Normally, it will require baking the mug in an oven at a specific temperature for a certain time.
What are the different types of mugs you can print on?
Each mug material affects the printing method and determines how sharp and durable the final product will be. There are four common categories of mugs often used for custom printing, including:
Coated Mugs
Coated mugs are usually made from ceramic and finished with a special polymer or ceramic layer that improves both print quality and durability. Thanks to this coating, inks bond more effectively to the surface, which makes the colors appear vibrant and last longer. This is why coated mugs are often chosen for sublimation printing.
The surface feels smooth, resists scratches and corrosion, and even helps keep drinks hot or cold for a longer time. They work especially well for detailed designs such as photos, logos, or artwork. However, most coated mugs are limited to white or light backgrounds, since that ensures the colors stay accurate and sharp.
Uncoated Mugs
Uncoated mugs do not have a polymer layer, so what you see is the raw material itself – whether ceramic, glass, or stainless steel. This gives them a more natural texture and makes them available in a wider range of colors, unlike coated mugs that are mostly white.
Since there is no coating, they are better suited for printing methods like UV printing, vinyl decals, or laser engraving. However, they do not achieve the same level of vibrancy or long-lasting detail as coated mugs with sublimation printing. They are also more prone to scratches, fading, or corrosion over time.
Cylindrical and Conical Mugs
Cylindrical mugs, with the same diameter at the top and bottom, are the most straightforward to work with. Their smooth, even surface makes them perfect for wraparound designs using sublimation or transfer printing.
Conical mugs, which taper from one end to the other, add a bit more challenge. They require careful alignment to ensure the design looks balanced, though they are still compatible with most printing methods.
Odd Shaped Mugs
Odd-shaped mugs like heart-shaped styles or designs with unusual curves – bring a different set of challenges to printing. Because the surface is uneven, it is harder to maintain consistent pressure and heat, which can result in patchy or distorted prints.
These mugs work better with flexible methods such as pad printing or vinyl decals, which can adapt more easily to irregular shapes. They are not the best option for detailed photo or logo prints, since the results may vary.
Printing on these mugs brings out a personal touch, letting customers showcase their individuality in ways that standard shapes cannot.
How much can you earn selling personalized mugs?
Selling personalized mugs has strong profit potential, with the global mug market expected to reach $58.05 billion by 2032 (Databridgemarketresearch). Your margins depend on several factors, including the printing method, type of mug, order size, and pricing strategy.
With print-on-demand services like Merchize, production costs usually fall between $3.75 and $7.50 per mug. This leaves room to set retail prices in the $10 to $20 range or even higher for unique or premium designs. For instance, if a mug costs $5 to produce and sells for $15, you earn $10 in profit per unit. Some of the custom mug options that Merchize offers include:
- Ceramic Mug (11oz – 15oz): $3.75 – $5.59
- Accent Mug (11oz – 15oz): $5.59 – $6.75
- Color Chaning Mug (11oz): $7.5
Ordering in bulk, such as 100 units or more, often comes with special offers from service providers. Once you have built a base of potential customers, producing high-quality custom printed mugs will no longer be a challenge.
Tips to boost your custom mug business
To maximize your custom mug business’s success, focus on strategic design, marketing, and operational efficiency. Here are actionable tips to drive sales and build a strong brand:
- Design smart: Creating niche-focused designs such as pets, hobbies, or corporate themes, always using 300 DPI files and testing with samples
- Use POD services: Use POD services like Merchize with Shopify, Etsy, or Amazon to avoid inventory and scale your business easily
- Market wisely: Market wisely through TikTok, Instagram, and X, combining testimonials, mockups, email campaigns, and paid ads, especially during holidays
- Bulk deals: Offer bulk deals with discounts for corporate or event orders, along with seasonal promotions and product bundles
- Quality first: Put quality first by choosing dishwasher-safe mugs, sublimation printing, and branded packaging
- Expand range: Expand your product range with tumblers, mason jars, enamel mugs, as well as color-changing or uniquely shaped mugs.
FAQs
How much does mug printing cost?
It can cost from 3-6 dollars to print a mug. The price might vary depending on the printing quantity, your printing methods, and the material.
If you are not familiar with the printing process, you can outsource to other mug printing companies to turn your designs into reality. At Merchize, we allow a minimum order quantity of only 1. We also help to handle packing and shipping for you. You can save a huge budget on buying equipment and materials. The base cost of Merchize’s mug starts from $3.75.
How to print on mugs at home?
You can print mugs at home with the right tools and materials. There are a few printing options you can try at home with little investment, for example, hand painting or using vinyl decals and stickers. If you want to print a large number of mugs, then consider screen printing, dye sublimation printing, or pad printing.
How do I print a mug without sublimation?
Besides sublimation printing, you can also try mug printing with other printing methods like screen printing, hand painting, pad printing.
What type of printing should I use to print pictures on mugs?
The best printing method for pictures on mugs is dye sublimation. It produces vibrant, durable, and high-quality images that won’t peel or fade. Sublimation works best on white, coated ceramic or polymer-coated mugs, making it ideal for detailed and full-color photos.


