
Contents
Whether you are printing your own banners for your business or starting to sell custom banners for customers, getting the right banner size is an important matter. You don’t want to waste your time and money on the wrong sizes that fail to deliver your banner design.
This guide breaks down the most common banner sizes across indoor, outdoor, and event use—so you can choose (or offer) dimensions that actually work in real-life settings, not just on paper.
Get the banner dimensions wrong, and even the best design can fall flat. A banner that’s too small gets ignored. One that’s too large looks sloppy, overwhelms the space, or simply won’t fit where it needs to go.
More than a technical detail, size can directly affect how your message lands. A vinyl banner squeezed onto a busy storefront becomes visual noise. A step and repeat that’s too narrow leaves logos cut off in every photo. These are some common mistakes people make when choosing banner sizes.
If you are selling banners, your banner sizes should also fit the market standards and customers’ common needs. By offering the right banner sizes, you can provide exactly what customers are looking for and increase conversion rate.
Portable & Indoor Displays
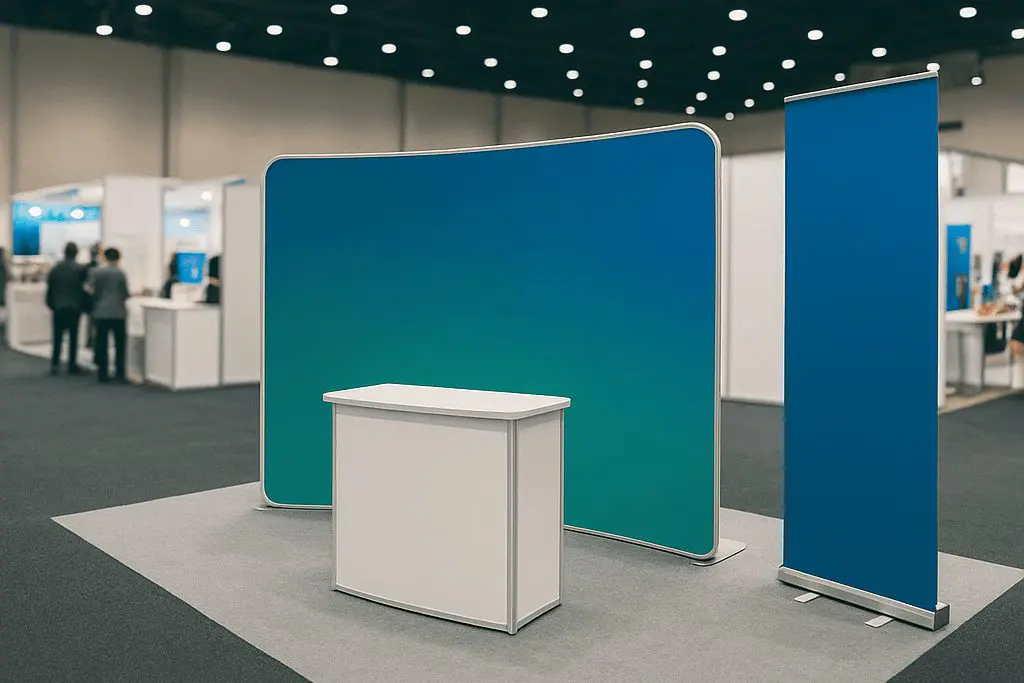
When you’re browsing a product catalog for your next event, you’ll notice that indoor displays are built for speed and portability. These are designed to be lightweight, usually featuring a support stand that lets you go from “packed in a bag" to “ready for business" in under two minutes. Sound familiar? It’s the same efficiency you look for in your fulfillment process.
- Retractable (Roll-up) Banners: The 33" x 80" model is the industry gold standard for trade shows and retail lobbies. If you have more ground to cover, “Wide" versions can reach 47" x 80", while thinner 24" widths work well for narrow hallways or 24" x 62" for shorter displays.
Retractable banners are commonly used at trade shows, retail lobbies, seminars, and pop-up events. These banners are positioned at eye level to provide quick information about a company or a specific product.
- X-Frame Banners: These usually come in 24" x 63" (60cm x 160cm) or 32" x 72" (80cm x 180cm). For a larger display, opt for 48" x 78" (120cm x 200cm).
Because the frames are light and the graphics are easy to swap out, they are perfect for budget-friendly indoor marketing. Because the frames are lightweight and the graphics are interchangeable, they are usually used for seasonal menu specials or temporary directional signage in shopping malls.
- L-Stand Banners: Often measuring 31.5" x 79", these offer a minimalist, high-end look, suitable for trade show and retail entrances. If the banner is showcased at a large space with high traffic, you can opt for a larger size, 39.5" x 79" (1000mm x 2000mm).
L-Stand Banners take up less floor space than other stands, making them a favorite for boutique environments where a sleek, non-bulky appearance is preferred.
- Pop-Up Backdrop Displays: The most common option is the 3×3 grid (Standard), measuring approximately 7.5′ x 7.5′ (about 2400mm x 2400mm), making it ideal for typical trade show booths. For wider coverage, the 4×3 grid (Wide) expands to around 10′ x 7.5′ (about 3000mm x 2400mm)
Pop-up backdrop displays are widely used at trade shows, exhibitions, press events, and branded photo areas. Thanks to their large format and seamless graphic coverage, they are perfect for showcasing logos, campaign visuals, or step-and-repeat designs. Despite their size, the collapsible frame makes them easy to transport and quick to set up, making them a practical choice for businesses that frequently attend events.
Outdoor & Large Format Banners
Outdoor banners need to grab attention from a block away. Choosing the right banner size is your first step in ensuring your message doesn’t get lost in the scenery.
- Standard Vinyl Banners: The common sizes for vinyl banners include 4′ x 2′, 6′ x 2′, 8′ x 4′, and 10′ x 5′. These banners are best used for all-purpose outdoor advertising. go-to for grand openings, school sports, or local storefronts. You’ll typically find these in horizontal formats like 4′ x 2′ or 6′ x 2′ for eye-level placements. If you’re aiming for roadside impact, stepping up to an 8′ x 4′ or 10′ x 5′ ensures drivers can actually read your offer at high speeds. Most of these include grommets—those handy metal rings—so you can hang them securely with rope or zip ties.
- Mesh banners: Mesh banners are built specifically to handle high-wind, outdoor environments like construction fences or building wraps. Their sizes often lean toward the “large and extra-large" end of the spectrum, spanning anywhere from 10′ to 50′ or more.
– Small/Medium Impact: 4′ x 8′ or 5′ x 10′ (Great for localized business promos on a gate).
– Standard Fence Height: 6′ x 12′ or 6′ x 15′ (The go-to for construction site branding).
– Large Format Wraps: 8′ x 20′ or custom sizes spanning up to 50’+ (Used for building facades or stadium outfields).
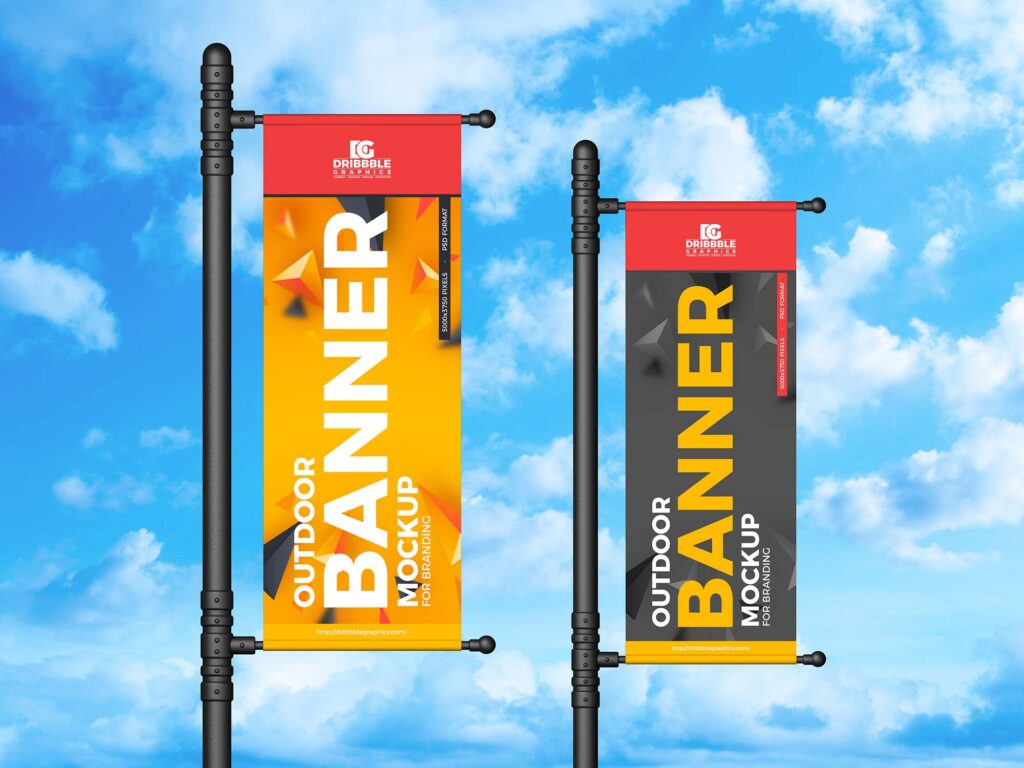
- Vertical pole banners: These are commonly used for university campuses, historic districts or city festivals to create a cohesive, professional look along a street. The width usually measures 18”, 24”, 30”. The height can ranges 24”, 36", 48", 60”. Popular sizes include:
– 18" x 36": Ideal for narrow pathways
– 24" x 48": The standard for street lamps
– 30" x 60": Maximum visibility for large districts
Event & Specialty Banners

These serve specific functional roles at organized gatherings.
- Step and Repeat Banners: Step and repeat banners are mostly used for event backdrops. Common sizes include the 7.5′ x 7.5′ square format and the wider 10′ x 7.5′ option. The square works well for tighter setups like press conferences or corporate headshot stations, while the wider format gives you more space for red carpets, award ceremonies, and wedding photo walls. Logo visibility is important when designing step and repeat banners: your branding should appear seamlessly behind every guest, no matter where they stand in the frame.
- Feather/Teardrop Flags: Both banner types are designed for movement in the wind and catching the eye of passing drivers. Both are popular picks for car dealerships, gas stations, grand openings, and outdoor festivals. Heights typically range from 8′ to 14′. Go taller (12’–14′) when you need roadside visibility from a distance; stick to the shorter range (8’–10′) for pedestrian-heavy areas where overhead clearance is a concern.
- Tension Fabric Displays: Tension fabric displays use a fabric that pulls tight over a frame for a modern, high-end look, commonly found in tradeshows. These offers a more professional look compared to the regular vinyl banner. Common sizes for these banners are often 8′ x 8′ or 10′ x 10′.
- Tabletop & Point-of-Purchase (POP) Banners: Ideal for checkout counters, reception desks, and trade show tables. These displays are typically much smaller than floor-standing units, with “mini" versions starting as small as a standard sheet of paper. Popular sizes for these miniature banners are usually A4 (8.3" x 11.7" / 210 x 297 mm), A3 Size (11.7" x 16.5" / 297 x 420 mm)
- Decoration banners: This type of banner is highly versatile. It can be used to decorate both indoors and outdoors. For example, decoration banners at Merchize can be used to decorate parties, birthdays, graduations, weddings, school events, holiday celebrations, and more. Made of durable polyester fabric and sublimation printing, the decoration banner offers a nicer-looking banner option that can be hung up anywhere you like. Decoration banner is available in various sizes, 24×47, 24×71, 35×71, 47×71.
Know your viewing distance
The farther away your audience is, the larger your banner needs to be. A 2′ x 4′ banner works fine outside a shop entrance where foot traffic passes within 5–10 feet. That same banner on a highway fence? Nobody’s reading it.
Your banner size must be large enough to capture eyes and render text readable from the viewer’s distance.
Measure your space first
Measure your walls, fences, frames, and poles. These are the physical limits for your banner sizes. You don’t want to mismatch your banner size with the available space. Assume dimensions, and you might have to reprint the whole thing.
Before ordering or printing, grab a tape measure and get the exact width and height of the space. If one wants a banner for a 6-foot chain-link fence, a 4′ x 8′ banner leaves awkward gaps. A 6′ x 12′ mesh banner fits flush, looks intentional, and does the job properly. Always confirm — never estimate.
Match the format to the setting
A trade show calls for different sizing than a roadside banner or a retail window. A tension fabric display at 8′ x 8′ makes sense inside a convention center where booth space is measured and consistent. That same size on a busy street corner gets lost against building facades and signage competing for attention.
Ask yourself: where will someone first see this banner, and what are they doing when they see it — walking, driving, browsing a booth? This information will give you important clues on how to select the right dimensions that match the setting and get your design messages delivered properly.
Consider your content
More text and logos need more space. A simple call-to-action can work on a smaller banner. A bold “SALE — 50% OFF" with an arrow can work perfectly on a smaller 2′ x 4′ banner at a storefront entrance.
However, if your designs need to contain various information, from business name, tagline, date, phone number, to logo, cramming all of that onto a 3′ x 2′ banner can create a cluttered mess that isn’t easy to grasp at first glance.
Think about orientation
Horizontal banners work best for eye-level placements, suitable for hanging up on walls and long fences, while vertical formats suit pole banners and tall displays.
A horizontal banner hung across a storefront reads naturally because we scan left to right. Flip that same content into a vertical layout, and suddenly your reader is tilting their head, and possibly, your text becomes harder to read.
Vertical formats shine on street pole banners, feather flags, and retractable stands — spaces where height is your asset and width is limited. Match the orientation to the space, not just the design preference.
Factor in standard sizes
When it comes to banner size, it is worth following the advice not to reinvent the wheel. Stay close to industry-standard dimensions.
For each type of banner, there are certain sizes that are used again and again. These standard dimensions are optimized for the best results and for each banner’s specific usage.
Besides, custom sizes usually require manual cutting, longer lead times, and higher costs, while standard sizes like 6′ x 2′, 4′ x 8′, or 8′ x 4′ are pre-configured in most print workflows, which means faster turnaround and fewer chances for production errors.
Check local regulations
Outdoor and street-level banners may have size restrictions depending on your city or venue. Many cities cap the size of temporary signage on public-facing storefronts, and event venues often have strict rules about what can be hung, where, and how large.
Always confirm size permissions with the venue or local authority before finalising your outdoor banners.
Ask your printer
The most practical tip is to ask your printer. Most print shops can advise on the best size for your substrate, use case, and budget. Printers work with banner sizes every day and know what works in the real world — not just in theory.
If you’re unsure whether a 5′ x 10′ mesh banner will hold up on a construction fence in a windy area, your printer can tell you whether the material and size combination makes sense or whether you need to go larger, smaller, or switch substrates entirely. Think of them as a resource, not just a vendor.
Get these three things right from the start, and you’ll save yourself (and your clients) a lot of headaches.
Aspect Ratio & Design Scalability
Designing a banner at 2′ x 4′ and need to scale it up? A 4′ x 8′ version will look perfect — same 1:2 ratio, just larger. However, the same design will look distorted if forced onto a 3′ x 5′ banner.
So before you start designing, lock in the ratio and stick to it across all size variations. Don’t make the mistake of designing a banner in one size and trying to stretch it to another size.
Resolution vs. Viewing Distance
Resolution isn’t one-size-fits-all. A common mistake is designing everything at 300 DPI regardless of banner size. Here’s the reality — the further away your audience stands, the less resolution you actually need:
- Tabletop or retractable banners (arm’s length): 150–300 DPI
- Standard storefront banners (10–20 feet): 100–150 DPI
- Large outdoor or roadside banners (20+ feet): 75–100 DPI
A 10-foot banner viewed from 20 feet away does not need 300 DPI (dots per inch); 75–100 DPI is often sufficient. Designing a 10-foot outdoor banner at 300 DPI creates a massive file that’s slow to work with and unnecessary for the print.
Safezone
In many cases, your usable design area is slightly smaller than the total banner size. Take into account hemmed borders (around 1–2 inches on each side) and grommets (typically placed every 2 feet along the edges). If a logo or key text sits too close to the edge, it risks being hidden behind the hem or punched through by a grommet.
Strictly follow the printing/safe zone guides, if any. As a rule, keep all critical design elements at least 2–3 inches away from any edge.
Readability
When creating visual banners, it’s very important to ask: Can the viewers read your message? What is the best font size for text to be readable from the viewer’s point of view?
A readable street-level banner also follows a simple font rule: 1 inch of letter height for every 10 feet of viewing distance. So a banner read from 30 feet away needs letters at least 3 inches tall.
Think about where banners are displayed and design accordingly.
Final thoughts
Banner size can determine whether your message gets seen, understood, and remembered. The right dimensions help your design fit the space, match the viewing distance, and deliver impact without compromise.
By sticking to proven standard sizes, planning for real-world conditions, and designing with clarity in mind, you set every banner up to perform exactly as it should. If you’re ready to create banners that actually work, start by choosing sizes that match your use case—or align your product offerings with the dimensions customers already expect. The right size isn’t guesswork—it’s your advantage.


