
Contents
In every designer’s career, transforming their digital artwork into something valuable is a goal everyone aspires to when entering the profession. Creating a finished piece already showcases your skill, but how to print digital art to elevate the value of your artwork takes more than just design. In this article from Merchize, you’ll learn how to print your digital creations and how to sell them at a higher price.
Step-by-step guide on how to print digital art
To make it easier for you to learn how to print digital art, carefully read through each step below to create a high-quality print.
Step 1: Preparing your digital art for printing
Finalize your artwork
To get started with printing, the first and most important thing you need is a properly prepared digital art file that meets the printing requirements:
- Resolution and Size: The standard resolution for high-quality prints is usually 300 DPI
Size Calculation Formula: Width (inches) x 300 = pixels. For example, to print a 10×8 inch image, you need a file that is 3000×2400 pixels.
Read details: Prepare Artwork for Print
- Color Mode: Typically, when designing digital art, the color mode is RGB. However, for POD printing, you need to switch to CMYK to avoid color discrepancies during printing
- File Format: For print-on-demand products, PNG or PDF formats are preferred to ensure high-quality prints with a transparent background. Additionally, TIFF format can be used for artworks requiring very high resolution, though it’s not ideal due to its large file size
- Bleed and Safe Margins: To ensure that no part of the artwork gets cut off during production, you should add a bleed area of 0.125 to 0.25 inches, and a safe margin of 0.25 inches
Selecting materials and products for printing
Paper Types:
- Matte: Smooth, non-reflective surface, perfect for detailed artwork or pastel colors
- Glossy: Vibrant colors and a shiny surface, ideal for bold and bright paintings
- Textured: Paper with a texture that gives a hand-painted feel, perfect for traditional art styles
Canvas:
- Stretched: Pre-stretched on a frame, ready to hang
- Rolled: Rolled for easier shipping, typically more affordable
Fabric (for shirts, tote bags, etc.):
- Cotton: Soft and comfortable, ideal for casual wear
- Polyester: More vibrant print colors, great for DTG printing
Products for printing digital art: Poster, Canvas, Framed Print, Metal Print, Wood Print, Acrylic Print…
Step 2: Choose your printing method
There are four printing methods suitable for printing digital artwork that you can explore and consider during your journey of learning how to print digital art.
1. Direct to garment (DTG) printing
DTG (Direct to Garment) is a method of printing ink directly onto fabric (typically cotton) using advanced inkjet technology. DTG technology employs inkjet print heads to print each pixel of an image without the need for screens or print plates. This method is ideal for printing digital artwork onto t-shirts or fabric.
Advantages:
- High detail printing, accurately reproducing shades and color transitions.
- No minimum order required, making it perfect for print-on-demand (POD).
- Great for designs with multiple colors or complex gradients.
Limitations:
- Printed colors may fade after multiple washes if the fabric is not of high quality or not properly treated.
Note: DTG works best on cotton or cotton blend fabrics. Ensure your file is a PNG with a transparent background, 300 DPI, and in sRGB or CMYK mode to achieve accurate colors when printing.
2. Giclée printing
Giclée describes the high-quality inkjet printing process using pigment-based inks on specialized paper or canvas. Giclée printing is commonly used for reproducing fine art, photography, and high-end digital artwork or canvas prints.
Advantages:
- Uses pigment-based inks, ensuring color durability for decades.
- Allows printing on textured paper, giving a hand-painted feel.
- Vibrant, sharp colors with rich depth.
Limitations:
- Higher printing costs compared to standard methods, and requires a high-quality original file for printing.
Note: Giclée requires high-quality files, with a minimum resolution of 300 DPI, CMYK color mode, and TIFF or PDF formats. If you’re an artist looking to print and sell art prints, Giclée should be your first choice, as the prints are perfect for limited editions or gallery displays.
3. Screen printing
Screen printing is a method that uses a mesh stencil to push ink through each layer of mesh onto the material’s surface. Each color is printed using a separate stencil, so if a design has three colors, it will require three stencils and three printing passes. This technique is either manual or semi-automatic and is known for its ability to produce bold, long-lasting colors, making it ideal for large batch printing. It’s commonly used for printing on t-shirts, bags, or simple posters.
Advantages:
- Cost-effective for large quantities.
- Bold, long-lasting colors, especially effective for minimalist designs or those with few colors.
- Can be used on various materials, including thick fabrics or dark backgrounds.
Limitations:
- Each color requires a separate stencil, so it’s not ideal for designs with many colors or complex details.
Note: If you’re printing only a few shirts or need gradient designs, screen printing may not be the best choice due to its high cost and difficulty in achieving accurate prints. File formats should be vector (AI, EPS) or clear PNG.
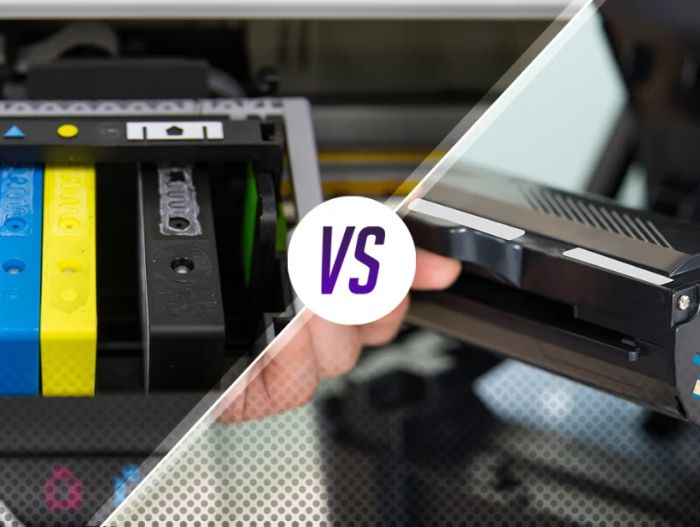
4. Laser and inkjet printing
Laser and Inkjet Printing are two methods used in some print-on-demand applications. These techniques are particularly well-suited for paper products such as posters, stickers, or cards. While they operate similarly, they differ in terms of image quality, ink types, and production costs.
Advantages:
- Convenient, accessible, and cost-effective.
- Fast printing, suitable for non-professional needs.
Limitations:
- Print quality depends heavily on the printer, ink type, and paper used.
Note: Laser printing typically offers bolder and more durable colors, while inkjet printing delivers smoother, more detailed reproduction. This method is ideal for test prints before committing to a larger run with a more professional technique.
Step 3: Select a printer or service
Once you’ve chosen the right printing method for your artwork, the next step is to select where to print your work. To ensure high-quality products that can be sold at a premium price, you need to make your decision based on several key criteria, such as:
- Print quality and real customer reviews
- Product catalog (depending on whether you want to print your artwork on poster, canvas, or accessories)
- Shipping time and coverage
- Integration with your sales platform
- Price comparison and sample prints
Step 4: Upload and configure
Typically, when you choose a print-on-demand service, they will guide you step-by-step on how to work with their system to ensure the most accurate prints. However, you can generally follow these guide:
- Log in to your POD account.
- Select the product you want to print (such as t-shirts, posters, or canvases), then upload your prepared design file (ensure it’s in CMYK mode).
- Align the position and size of the image directly on the product mockup (you can either design it yourself or the service provider will offer mockup templates).
- Preview the design on the product to check alignment, print area, and image proportions.
- Save and publish the product to your store once everything is ready.
File upload tips: Always follow the platform’s guidelines as each one has specific requirements regarding maximum sizes, supported formats (PNG, PDF, JPEG), and file size limits. For instance, Merchize typically requests PNG files with transparent backgrounds and a minimum resolution of 300 DPI.
Step 5: Order samples
Order a sample to confirm the print quality and check the image before moving forward with mass production and shipping to your customers. This will give you the most accurate assessment of whether the printed product meets your expectations and help prevent any potential mistakes when you start selling the actual items.
For each product you plan to sell, make sure to order at least one sample to evaluate the quality (this might be free if the provider offers a service to support it).
Step 6: Production and delivery
When you receive an order from promoting on the sales platforms you’re participating in, the information will be sent to the print-on-demand provider you’ve partnered with. At this point, the production and shipping process will begin.
There are a few things you should pay attention to during this stage:
- Make sure to understand the production and shipping times so you can advise your customers accurately.
- Track the order status through the dashboard.
Merchize: Your print on demand partner
Merchize is a reputable print-on-demand provider in Asia and globally. When using Merchize’s services, sellers get a seamless experience from receiving order details to fulfilling and shipping the orders across continents.
Merchize offers over 500+ customizable product categories for printing digital art, with modern printing technologies such as DTG, DTF, and embroidery, providing a personalized experience for consumers. Additionally, several standout features make Merchize the top choice for collaborating on digital art prints:
- A wide network of factories, including locations in Vietnam, the USA, Australia, the UK, the EU, and China
- Services to support brand development for each seller
- Easy integration with major sales platforms like Etsy, Amazon and Shopify
- Fast production and shipping times, typically ranging from 2 to 5 days for international shipping
- 24/7 customer support service
Tips for selling your printed digital art
- Promote on the right e-commerce platforms: Since POD only charges when an order is placed, you can focus your resources on promoting and attracting potential customers
- Run marketing campaigns: Email marketing campaigns or social media channels are free methods that any seller should implement
- Optimize SEO for digital art prints: By optimizing for search engines, the chances of your product appearing to users on the platform will increase, which in turn boosts conversion rates
- Price your prints strategically: Setting the right price for your product can be a competitive advantage for your brand, as long as it is priced reasonably and still ensures profitability
- Offer limited edition prints: When prints are available in limited quantities, customers will feel a higher sense of ownership value, increasing scarcity and encouraging swift action
- Identify the right target audience: Focus on customers who appreciate art, home decor, and value personal creativity, rather than catering to everyone
- Optimize according to trends/seasonal events and holidays: Choose themes related to the season, holidays, or trends to increase relevance and demand from customers
- Sell the story, not just the product: Share the story behind each artwork so that customers feel a connection and desire to own it, rather than simply purchasing a product
- Build a personal brand: Develop a strong brand that helps customers recognize and remember your products long-term
- Leverage customer reviews: Encourage customers to leave reviews, which helps build trust and encourages others to buy from you
Common mistakes to avoid when printing digital art
There are several mistakes that beginners often make when selling digital art prints:
- Using the wrong color mode (RGB instead of CMYK)
- Low resolution: A design file with only 72 DPI will result in pixelated or blurry prints. Make sure your artwork has a minimum resolution of 300 DPI to maintain detail and sharpness
- Ignoring the bleed: If you don’t add a bleed (an additional 0.125–0.25 inch of space outside the design edges), the print file may shift or have unwanted white borders
- Skipping the sample print: Neglecting this step may lead to selling defective products or prints with colors that don’t match your design
- Designing too intricately for fabric printing: Small details, bleeding colors, or gradients may not display clearly on T-shirts or canvas. Simplify the design to optimize it for DTG or screen printing methods
- Not reading the platform’s guidelines carefully: Each platform has its own specifications regarding file format, size, and print area. Be sure to review the guidelines thoroughly before uploading to avoid file errors or order rejections
How to print digital art FAQs
What is the best paper type for printing digital art?
For each type of digital artwork, there are specific paper types that best suit the design. Therefore, there is no single “best" paper for all artworks. For example, Matte paper is ideal for detailed paintings, Glossy paper enhances vibrant colors, while textured or cotton papers provide a premium feel for fine art prints.
How do I ensure my digital art prints with accurate colors?
To ensure the print color matches your design, you should calibrate your monitor, design in CMYK mode, and use the soft-proofing feature in software like Photoshop. Always order a sample to check color accuracy before proceeding with the print.
What resolution should my file be for high-quality digital prints?
The print file should be at 300 DPI to ensure sharpness. For example, an 8×10 inch print requires an image size of 2400×3000 pixels. Avoid enlarging low-resolution images as the print quality will significantly decrease.
Through this article provided by Merchize, we hope you can start your own business selling digital art print products. Merchize will always be a reliable partner for sellers working with print on demand.


