
Contents
Far gone are the days when artisans had to sit day after day to create just an intricate and exquisite embroidery. With the help of modern technology, we have digitalized and industrialized the process of embroidery, allowing the embroidery business to be more accessible and efficient. It has never been easier for an aspiring entrepreneur to tap into the embroidery business.
In this post, Merchize will provide you with a complete guide on how to start an embroidery business.
Step 1: Choose your embroidery business model
DIY Embroidery
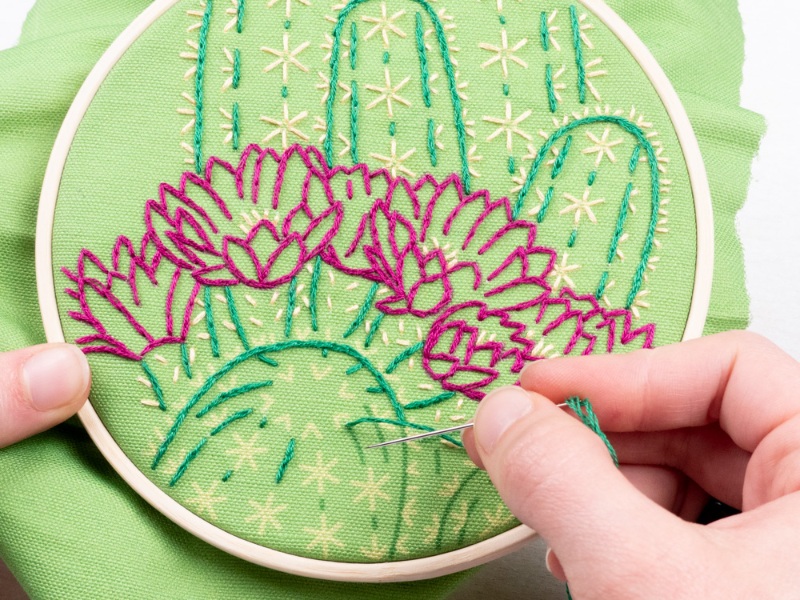
A hand embroidery business offers top-notch quality, unique design, and exquisite feel to your products. But it is clearly not mass-production-friendly. If you are targeting just the average customers looking for some decent quality but not necessarily one-the-kind embroidery, you should look at the other ways to make embroidery products.
Modern embroidery machine offers a quick solution for mass production of embroidery products. Depending on the budget, you can find an embroidery production solution that matches your requirements
Home Embroidery
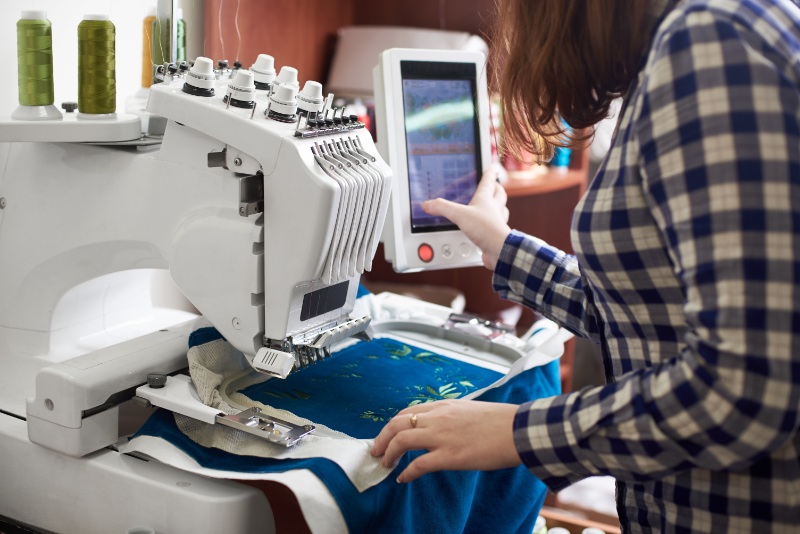
With a large budget to spare, you can think about buying embroidery machines to support the production of your embroidery products. With a proper embroidery setup, you can handle orders from your own home.
One of the biggest challenges in business embroidery is the hefty price of purchasing an embroidery machine. The price can range from less than $400 up to $20,000.
Of course, if you have a large volume of products with intricate designs, a powerful commercial embroidery machine is required. And these types of professional embroidery embroidery machines will cost no less than $10,000, which is a huge number for a new, small business.
Outsourced production/print on demand
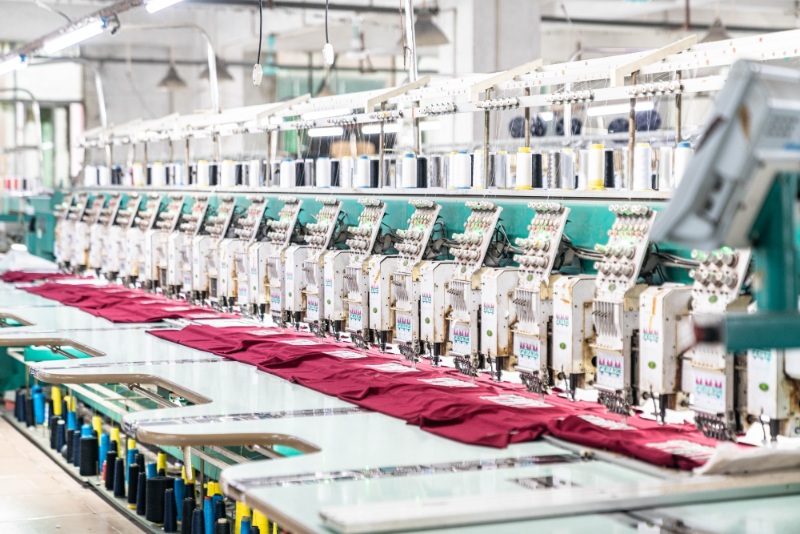
If your budget doesn’t allow you to purchase an embroidery machine, don’t worry. You can either outsource production from an embroidery manufacturer. This option requires a lower initial investment and a stress-free production.
Even better, with print on demand embroidery, you don’t even have to pay upfront. Unlike when you work with a manufacturer, print on demand embroidery companies require no minimum quantity order required. It also means that you have the ability to deliver personalized products for individual customers. With this option, you can start as small as possible.
Moreover, it gives you more time and space to take care of other important aspects of your business, like marketing, market research, customer services, and product design.
Step 2: How to start an embroidery business by finding your niches
If you ever asked any experienced business owners about the secret to a successful business, there is a good chance that you will get this answer: Find your niche!
Yes. Targeting the right niche is extremely important, especially when it comes to e-commerce businesses where customers are empowered to find everything they need online. The online marketplace gives customers more options than ever before. You won’t be able to compete with other competitors if you sell only generic products that everyone else is selling.
By focusing on one small niche, you can lower the competition and differentiate yourself from other competitors. In fact, finding a well-defined niche is one of the most practical strategies for those wondering how to start an embroidery business with no money. It allows you to compete through creativity and personalization rather than capital.
The same can be applied to the market for embroidery products. On Etsy – the number one marketplace for crafty products like embroidery, if you search the keyword “embroidery”, you will get nearly 2 million active listings. There is nearly no chance for your newly launched business to get to the first result pages with this broad keyword and generic “Your text here” type of design.
But if you start with something more specific, embroidered hats for mom, or funny embroidered hats, you have a higher chance of getting on the first pages and reaching more customers.
If you want to check for new niches, here are a few tips on researching potential markets and identifying profitable niches:
Conduct keyword research
Keyword research is crucial for identifying profitable niches. Use Google’s Keyword Planner or paid tools like SEMrush to find keywords related to embroidery with high search volume but low competition. This indicates consumer demand and potential for gaining traction. Analyze the top-ranking sites for those keywords to assess competition levels in that niche.
Study social media conversations
Monitor embroidery hashtags and groups on platforms like Instagram, Facebook and Pinterest. Look for passionate communities discussing specific interests like dog breeds or hobbies. Pay attention to the topics and styles generating engagement as those indicate viable niches.
Use market research reports
Market research firms like Grand View Research publish niche industry reports with market size, growth forecasts and trends. These provide data-driven insight into expanding vs declining niches. For instance embroidery in fashion accessories may be surging faster than general embroidery products.
Evaluate commercial opportunity
Assess if a passionate niche has commercial viability. Consider size of target demographic, purchase power, willingness to pay for customized/themed products etc. Even small niches can provide full-time income if customers value specialized work.
Stay on top of trends
Fad-driven niches come and go quickly, but some trends turn into stable long-term niches. Continuously research sites like Etsy and ecommerce publications to spot rising trends like pop culture themes to capitalize on. The goal is identifying niche interests that have both current popularity and sustainability.
Step 3: Select products to sell
After determining the niches you want to dive into, it’s time to reckon what products are the best matches to sell in your niches.

Start with some popular products
To begin with, you can always start with popular embroidered products like hoodies, sweaters, hats, or totes. Regardless of what niche you are in, these products can be profitable. These products are easy to make with embroidery machines and are in great demand. Most embroidery manufacturers are offering all of these products.
Diverse your products
Don’t just limit your product range to these common products. You can extend your catalog with less popular products that match your niches.
For example, with baking niches, you can try with an embroidered apron. Or if you are working on the schools/students niche, products like backpacks should definitely be on your list. These are just a few simple examples. In reality, depending on the demand in your niche, you can select products that fit.
Another direction for your product research is to find products with specific styles and functions that match the tastes and preferences of your customers.
Take hats for example. Instead of going for a standard, regular cap, you can pick different styles of hats. Your target customers are people who love fishing. How about a rugged and well-regulated trucker cap? Or if you want to sell products to cyclists, cool robust embroidered jackets would be a great option.
Seek quality products
What makes embroidered products special than other regular printed alternatives is the feel of premium and delicacy. Generally, customers have higher expectations when it comes to embroidered products. To keep up with their standards, you must put quality first on the criteria list for your product research.
It should also be noted that for the embroidery to look as great as possible, the product material quality is very important. Higher quality, thicker, and more durable materials are what you should look for. On the other hand, thin and flimsy materials are made to withstand the tension of the embroidery process.
Step 4: Create and turn your design into actual products
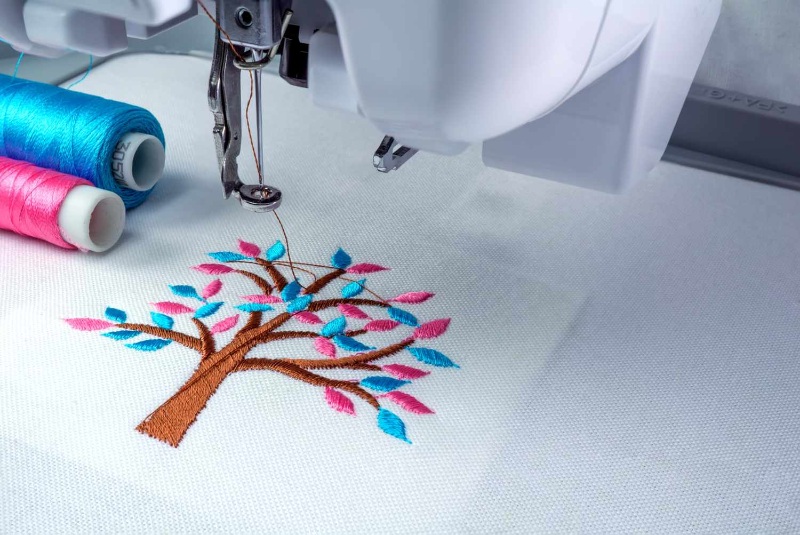
This step is where all the fun goes: Create the designs that your customers would love and transfer them into the beautiful embroidery on the real products.
Compared to the regular printing, the embroidery process is much more complicated. Depending on the embroidery technique and machines, there will be some slight differences during the process.
For example, with traditional embroidery, there might be limited in terms of colors and design complexity. However, with more advanced embroidery machines, you will have more space to show your creativity with complex and colorful designs.
Despite all the challenges, this is the most important stage that decides whether the final products are good. Now, let’s see how you can create the most stunning embroidery designs and turn them into actual products.
Find ideas
All good designs come from good ideas. Ideas can come from anywhere. However, if you want to create a design that really sells, it is a must to look at the best-selling designs in the market.
Once you decide what niches you want to focus on, the next step is to dive into the given niches and identify hot designs, analyzing what makes these designs appeal to customers and how you can apply these factors to your own designs.
In the beginning, let’s just focus on creating designs that:
1, are aligned with your niches.
2, incorporate factors from best-selling designs in the market.
After enough experience with the market, you might want to experience more unique and original ideas. But first, let’s just play safe and follow what has been proven successful.
Read our guide to know to learn how to create embroidery designs step by step.
Pick where to put your designs
A great part about embroidery is that you have more freedom to choose where to put your embroidery.
With traditional printing techniques, there are certain limitations in where you can put your prints. Normally, you can only print designs on the front or the back. But with embroidery, you can decorate not only the front and back but also around the collar, on the sleeve, or hems. The reason is that embroidery is more durable it can endure all the extra stretch or movement regardless of the placement.
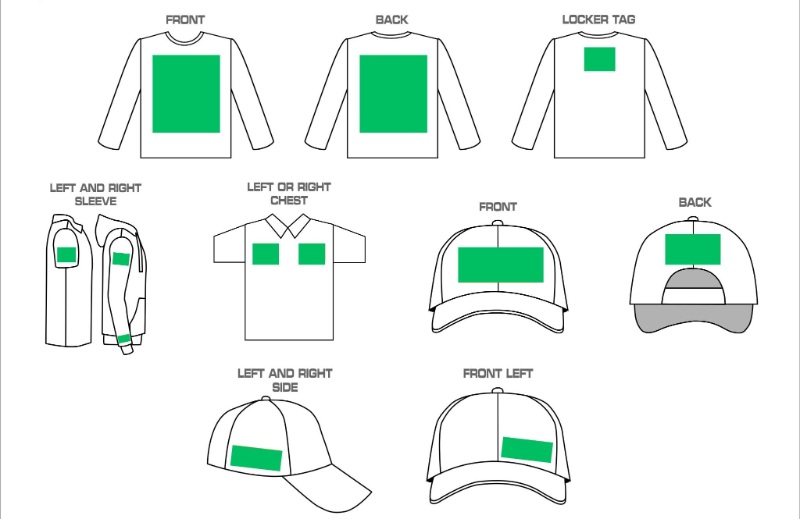
You can add some twists to your products just by playing with the placement of your embroidery designs. For regular top clothing items, here are a few popular embroidery placements for you to try:
- Center front, center back: Bigger, bolder design
- Right chest, left chest: Smaller designs or logos
- Around collar: Short text with elegant fonts
- Sleeves: Small designs or texts
- Above the waistband/bottom hem: Short text with elegant fonts
Prepare your file
For the embroidery machine to read and process an image, it needs to be converted into a proper format which is completely different than the regular file formats that we used for printing.
Typical printing techniques usually require graphic design files in either raster or vector formats like JPEG, PNG, or SVG. However, embroidery machines can’t process such types and require specific file formats, such as DST (Tajima) or PES (Brother).
Other than the images, these files include special stitching information necessary for the embroidery machine to recreate the design with threads, for example, stitch types, colors, density, and other parameters.
Here’s how you can convert your regular graphic design file into an embroidery-compatible format:
- Open your design file with digitalization software:
There is a special software designed for converting regular graphic designs into embroidery files. You can try popular digitalization software like Wilcom, Embird, Pulse, SewArt, etc. Some embroidery machine also provides special software for creating embroidery design files.
Each software will operate differently to create an embroidery file. Depending on the software you choose, you can create a file accordingly. The detailed steps might be different but all of these software share a similar process as follows
- Import a high-quality graphic design file, preferably in vector formats like SVG or AI. Other formats like JPEG or PNG are still acceptable.
- Trace the graphics:
The next step is to trace the designs based on the original graphic to convert them into stitches. Use all the tools and features on the software to manually trace the design. Some software are built with automatic tracing features that allow a faster and more efficient process.
- Set embroidery parameters:
After tracing the designs, it’s time to set the parameters of the embroidery, which could be:
– Stitch types: You can choose to use fill stitches, satin stitches, running stitches, etc for specific parts of the design.
– Stitch density: It is advisable to set the stitch density depending on the materials. Basically, thicker and higher-quality materials can withstand higher-density stitches. If your material is pretty light and thin, you should lower the stitch density.
– Thread colors: Unlike printing, a normal embroidery machine wouldn’t be able to print or embroider all colors. Depending on the available stitch colors and the machine’s stitch number, you choose the thread colors and the number of colors for your designs. The less colors, the more convenient and time-saving.
– Optimize stitching sequence: With this step, you have to decide the sequence in which the embroidery design will be embroidered. It’s important to arrange an optimal sequence that minimizes unnecessary jumps, trims, and thread changes.
– Size: Last but not least, you should also pay attention to the size of your design. With embroidery design, you will have to consider the space economics very carefully. First, the design shouldn’t be too large. A large embroidery can alternate the softness of the materials. Also, your embroidery should aligned with the frame size of the embroidery machine.
On the other hand, the size of your designs should be too small and include thin and intricate lines and details, or else, it might cause a loss of details, distorted images, and illegible text
- Save as embroidery file:
After reviewing your embroidery design file, you can save your embroidery design, transfer the file to the embroidery machine, and start embroidering.
Step 5: Promote your embroidery products
Once your designs are embroidered, the next step is to promote the products to the right audience and convince them to buy from you. The process of promotion can be very complicated and requires a whole lot of experience to figure out the most efficient way to acquire customers. Still, everything all boils down to these core steps:
1- Prepare stunning product images and videos
2- Identify your target audience
3- Select the right platform to promote your products
4- Decide your marketing budget
5- Figure out the best type of advertisement for your products
6- Design initiatives to increase conversion and retention
There are several Low Cost Methods of prospecting for new customers.
- Networking Off Line and On Line to promote your products on social media platforms.
- Donate Products & Services to Charity for Fund Raising Events to gain exposure.
- Ask For Referrals from existing customers.
- Attend Trade shows in Your Niche to directly connect with potential buyers.
- Offer to Trade Your Products & Services with other crafters and artists.
- Press Releases to announce new products or other business news.
FAQs
How to start an embroidery business with no money?
Starting an embroidery business with no money is possible by leveraging free or low-cost options like using your existing equipment, partnering with print-on-demand services, or offering digital designs for embroidery. You can also focus on building an online presence through social media and word-of-mouth marketing to generate organic traffic without significant investment.
What is the cost of starting an embroidery business?
The cost of starting an embroidery business can vary greatly depending on the scale and type of operation you choose. If you’re starting small, you can begin with just a few essential tools and low-cost options like outsourcing production through print-on-demand services. This can minimize upfront expenses. However, if you’re investing in your own embroidery machines, costs can range from a few hundred dollars to several thousand.
How can you efficiently manage an embroidery business model?
To manage costs efficiently, consider focusing on profitable niches, minimizing overhead, and using low-investment marketing strategies like social media promotion until your business gains momentum.
In summary, launching an embroidery business requires selecting your business model, finding a profitable niche, choosing quality products to embroider, designing appealing motifs, digitizing designs, embroidering items, and effectively promoting your wares. With proper planning and execution, entrepreneurial crafters can tap into the embroidery sector by following key steps like conducting market research, purchasing equipment, optimizing operations, and connecting with target buyers through networking, referrals and marketing.


")

