Contents
- Understanding Embroidery and Its Attachments
- Expand Your Product Catalog and Reach More Customers
- How to remove embroidery logo with seam ripper
- How to remove embroidery logo with small scissors
- How to remove embroidery logo with thread snips
- Tips for Protecting Your Garment During Removal
- Some things to consider when removing embroidery logos
Embroidery adds flair and personality to clothing, but what happens when you want to remove an embroidered logo or design? Fear not! While it may seem daunting, removing embroidery from clothing is entirely possible with the right tools and techniques. In this extensive guide, we’ll delve into various methods on how to remove embroidery logo from clothing, offering step-by-step instructions, expert tips, and cautionary advice to ensure a successful outcome.
Understanding Embroidery and Its Attachments
Embroidery has been adorning textiles for centuries, with intricate designs stitched onto fabric to create stunning visuals, whether it’s a company logo on a uniform or a decorative motif on a garment. However, what if you need to part ways with these embroidered embellishments? Before diving into removal techniques, let’s first understand the anatomy of embroidery and its attachments.
Embroidery consists of individual stitches meticulously sewn onto fabric to form intricate patterns or designs. These stitches may vary in style and complexity, ranging from simple running stitches to elaborate satin stitches and French knots. Additionally, embroidery may be further enhanced with embellishments such as sequins, beads, or appliqués, adding texture and dimension to the design.
Embroidered logos or designs are typically attached to fabric using one of several methods:
- Stitching: The embroidery threads are sewn directly onto the fabric.
- Adhesive Backing: Some embroidered patches or appliqués are affixed to fabric using adhesive backing, which adheres to the garment when heated.
- Stabilizers: Stabilizers, such as tear-away or cut-away varieties, are often used to reinforce fabric during embroidery, providing support for intricate designs.
Understanding these attachment methods is crucial when deciding how to approach embroidery removal. Different techniques may be required depending on the attachment type and fabric composition.
Types of embroidery logos and their impact on removal
The difficulty of removing an embroidered logo depends largely on its complexity. By understanding the logo’s design and stitch structure, you can determine the best tools and techniques for safe and efficient removal.
- Simple logos: These logos typically feature minimalistic designs with basic running or chain stitches. They use fewer threads and are easier to remove due to less dense stitching.
- Complex designs: Logos with satin stitches, French knots, or layered patterns are more intricate and time-consuming to take out. Densely packed and overlapping stitches require extra care to avoid damaging the fabric.
- Single-thread vs. multi-thread logos: Single-thread logos use one color and simple stitch patterns, which makes them easier to remove. In contrast, multi-thread logos often include multiple colors and various stitch types, making them more difficult to remove due to the increased thread density and complexity.
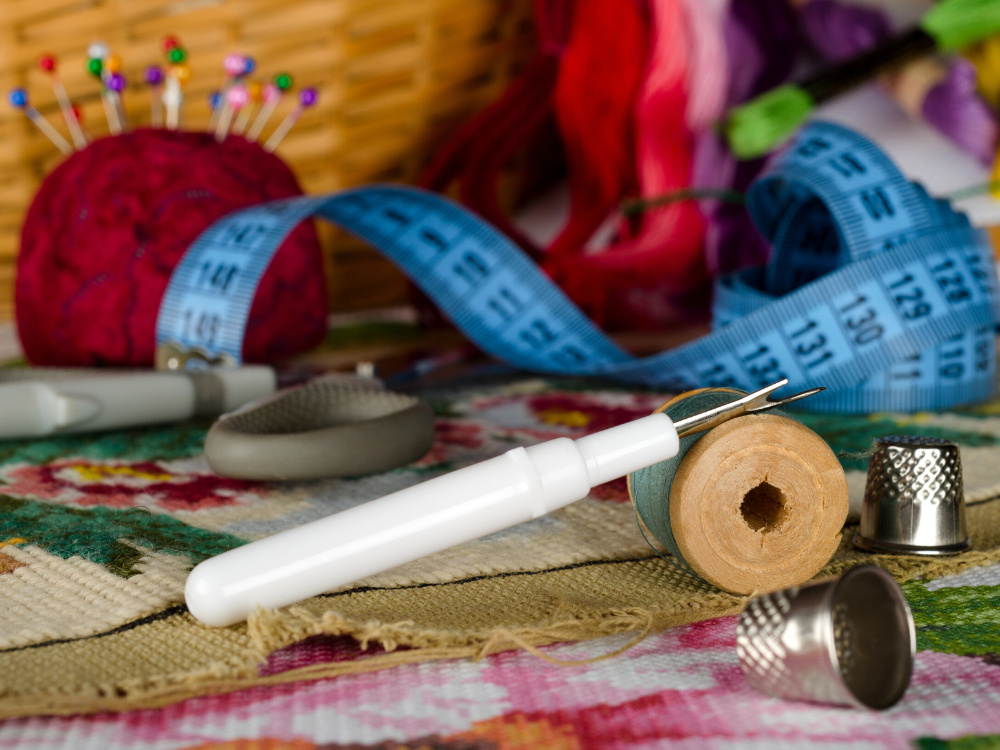
Tools for embroidery removal
Each type of embroidered logo requires the right approach to avoid tearing or damaging the garment. In general, there are three commonly used tools for removing embroidery, depending on the logo’s complexity and the fabric type:
- Seam ripper: This small, forked tool is ideal for lifting and cutting individual stitches. It works best for precise work on simple logos or sturdy fabrics. (E.g. embroidered t-shirts and canvas tote bags)
- Small embroidery scissors: These sharp, pointed scissors are perfect for cutting threads in tight spaces. They are especially useful for removing complex designs or working with delicate materials. (E.g., lightweight polos and silk blouses)
- Thread snips: Lightweight and sharp, thread snips are designed for quick and clean cutting of loose threads. They are suitable for finishing touches or removing logos with lighter stitching. (E.g., fleece sweatshirts and lightly embroidered hats)
How to remove embroidery logo with seam ripper
A seam ripper is a slender, pointed tool with a sharp blade at one end, designed for cutting stitches without damaging fabric. When removing embroidery, a seam ripper is invaluable for delicately cutting through embroidery threads, allowing for precise removal of stitches.
The seam ripper method is a classic approach to embroidery removal, offering precision cutting and controlled stitch removal. Let’s delve into the step-by-step process for using a seam ripper to remove embroidered logos from clothing.
Step-by-Step Guide:
Follow these instructions to remove embroidery using a seam ripper:
- Insert the pointed end of the seam ripper under the stitches of the embroidery, starting from one end.
- Gently push the seam ripper forward to cut through the stitches, being careful not to cut the fabric underneath.
- Continue cutting along the stitches until the entire embroidery design is removed.
- Use tweezers to pull out any remaining threads if necessary.
Tips for Success:
- Ensure the seam ripper blade is sharp to facilitate clean cuts through the embroidery stitches.
- Work slowly and meticulously, paying close attention to each stitch to avoid damaging the fabric.
- Hold the fabric taut while cutting to prevent puckering or distortion.
By following these tips and techniques, you can achieve precise and clean removal of embroidered logos using a seam ripper.
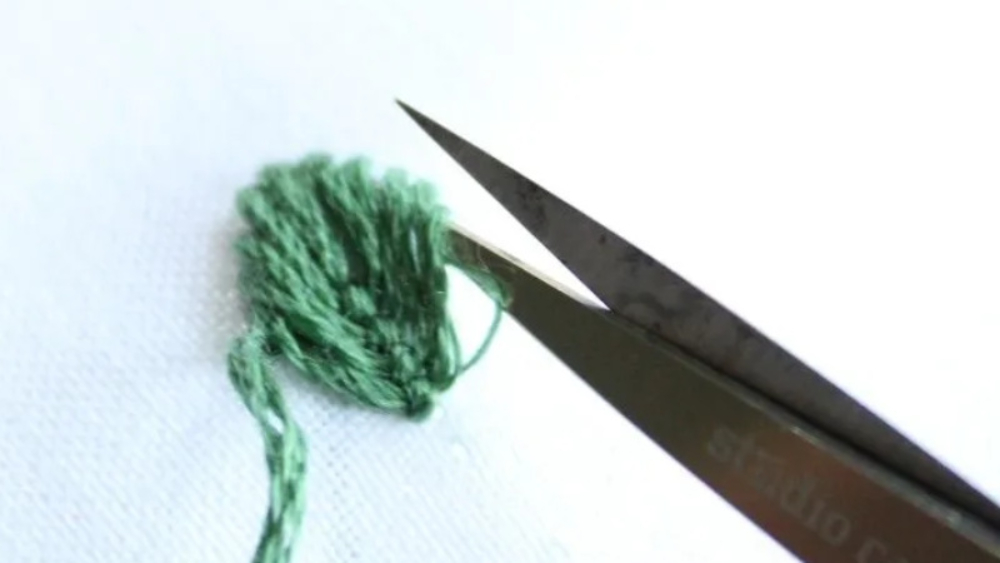
How to remove embroidery logo with small scissors
Small scissors offer a delicate approach to embroidery removal, allowing for precise
and controlled cutting of embroidery threads. In this chapter, we’ll explore the step-by-step process for using small scissors to remove embroidered logos from clothing.
Small, sharp scissors are essential for snipping embroidery threads close to the fabric surface. Look for scissors with fine blades and pointed tips to facilitate accurate cutting while minimizing the risk of fabric damage.
Step-by-Step Guide:
Here’s how to remove embroidery using small scissors:
- Carefully cut the embroidery threads using small, sharp scissors. Start by snipping the threads at one end of the embroidery design.
- Hold the fabric taut and cut along the stitches, being cautious not to cut the fabric.
- Repeat this process until all the stitches have been cut, and the embroidery is removed.
- Use tweezers to remove any remaining threads or trim them close to the fabric surface.
Tips for Success:
- Select small scissors specifically designed for precision cutting to ensure accuracy and control.
- Cut the embroidery threads close to the fabric without cutting into the fabric itself to avoid damage.
- Work slowly and with a light touch to prevent accidental snips or cuts to the fabric or surrounding stitches.
By following these guidelines, you can effectively remove embroidered logos using small scissors, achieving clean and detailed results.
How to remove embroidery logo with thread snips
Thread snips, also known as thread clippers or snippers, are miniature scissors specifically designed for cutting threads close to the fabric. These compact tools are ideal for trimming excess threads and removing individual stitches during embroidery removal.
Thread snips provide a precise and convenient way to remove embroidery threads, especially when dealing with intricate designs or finer details. Let’s explore the step-by-step process for using thread snips to remove embroidered logos from clothing.

Step-by-Step Guide:
Here’s how to remove embroidery using thread snips:
- Hold the fabric taut and use the sharp blades of the thread snips to cut the embroidery threads close to the fabric.
- Work your way along the stitches, cutting them one by one until the embroidery is completely removed.
- Use tweezers to pull out any remaining threads or trim them close to the fabric surface.
Tips for Success:
- Hold the thread snips at a slight angle to the fabric for easier access to the embroidery threads.
- Snip the threads close to the fabric surface to minimize leftover thread ends.
- Keep the fabric taut and work in small sections for better control and precision.
By employing these techniques, you can achieve precise and detailed removal of embroidered logos using thread snips.
Tips for Protecting Your Garment During Removal
While embroidery removal can yield excellent results, it’s essential to take precautionary measures to protect your garment from damage or discoloration. In this chapter, we’ll explore essential precautions to ensure a safe and successful embroidery removal process.
Test on an Inconspicuous Area:
Before attempting any removal method, it’s crucial to test it on a small, inconspicuous area of the garment to ensure compatibility. This test helps determine how the fabric will react to the removal process, allowing you to proceed with confidence.
Work Slowly and Carefully:
Embroidery removal requires patience and precision, so it’s essential to work slowly and carefully throughout the process. Rushing or applying excessive force can result in accidental damage to the fabric or surrounding stitches, compromising the garment’s integrity.
Protect the Fabric:
When using heat-based removal methods such as steam and iron or chemical solvents, always protect the fabric with a clean cloth or pressing cloth. This barrier helps prevent direct contact with the heat or solvent, minimizing the risk of damage or discoloration.
Maintain Fabric Tautness:
Keeping the fabric taut during embroidery removal helps prevent puckering, distortion, or stretching. Whether using scissors, tweezers, or thread snips, ensure the fabric remains flat and taut to facilitate precise cutting and extraction of embroidery threads.
Use Proper Tools:
Selecting the right tools for embroidery removal is crucial for achieving clean and accurate results. Sharp scissors, fine-tipped tweezers, and high-quality seam rippers ensure smooth cutting and precise thread removal without damaging the fabric.
Proceed with Caution:
When in doubt or dealing with delicate fabrics, exercise caution and consider seeking professional assistance. While DIY removal methods can be effective, complex or challenging embroidery removals may require the expertise of experienced professionals.
By implementing these precautionary measures, you can safeguard your garment during the embroidery removal process, ensuring a safe and successful outcome.
Removing embroidered logos from clothing may seem daunting, but with the right tools, techniques, and precautions, it’s entirely achievable. Whether using a seam ripper, small scissors, thread snips, or professional services, each method offers its unique advantages for embroidery removal. By following the step-by-step instructions and expert tips outlined in this comprehensive guide, you can confidently tackle embroidery removal projects with precision and finesse. Remember to test on an inconspicuous area, work slowly and carefully, and protect the fabric throughout the process. With patience, practice, and perseverance, you’ll master the art of embroidery removal, restoring your garments to their pristine state and unlocking new possibilities for customization and style.
In the journey of garment customization, the ability to remove embroidery from clothing opens up endless possibilities. Whether refreshing vintage finds, personalizing garments, or correcting embroidery mishaps, mastering the art of embroidery removal empowers you to take control of your wardrobe with confidence and creativity. So, roll up your sleeves, gather your tools, and embark on the adventure of embroidery removal—it’s time to unleash your inner seamstress and transform your garments one stitch at a time.
Some things to consider when removing embroidery logos
1. Can you remove embroidery without leaving holes?
Yes, embroidery can often be removed without leaving holes by carefully cutting and pulling threads with a seam ripper or small scissors. However, success depends on the fabric type and stitch density, as delicate or tightly stitched fabrics may show minor marks.
2. How long does it take to remove an embroidery logo?
Removing an embroidery logo typically takes 15–60 minutes, depending on the logo’s size, stitch complexity, and fabric type. Simple logos on sturdy fabrics take less time, while intricate designs on delicate materials require more care and time.
3. What if the embroidery is on a delicate fabric?
Embroidery removal on delicate fabrics like silk or chiffon requires extra caution, using fine-tipped scissors or a seam ripper to avoid tearing. Jon. Gentle techniques and stabilizing the fabric can help prevent damage, but some minor marks may remain.
4. Can I reuse the garment after removing the logo?
Yes, garments can often be reused after logo removal if the process is done carefully to avoid fabric damage. Minor thread marks or slight stretching may occur, but proper cleaning and pressing can restore the garment’s appearance for reuse.


