How To Create Products And Campaigns At Merchize
In this guide, you will learn how to create products and campaigns.
1. Create products with “Create Regular Product"
This function allows you to create a regular product for your store:
- In the Dashboard
- Go to Products > Click “Create Regular Product" button
- Choose the product preset in the dialog, the preset will load all variants set up for this product.
(Note: If you use the description for listing, You should Check the newest information, details, and stock available on the product details page on the website in advance).
- Add product preview images or mockups to “Product gallery" section or for each variant (if the products have different types or colors, designs)
- Add product name, price, SKU, and weight information … for individual variants.
- You also can add a product to multiple collections (set up in Collections pages of your site’s dashboard) & assign tags while creating it.
- Once everything is done, then click Create Product.
2. Create products with “Create Campaign"
This feature allows you to create products and generate mockup images for the products. To access Merchize’s mockup generators:
- Go to Products > Click “Create Campaign".
- Now, you will see two options: “Combined Layout" or “Split Layout". Both of these options allow you to create mockup images for your products. Select one of these two options.
- With Combined Layout, you can add multiple products at once. You can also apply the same artwork sets (or Campaigns) on multiple products.
- With Split Layout, you can only add one product at once.

2.1. How to create products with “Combined Layout"
- Select one or multiple product types from Merchize catalog > Click “Design"
- Upload your print files to generate mockup
If you want to apply different designs for multiple product type variations. Click “Design Linked" to unlink variants.
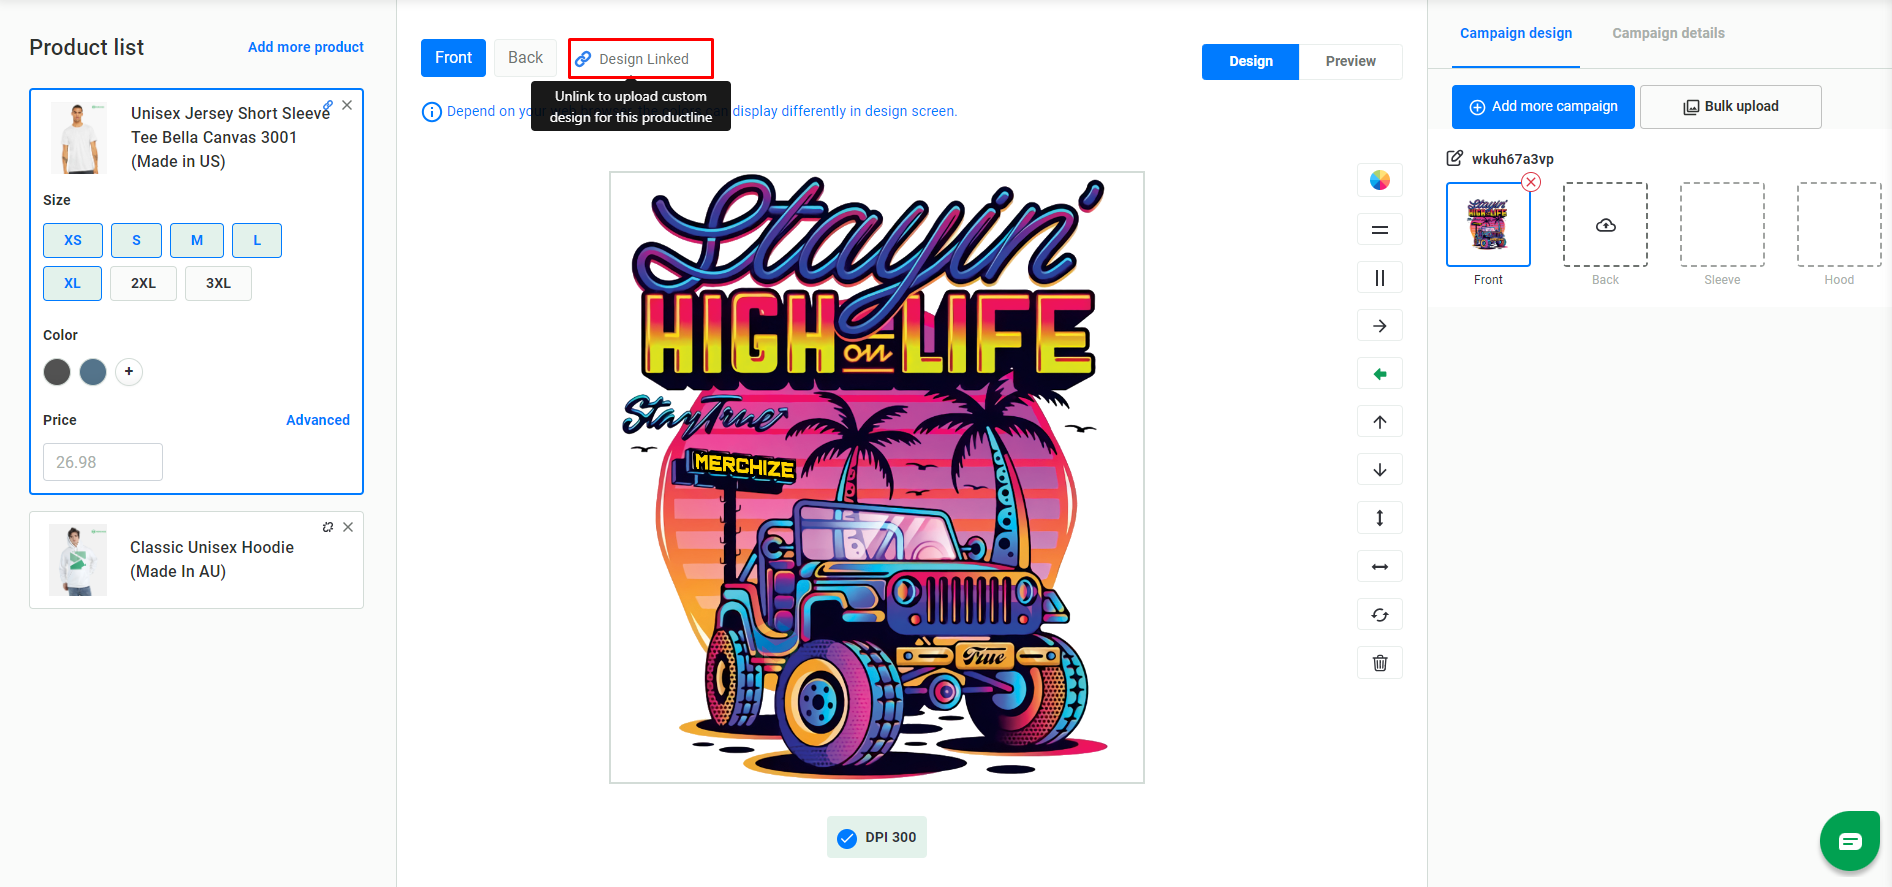
Click “Add more campaign" to create campaigns in bulk.
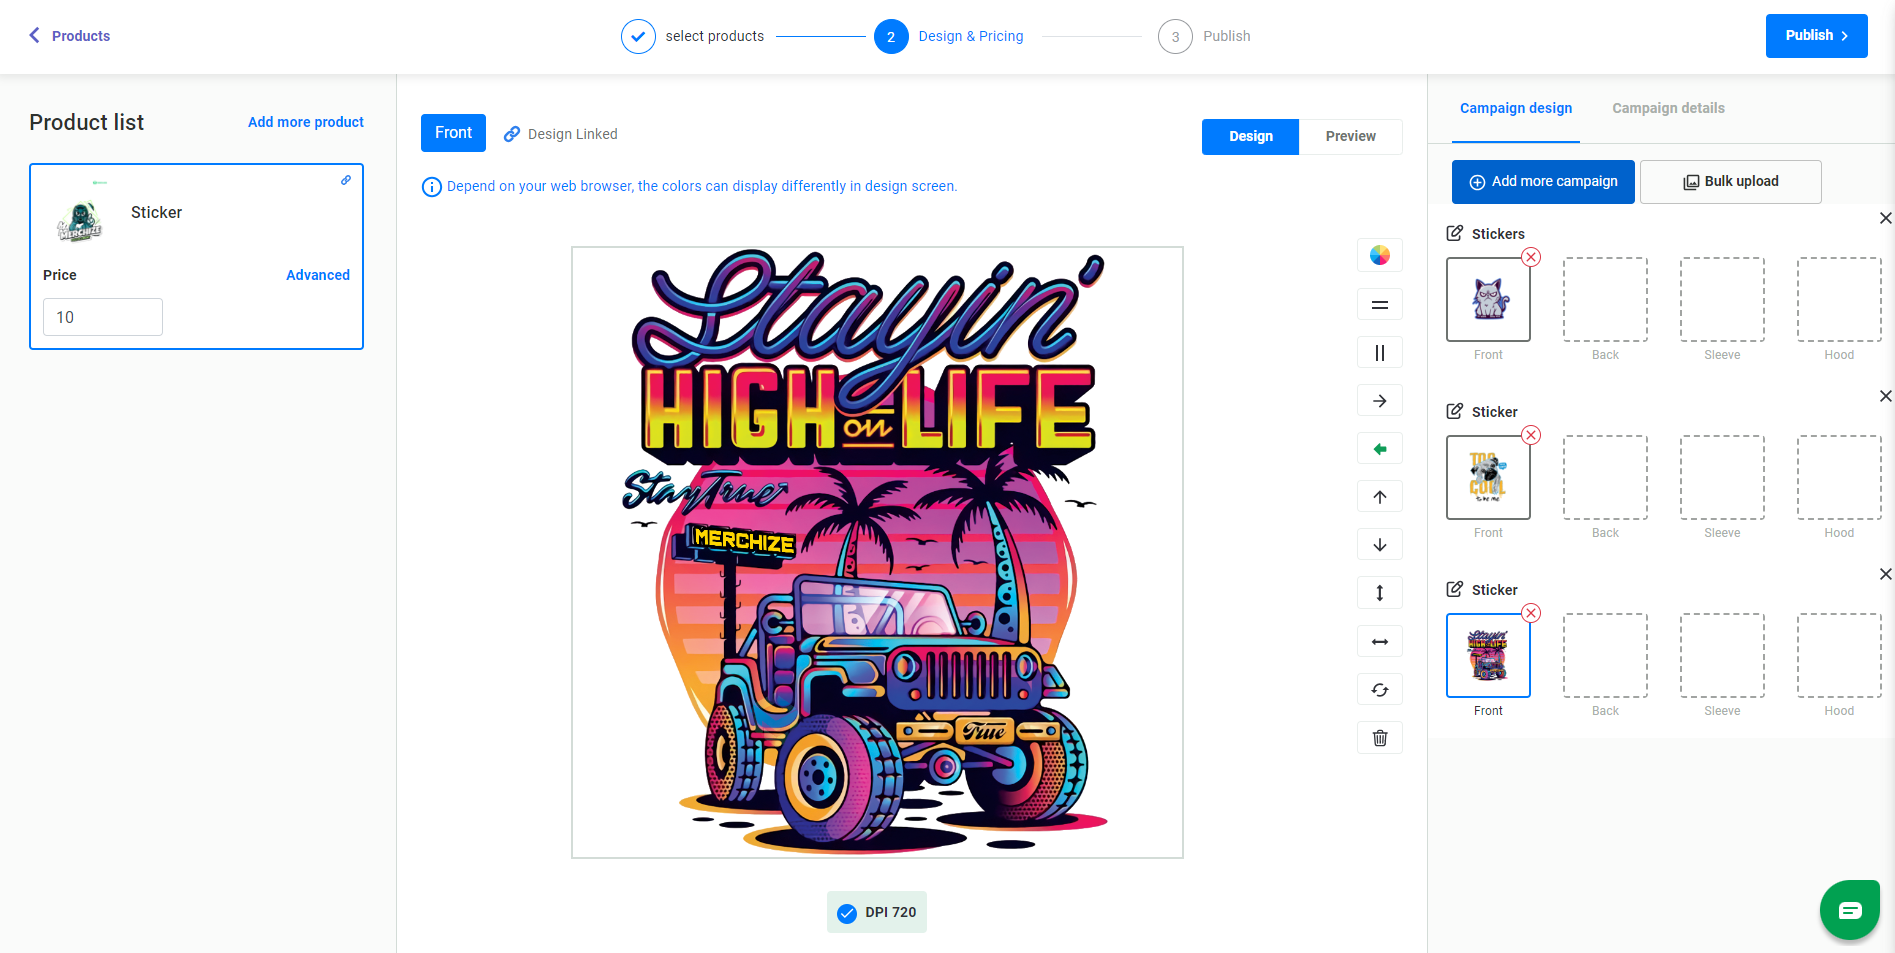
- When done, you can click “Preview" to see mockup images.
- Set up product information
- For each product type: Sizes, Colors, Prices
- For each Campaign: Title, Description, Collection, Tags, etc. (On Campaign details)
- Once everything is done, click Publish.
2.3. How to create products with “Split Layout"
- Select a product from Merchize catalog > Click “Design"
- Select variants you want to add to your product

- Upload your pre-made print files to each section or use Merchize’s editor tools to create designs for your product.

- When done, you can click “Preview" to see mockup images
- Click “Next". At this step, you can edit your product information:
- On “Product Variant & Pricing" table, enter the price for each variant of the product
- On “Mockup image preview" tab, select a featured image for your products from the mockup images
- On “Campaign details" tab, edit product information like Title, Description, Collection, Tags, etc.
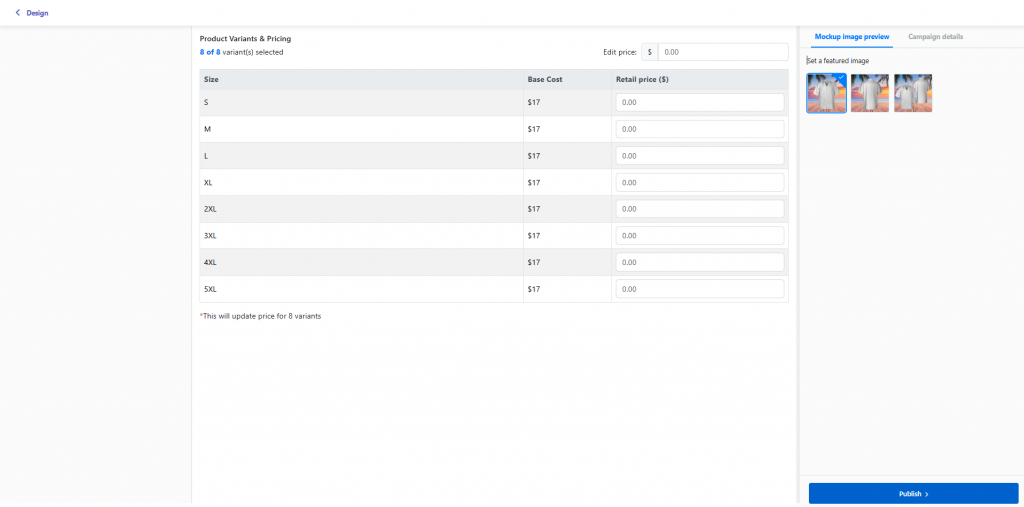
- If you want to Create a single product with different designs then In the “Campaign Details" tab, choose “Combine into a single product".
- Once everything is done, click Publish.
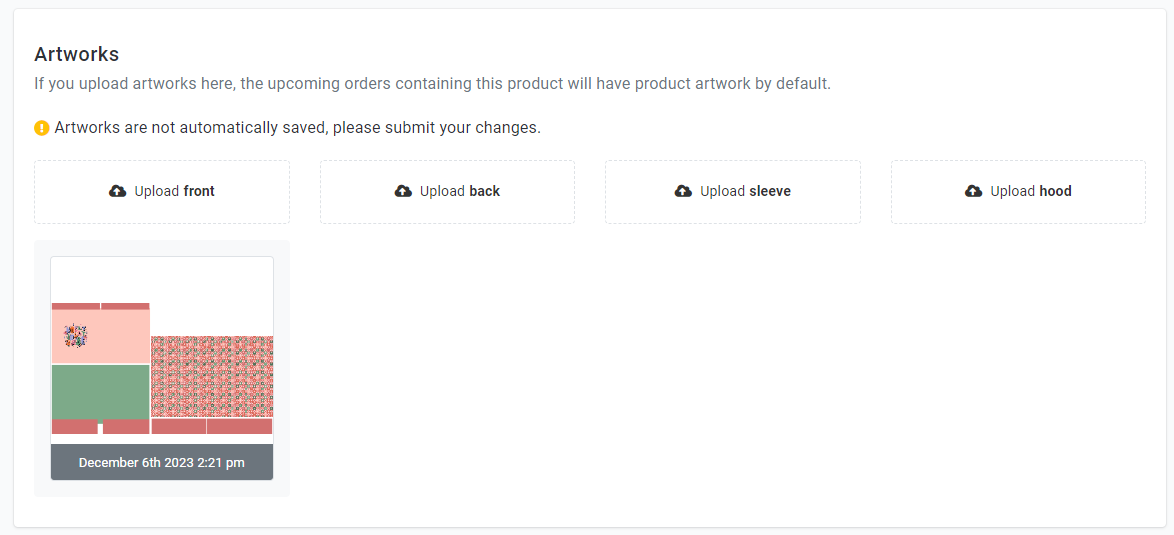
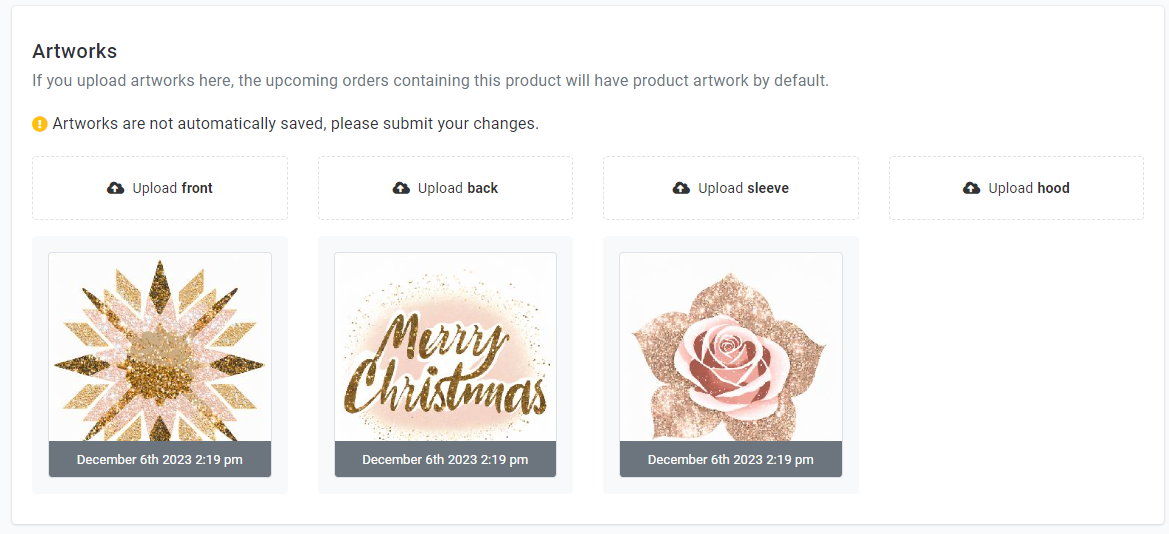
Upload print files to product
1. If you use the product template accepts separate print files such as:
- DTG T-shirts have front, back, sleeve prints
- Flags have front, back prints
- …
When uploading print files to the product, you must add to each respective placement (in the Product creating page > “Artworks” section”).
2. If you use the product template accepts all parts in one single print file such as:
- Most All-over print apparel products
- Most Decor products
- …
When uploading print files to the product, you must add to “Front” placement (in the Product creating page > “Artworks” section”).