
Create and Import orders for FBA Fulfillment
If you sell on Amazon using the FBA (Fulfillment by Amazon) model, you can use Merchize to produce your products and ship them directly to Amazon’s warehouse. Merchize handles printing and packaging to Amazon’s standards.
The whole process has 3 main parts:
- Import your FBA orders to Merchize
- Track the order status while it’s in production
- Confirm box information, so Merchize can ship to the correct Amazon warehouse
Part 1: How to Import FBA Orders
The system needs to know exactly which product, how many units, and the Amazon label information, so it can produce and attach the correct label to each box before sending it to the FBA warehouse.
Step 1: Prepare the Import File
1. Download the template from Merchize: Go to Orders > CSV Import > In the FBA section, click Download example CSV to get the template file.
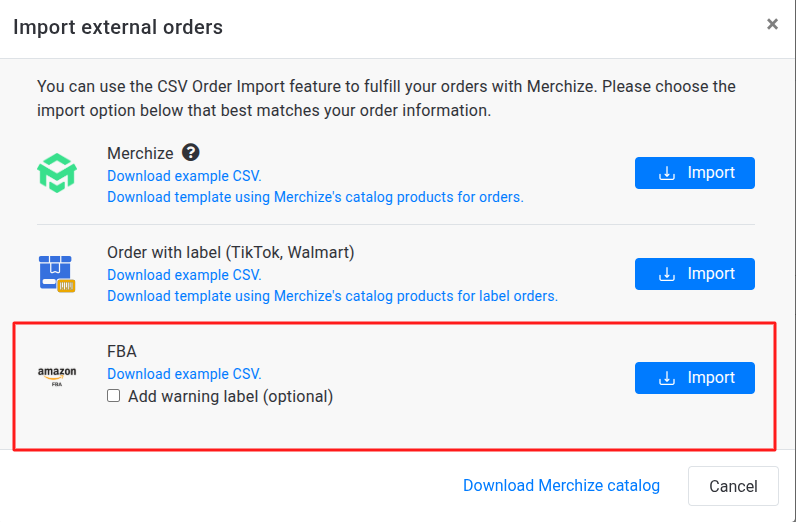
2. Fill in the template: Prepare your file using Merchize’s template. Below is the list of fields required for the CSV import. You must fill in all Required fields; Optional fields can be left blank.
| Field | Required/ Optional | Description |
|---|---|---|
| mockUpFront (required) / mockUpBack / … | Required | Link to the preview image. |
| designFront (required) / designBack / … | Required | Link to the print-ready file. This should be an image URL (PNG or JPEG). You can use any cloud service (e.g. Google Drive, Dropbox). Make sure the sharing settings allow Merchize to access the file. |
| type | Required | E.g. T-shirt, Mug, etc. |
| title | Required | E.g. Women’s Black T-shirt, etc. |
| SKU | Optional | For your own reference only. |
| fnSKU | Required | A unique package identifier provided by Amazon. Each row needs a different value. |
| size | Required | The size of that specific line item. |
| color | Required | The color of that specific line item. For products without a base color (e.g. AOP products), you can enter “White". |
| quantity | Required | The quantity of that specific line item. |
| labelUrl | Required | Link to the Amazon Shipping Label File (must be a .PDF) that you created and printed from your Amazon Seller account beforehand. |
| 💡 Tip
Merchize may update the file format over time. If your upload fails, check whether your import template is the most recent version. |
Step 2: Import the File
1. Go to the Orders page > Select CSV Import
2. Click the Import button next to FBA
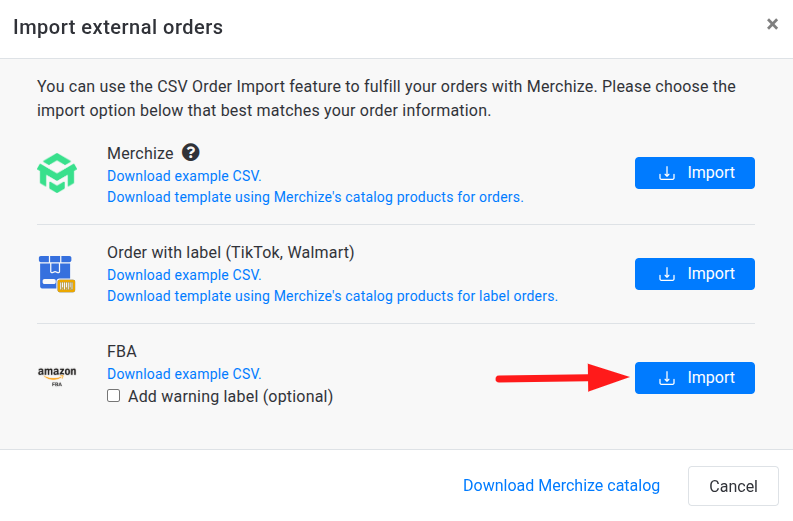
3. Upload your completed template file with the correct structure
Step 3: Check the Import Result
After importing, the system will tell you:
- The number of valid orders that were accepted
- The number of invalid orders (if any) — you can download the error file to see the details, fix the issues, and import again
Step 4: Track the Imported File
After a successful import, the system re-validates the details of each order. This process takes 1–2 minutes. Only after the information is confirmed valid will the system accept and continue processing the order.
To check whether your import file is valid, go to Orders > More Actions > Order Import Log.
Here you can view the full import history, the processing status (in progress / completed / error), and the number of items in each import.
After being successfully imported, your order will show up on Orders. Your FBA order is automatically tagged “FBA".
You cannot add tags from other platforms (such as ShopBase, Shopify, etc.) to this order, but you can still add your own custom tags for management purposes.
Part 2: Tracking Order Status
Every FBA order goes through several stages, from being received to being delivered. Tracking the status helps you know what stage the order is at and act proactively when needed. Orders move through the following stages in sequence:
Order imported > Pushed order > Fulfillment cost paid > In production > Shipment started > Delivered
A Few Notes When Viewing Order Details
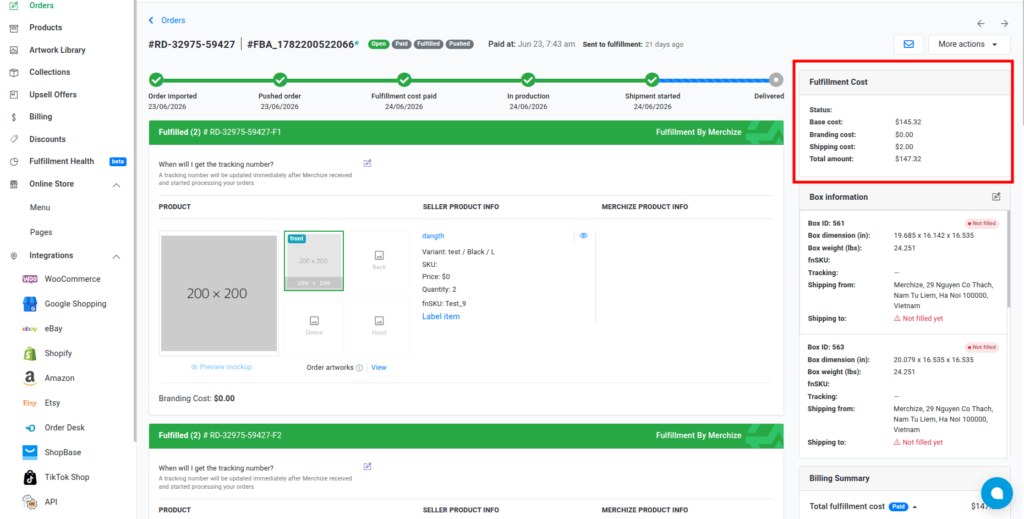
- When an order moves to the Fulfillment cost paid status, the order detail page will show a Fulfillment Cost table, including:
- Base cost (production cost)
- Branding cost (if applicable)
- Shipping cost
- Total amount and the payment date
- Order detail page will show a Box Information table. At this point, you can continue with the box confirmation steps (Part 3).
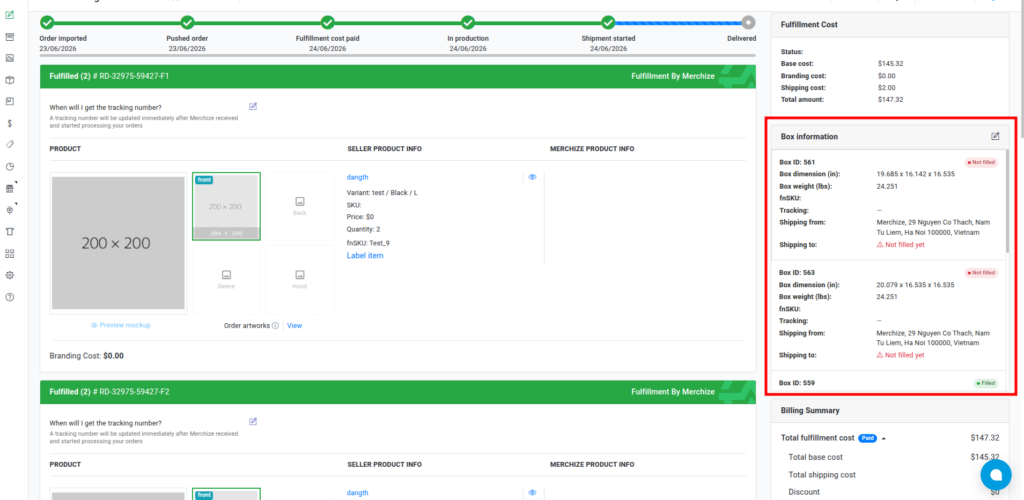
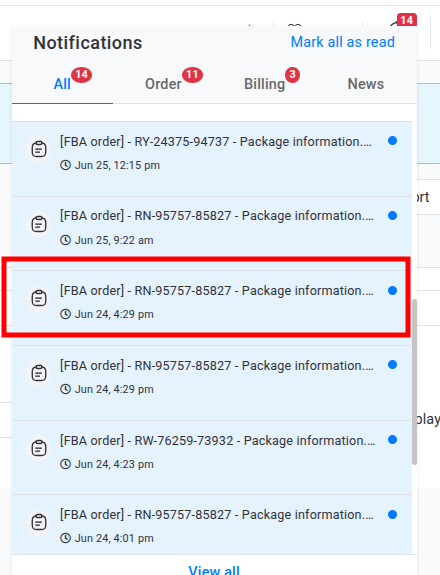
Note: Information for each box can be updated one at a time. You will get a notification and email whenever box information is available.
Part 3: Adding Box Information
This is the most important step that requires action from you — if it isn’t completed, your order cannot be shipped.
Why Do You Need to Confirm Box Information?
An order may be packed into multiple boxes. Each box needs accurate shipping information (recipient address, shipping label, etc.).
As the seller, you need to provide this information so Merchize can send your order to the correct Amazon warehouse. Missing or incorrect information can easily lead to shipments going to the wrong warehouse, being rejected, or being delayed.
Box Information Workflow for FBA Orders
The process has 3 steps. Step (2) must be done outside the Merchize system:
- Merchize updates the box information. Once the order is packed, Merchize updates each box with: Box ID, box dimensions, box weight, and the ship-from address (this is Merchize’s warehouse address — you don’t need to enter it). Sellers will be informed via notification and email when the box information is updated.
- ⚠️ You declare the box information on Amazon Seller Central (done outside the Merchize system). Use the box details from step 1 (dimensions, weight, fnSKU, ship-from address) to declare the shipment on Amazon. After you submit this, Amazon will provide you with a shipping label and a receiving warehouse address for each box.
- You return to the Merchize system and enter the label link and the receiving warehouse address (Shipping to) that Amazon just gave you in step 2, into the matching box on the order detail page. Detail instruction in “How to Fill in Box Information" section below.
| ⚠️ Very Important Notes
You can only edit or fill in each box’s information ONE TIME. Once you click Confirm, you cannot change it again — so double-check everything carefully before confirming. The “Shipping to" address you enter must match exactly the address on the shipping label Amazon issued. If the two addresses don’t match, your shipment may go to the wrong warehouse or get lost. |
How to Fill In Box Information
Before starting the steps below, make sure you have completed step 2 above (declaring the boxes on Amazon Seller Central) and have the label and receiving warehouse address ready for each box.
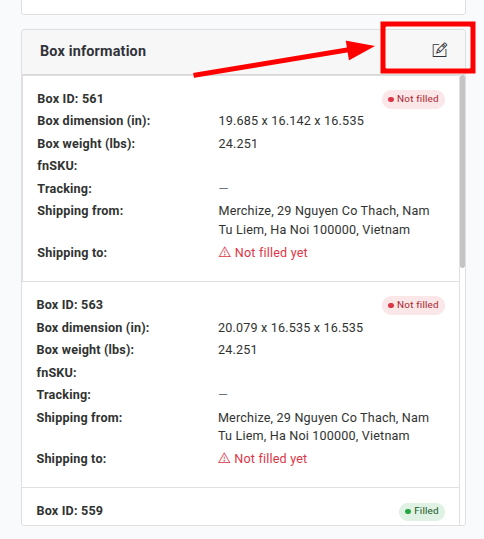
On the order detail page, in the Box Information area, each box will show one of two statuses:
🔴 Not filled: the box has no recipient address yet — you need to fill it in
🟢 Filled: the box already has complete information — no action needed
On the order detail page, click the edit icon in the “Box information" section.
You have 2 ways to fill in box information:
Option 1: Use a CSV File (recommended for many boxes)
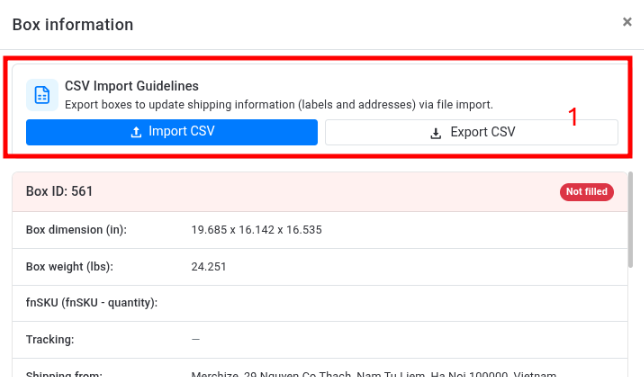
1. In the Box Information popup, click Export CSV to download a file listing the boxes waiting for information
2. Open the CSV file and complete all required fields. The required information includes:
- Box ID
- Label Link
- Recipient Name
- Street Address 1
- City
- State/Province (required for U.S. shipments only. You can leave this field blank for shipments to all other countries.)
- Postal/ZIP Code (not required for shipments to Hong Kong)
- Country
3. Save the file, then click Import CSV to upload the completed file. The system will automatically fill this information into the matching boxes
4. Carefully review all the information shown on screen (especially the recipient address)
5. If everything is correct, click Confirm to submit the information
Option 2: Enter Directly in the Popup (suitable for 1–2 boxes)
1. In the Box Information popup, select the box you need to fill in
2. Attach the box label by uploading a file or pasting a link
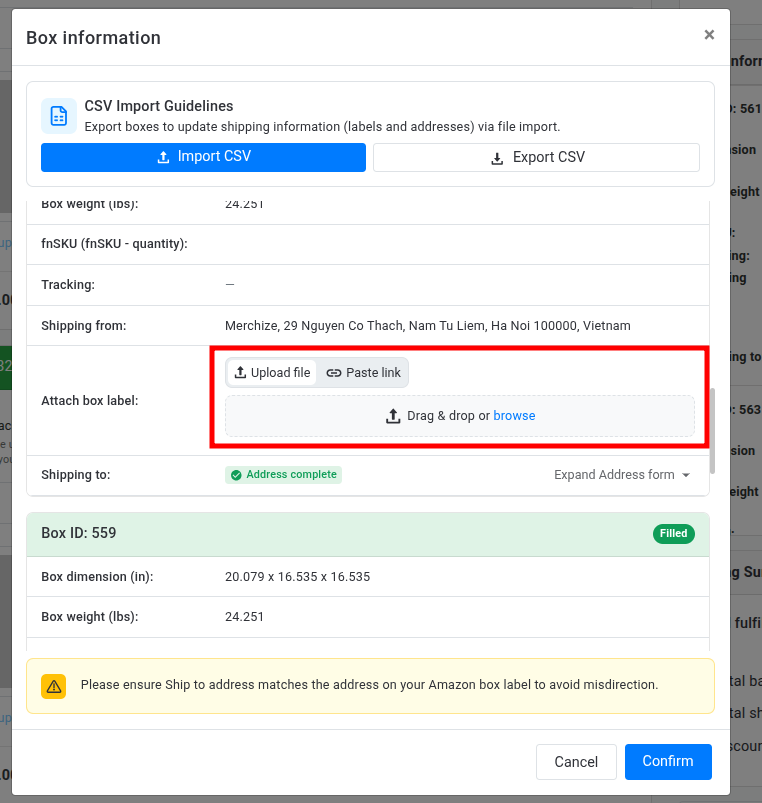
3. Fill in the recipient address (Shipping to): Recipient name, Address line, City, State/Province, Country
4. Review the information
5. Click Confirm to finish
After Confirming
Once you’ve filled in all the information and clicked Confirm, the box status will change to Filled, the “Not filled" warning will disappear, and the order can continue on to the shipping stage.
That’s the complete FBA fulfillment workflow on Merchize: import your orders, track them through production, and confirm each box’s shipping information so it reaches the right Amazon warehouse.
If you run into any trouble at any step of this process — importing orders, tracking status, or confirming box information — please contact the Merchize support team. We’re happy to help you get your FBA shipments sorted quickly.