How To Use All-over print Product Mockups
How To Use Mockup In Photoshop
Step 1: Download the Mockup
First off, you’ll need to download the Product Mockup. In this instruction, we used the All Over Print Custom Regular Fit Hawaii Shirt mockup, included in product link.
(Scroll down to Mockup & Template section, then click here to download)
Step 2: Open & Edit the File
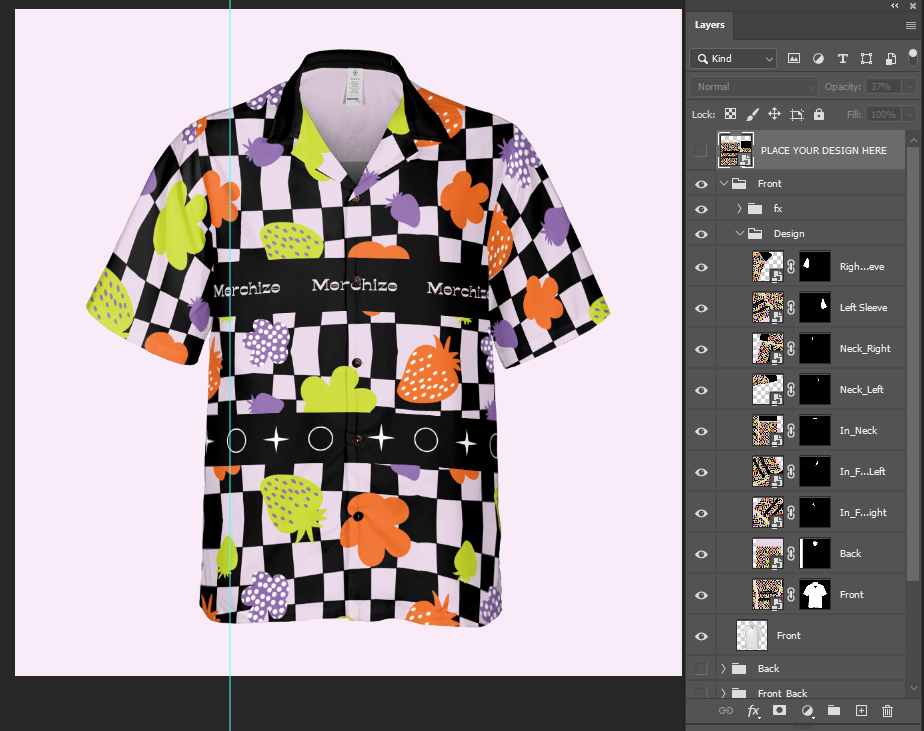
Once you’ve opened up your PSD Mockup on Adobe Photoshop (Requires Adobe Photoshop 2020 or later), you should have a layer on the right side of the screen titled “PLACE YOUR DESIGN HERE".
Double click on the “PLACE YOUR DESIGN HERE" layer thumbnail to open that Smart Object.
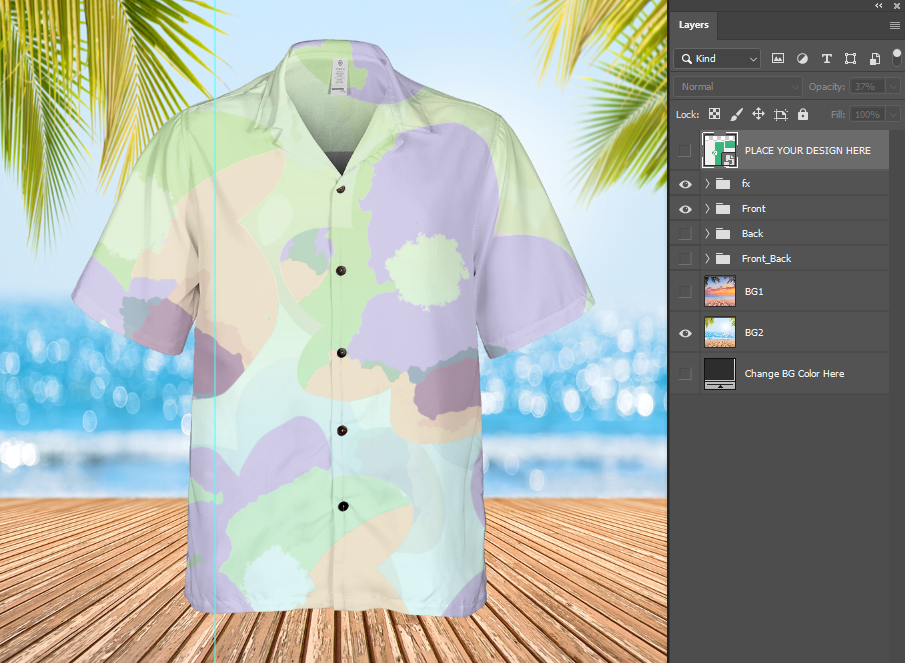
A new screen should open up (included the default mockup content layer and the print file template layer group). Before you start editing your image, make sure to either delete or turn off (with the eye icon) the original image.
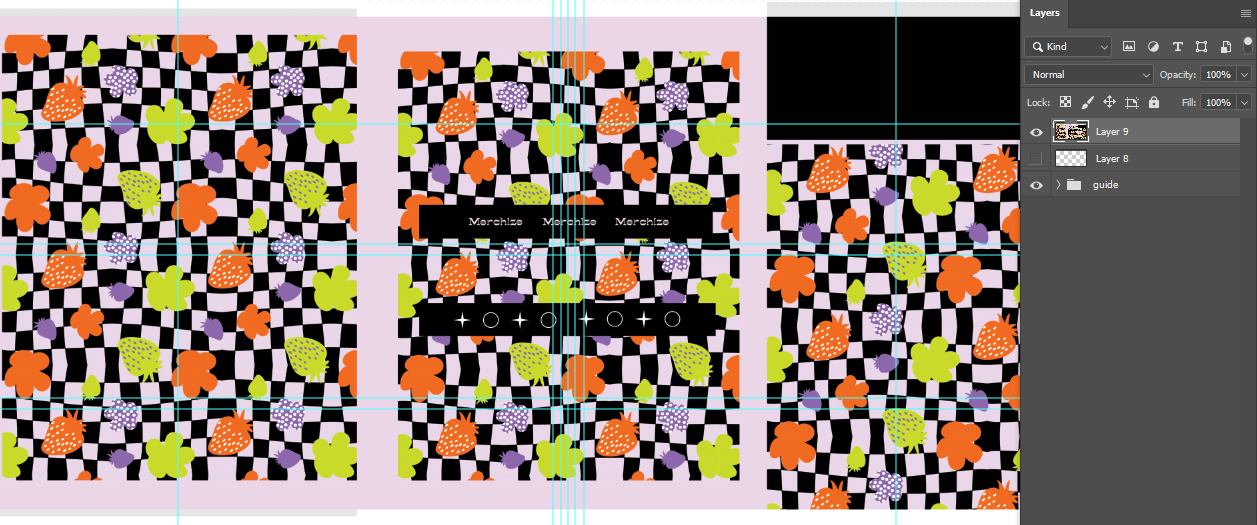
Edit/Drag the image you want to Mock Up to the files work surface, follow the instruction displayed in the template.
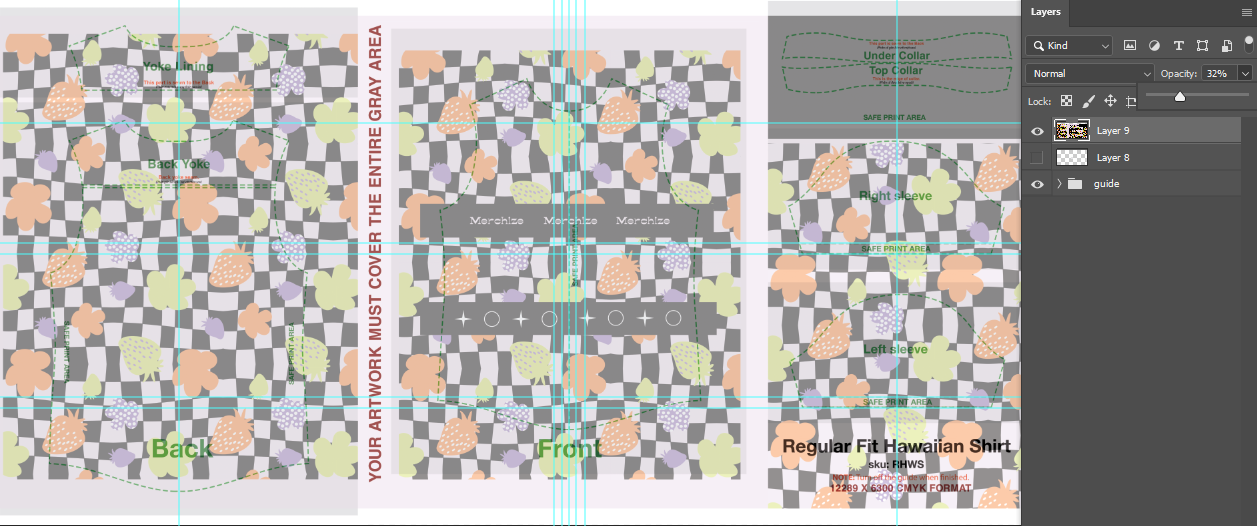
* Quick Notes For Setup Template Files for Print:
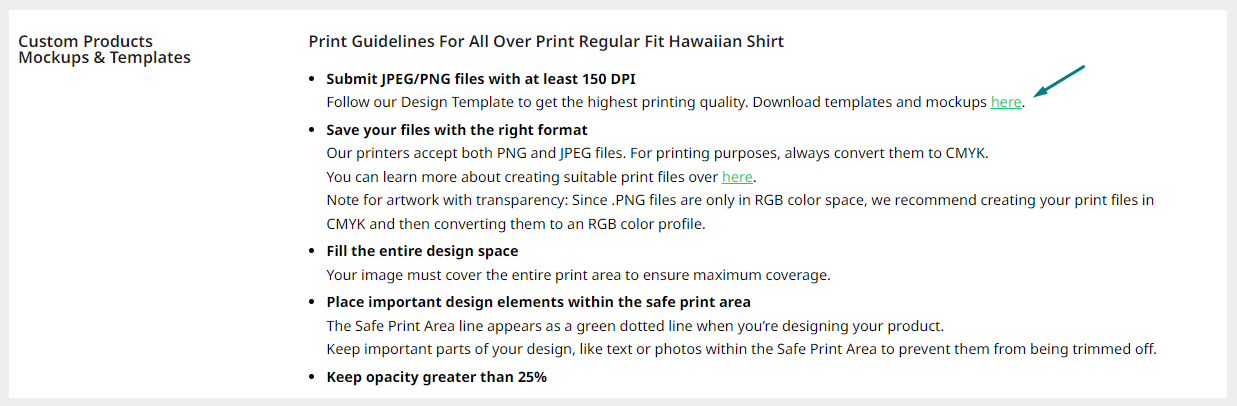
- Keep you main artwork in the ‘safe area’ so to ensure it is always visible when printed, and cover the whole grey area.
- Smaller lines might disappear against a dark background as the heavy ink coverage or neighbouring areas floods the line. Very light weight dark lines on a light coloured background may not be 100% sharp when printing on to fabric, so it’s best to stay above 1pt. Avoid general filters, reduced opacity, drop shadows, faded edges, glow and other effects.
- Use the resolution – at least 150 DPI. To produce the best quality with bitmap/raster files, again, always save your design files at the highest resolution possible.
- Your RGB file will have to be converted to CMYK prior to printing. You can learn more about creating suitable print files over here.
Merchize accepts both PNG and JPEG files, for artwork with transparency: Since .PNG files are only in RGB color space, we recommend creating your print files in CMYK and then converting them to an RGB color profile. - Be sure to turn off all Guide Layers before saving your artwork.
- You will find more design process & details within the specific template file to guide you.
Step 3: Save your mockup image
Hit the save button once you’re done.
Now go back to the original PSD file and you’ll find the new changes in place. The same mockup template looks like this:
How To Edit Mockup Templates Without Photoshop
Now that you know how to edit mockups with Photoshop, let’s talk a little bit about what your options are if you don’t have access to Photoshop!
You may be under the impression that something like GIMP or Krita — two of the largest free alternatives to Photoshop — would have the ability to work with mockup templates; especially considering that they can open PSD files. However, neither of these applications can edit mockup templates because unfortunately, neither has the ability to work with Smart Objects.
To edit mockup templates without Photoshop, you will need an alternative that has the ability to work with Smart Objects. The only free application of that fits this criteria would be Photopea.

Photopea is a free alternative to Photoshop that looks, feels, and functions exactly like Photoshop. It includes the Smart Objects feature, and best of all, it’s web-based! This means that you don’t need to download anything to use it. Just navigate to the Photopea website and you will be greeted with a free alternative right within your browser.
Since the two are nearly identical, mockup templates are edited using the same process that was used for Photoshop.