How To Use Product Gallery
🇻🇳 Click here for the Vietnamese version
The Product Gallery feature will help sellers can upload one or more photos to display collectively for all Variants instead of uploading photos for each Variant.
Create Product Gallery
The Gallery feature will not display immediately on the product creation page, it will display only after creating the product.
After creating products, you only need to refresh the page and click on the product that you just created, and then you can see the Product Gallery feature. The position of this feature is under the “Description” section and above the “Artwork” section.
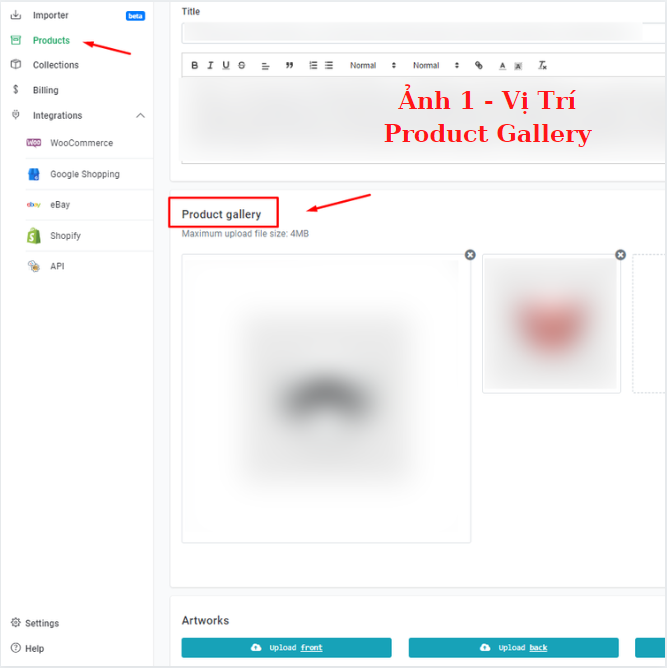
The Product Gallery feature will the same function with image management of Variants, allow to upload of more product images or delete images with a maximum size of 4MB as well as the unlimited size and accept the files such as .jpg, .png.
→ After uploading, the images will be automatically covert to .jpg
Where the Product Gallery will display?
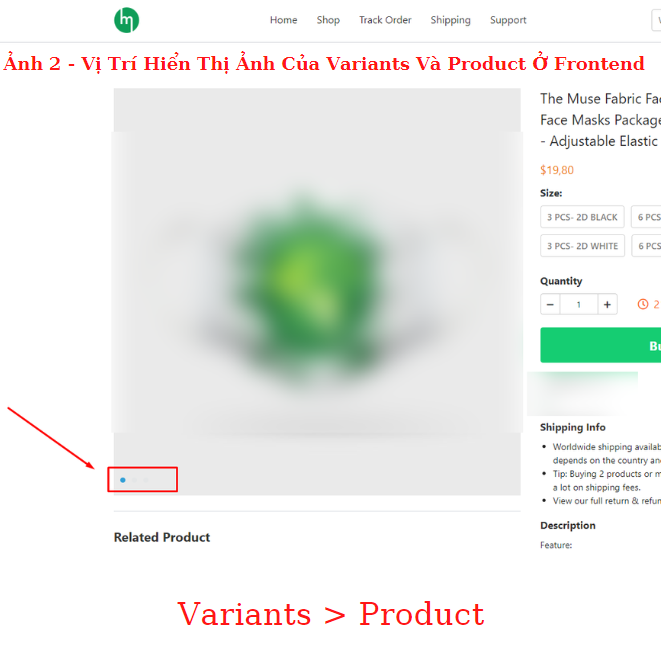
When uploading Gallery images, the frontend will display the images of Variants and Product in the order Variants → Product
In addition, here are some sections in Frontend which will also apply the rule for displaying images of Variants and Product as when uploading Product Gallery image
- Product page, the image of main products section.
- Product page, “Related product” section.
- Category page, product listing section.
- Shop page, product listing section.
- Homepage, all the blocks relate to images.
- Cart page, “Your cart” section.
- Cart page, “You may also like” section.
- Checkout page, “Order Summary” section.
- Product image in the email.
- Product imagine Google Shopping file.
We hope that this article will help use Product Gallery most effectively.