How To Prevent DDOS Attack By Using Cloudflare
In this article, we will guide you through the steps to redirect your domain to Cloudflare to limit denial of service (DDOS) attacks.
Although it is not guaranteed to block 100% of DDOS, for small and medium attacks, Cloudflare is still strong enough to support you. When you create a store with Merchize, you have already gone through the step of connecting to Cloudflare.
Depending on the size of the attack, this method can be more or less effective. Remember to talk to the support team as soon as possible to avoid site interruption in cases like this.
1 – Under Attack Mode
When your store suddenly has a large amount of traffic and suspects DDOS, you just need to log in to Cloudflare, in Overview section select Under Attack Mode as ON to turn on Cloudflare’s DDOS prevention mode.
Viewing the Overview section of Cloudflare is also a simple way to know if you are suffering from DDOS. Here Cloudflare displays statistics of visits and requests in the past time. If you see an unusual spike in traffic (eg x8 x9 x10… times), especially in the Total Requests section, it’s very likely that you are suffering from DDOS.
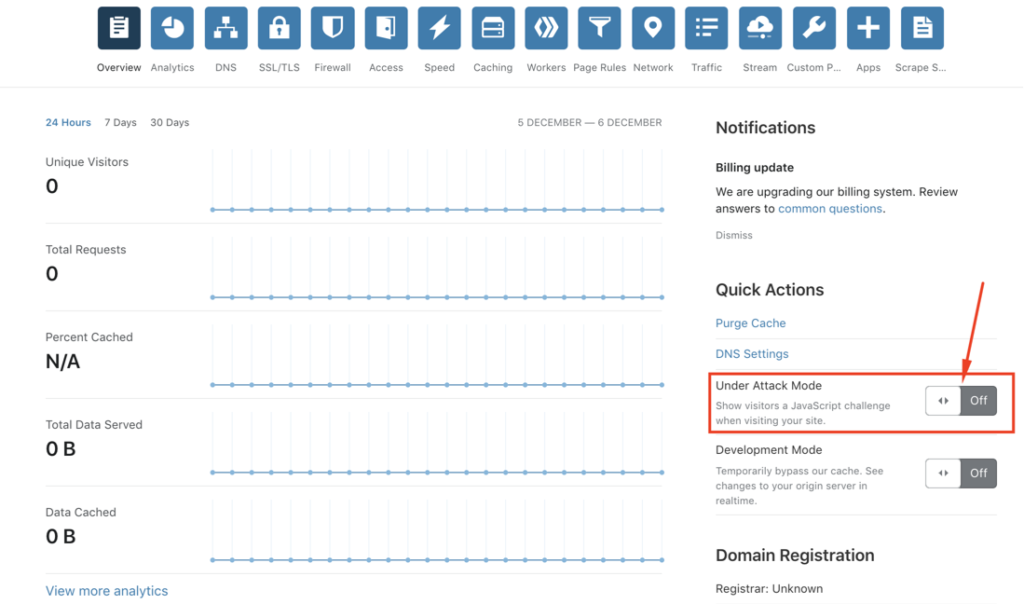
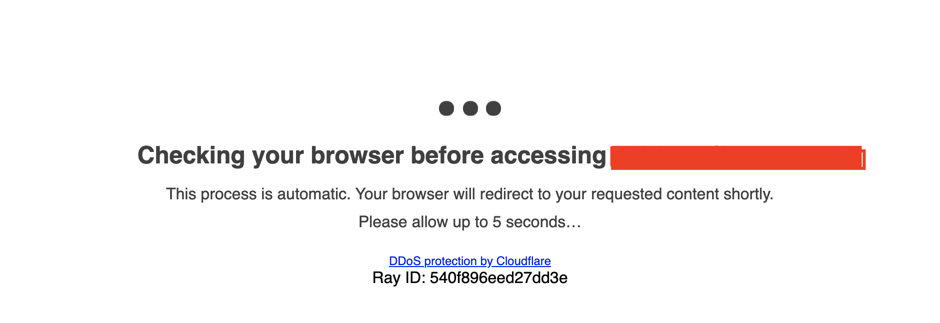
When Under Attack Mode is turned on, every time you enter the store, there will be a JS running, you have to wait 5 seconds before entering to avoid DDOS.
2 – Stronger Measure With Page Rules
Under Attack Mode has basically handled a lot of DDOS cases, but in case the opponent attacks to timeout >5s with each query, the store is still affected (Although the number of subjects capable of doing so is not high). If your store is, unfortunately, experiencing this, you can increase the level of protection by using Page Rules:
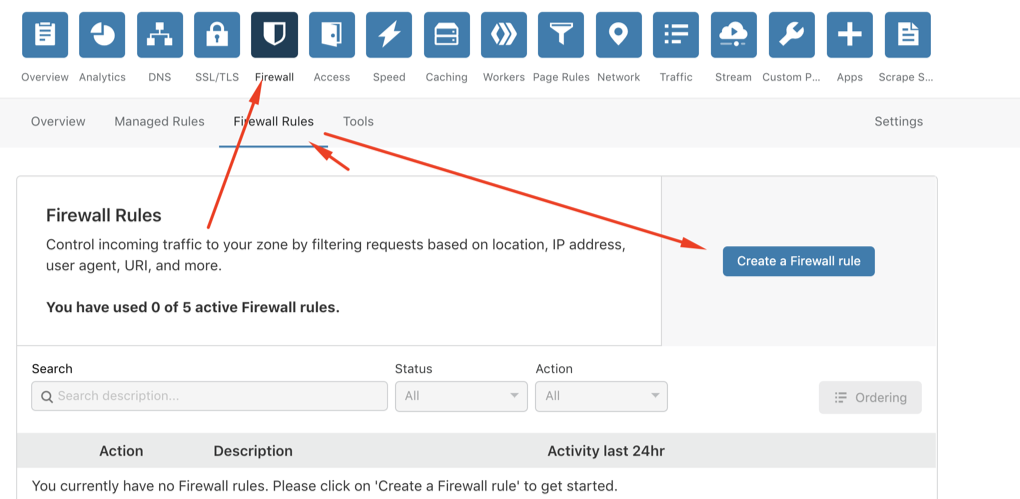
Go to Firewall > Firewall Rules > Create a Firewall Rule.
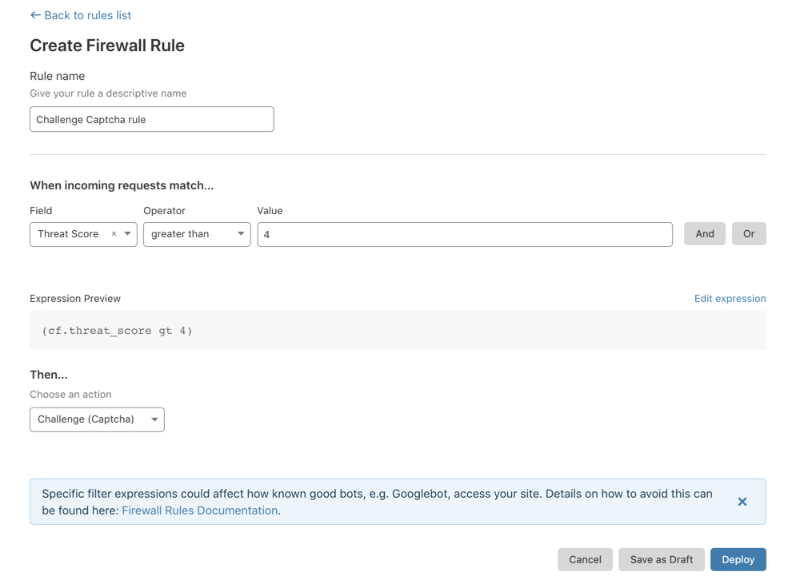
Then try to create a new rule with the condition that Threat Score is greater than any number from 0 -> 100, (the higher the number, the more suspicious the access is), here for example the store is being attacked should try set to 4.
Information about threat scores can be found here. In which, if you set Threat Score as:
- greater than 0: The store’s protection level is extremely high because everyone is affected.
- greater than 14: Medium level of protection, some people get caught.
- greater than 24: Low level of protection, few people get caught.
- greater than 49: Almost no protection, as there is almost no threat score > 49.
On Cloudflare there is also a topic discussing Threatscore, you can see it in detail here.
Then the action THEN is Challenge (Captcha) so if suspicious will show captcha, and then Deploy and see what happens next.
If your website is still being attacked, then reduce the threatcore point or if it still passes the captcha layer, we will have to leave the condition as Block (a bit risky because it is easy to block real guests, but for real guests, threatscore is usually very low).
Setting up a Firewall rule like this is easy to get confused if you are not familiar with using Cloudflare, so after the setup is complete, you can take a screenshot and send it to Merchize support for the team to check more specifically.
3 – Enable Rate Limit
You can learn about Cloudflare’s Rate Limit here: https://support.cloudflare.com/hc/en-us/articles/115001635128.
Basically, Rate Limit is a good paid solution by Cloudflare to fight DDOS. Rate Limit works with the same mechanism as Page Rule but will check if that user is requesting too much (depending on the number of requests / each IP set by you) to Block or perform other actions.
For example, if a user requests several hundred times per minute, it is definitely spam/ddos -> will be blocked. As for normal users, using at normal levels will not be affected.
How to calculate Cloudflare’s Rate Limit:
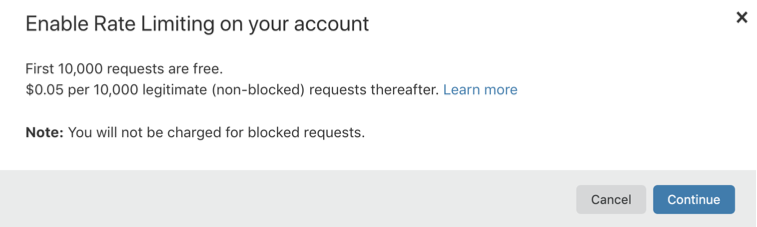
- With the first 10K valid traffic of all stores on your account: FREE.
- For every next 10K traffic: $0.05/10K valid traffic.
- Note that Cloudflare calculates according to the number of valid traffic (not blocked traffic), so if you get shot several hundred thousand requests/s but you set up the standard rule, block most of it, it won’t be a problem, it won’t cost much at all.
Rate Limit’s pricing and extended functions also depend on Cloudflare’s plans:
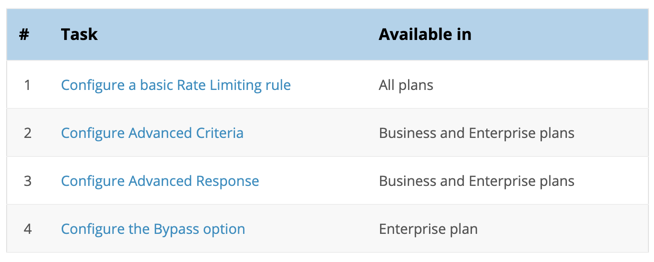
And when you find the User who is spamming, how to handle it (Block or Challenge..) also depends on the Cloudflare packages:
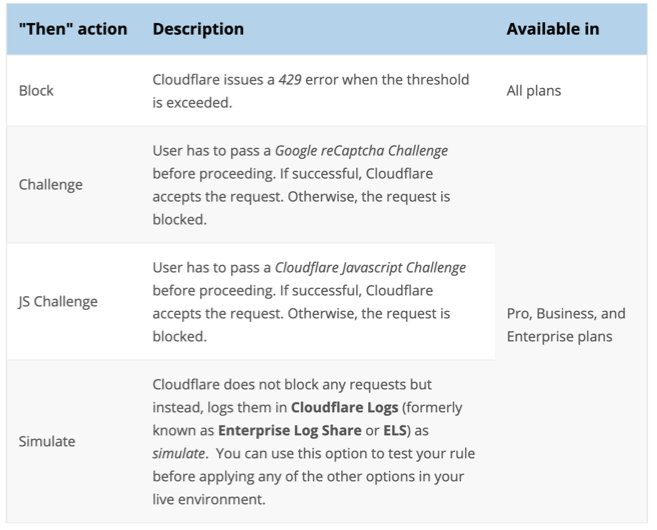
Basically, using the Free plan and buying more Rate Limit is fine, but if you want to be more sure, you can upgrade to the PRO plan for $20/month to have the ability to Challenge with JS or Captcha with users exceeded the set threshold.
How to Enable Rate Limit:
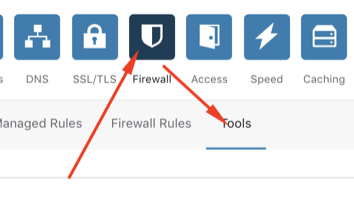
1 – Log in to Cloudflare, select Firewall > Tools
2 – Select Rate Limiting > Enable Rate Limiting
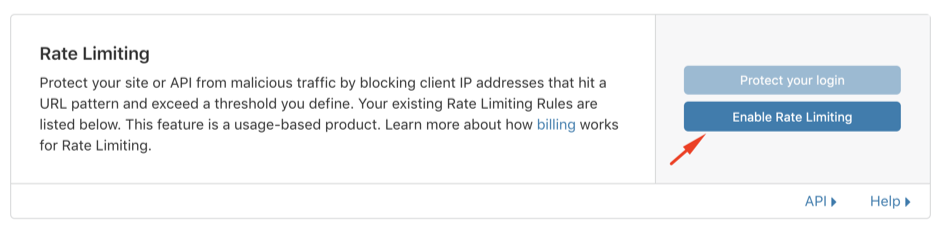
Cloudflare will display a price snooze dialog and note that you will not be charged for blocked requests.
Then you just need to select next > next > next and fill in the payment information (can be paid by card or PayPal), you won’t be charged right away so don’t worry.
3 – Setup Rate Limit
After Enable Rate Limit is done, go back to Firewall > Tools > Create a Custom Rule to create a rule.
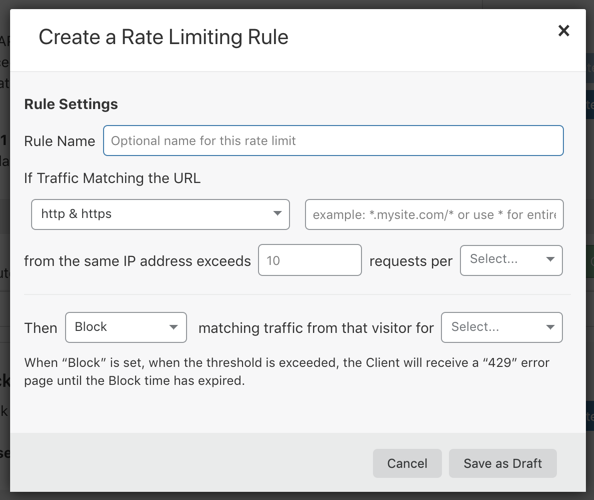
Then fill in the information fields according to the instructions below:
- Rule Name: Enter the name of this rule (any name is fine).
- If Traffic Matching the URL: Enter a * to select a filter for all traffic (or enter the URL that you have found to be DDOS).
- Exceeds section…. requests per ….. : To enter the maximum number of requests per minute/hour that the user can request (after that it will be blocked). The example will usually fill in 40-50 requests per minute. Or 5-10 requests per 10 seconds. This part is quite important and needs to be carefully checked with each case. After you’re done, it’s best to: contact the support team for a more thorough check, and get a different network phone to test. If you see that you’ve only been logged in for a while, it means that the rule is a bit too strict. If f5 is too much and has not been blocked, then this rule is a bit too loose.
- Finally, Then … for … : This part to determine if the user violates, how long to do, for example, block for 1 minute or 1 hour. In the free version of Cloudflare, only action is block. You can upgrade to PRO version for more reasonable actions (eg challenge JS, challenge captcha).
In short, this Rate Limiting method is quite effective and will not be too expensive if you configure it correctly. You also get the first 10K traffic for free, so there’s no initial cost. However, to be most effective against DDOS, you need:
- Test carefully after setting up each rule.
- Contact Merchize support for assistance.
- To ensure the safest, after contacting Merchize support, you need to add a Merchize dev account to your Cloudflare management so that we can best support you. Merchize’s dev account is [email protected].