Create & Sync Products from Merchize to WooCommerce
Introduction
The connection between WooCommerce store and Merchize is done by OAuth. Here are some of the key features Merchize provides:
Upload as many products as you wish to your WooCommerce with bulk upload features in one click.
Connect multiple WooCommerce stores to Merchize, synchronize products and orders instantly between both platforms from one place.
Centrally edit products and automatically sync edits across channels.
Export descriptions in HTLM format.
Create multiple product types under one listing.
⚠ Important: Merchize allows you to add listings to WooCommerce from products created in Merchize account directly, not supports products imported from other platforms. Before listing on WooCommerce, you have to connect your WooCommerce store:
- Go to your Merchize Account.
- Under the Integrations section in the Admin Dashboard, select WooCommerce.
- Enter the URL of your WooCommerce store frontend (without any subfolders) and press the Connect button
- You will be redirected to WooCommerce to login and approve the connection to Merchize App.
- Once the app has been connected, the authentication window will close, and you will be redirected back to Merchize account to see the new WooCommerce connection ready to go.
Quick Overview of The Listing Management
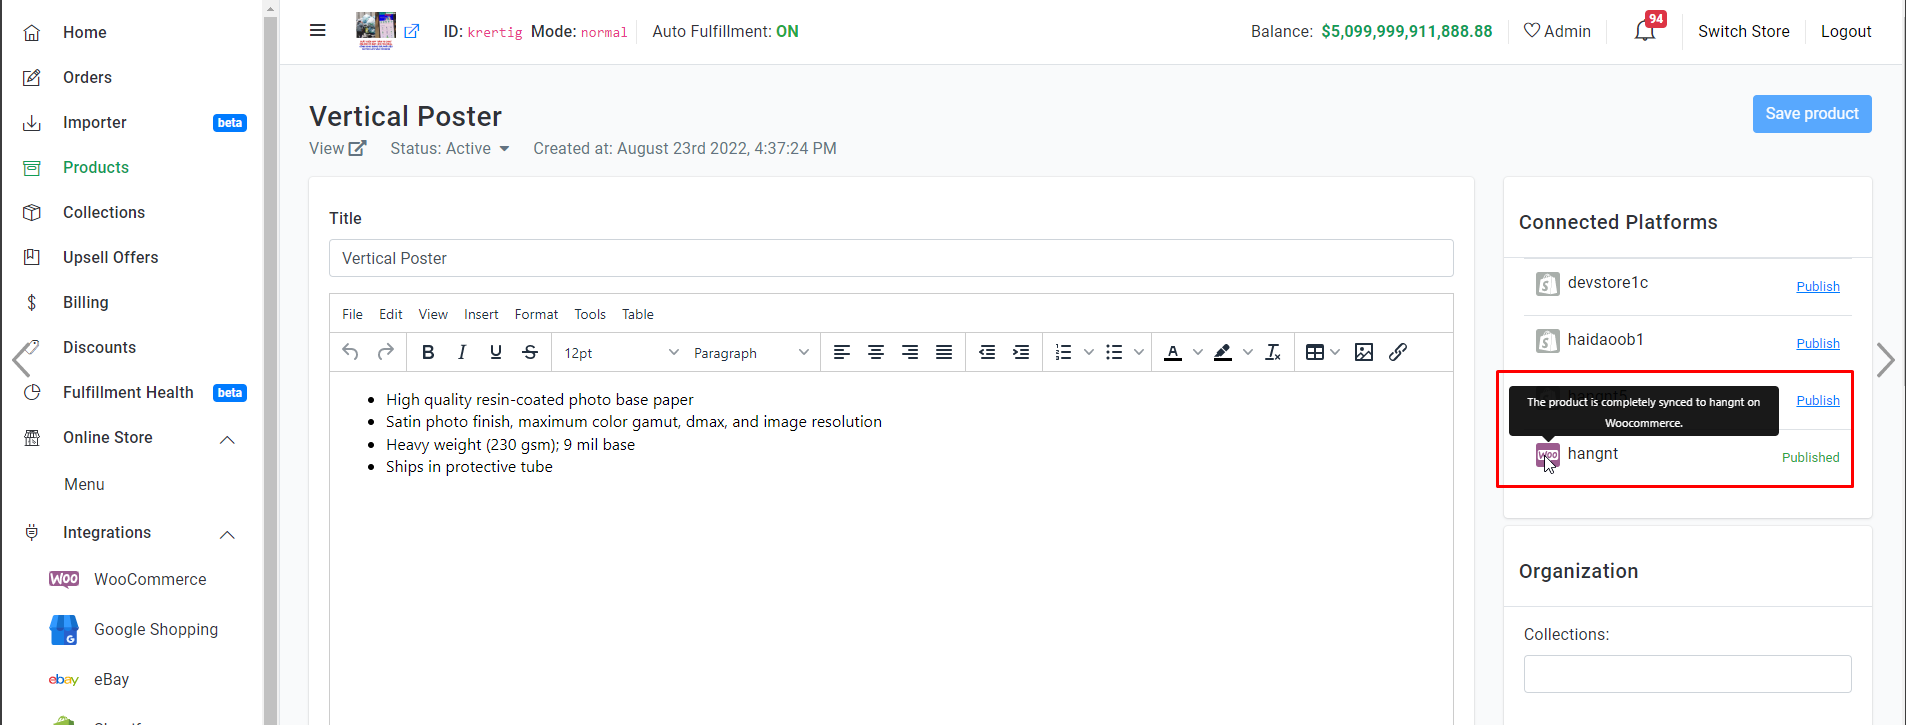
You will notice the Connected Platforms column in your Product Manager. Here, you can view all stores & sale channels. Merchize will present you with active status of listing for each stores.
Flexible to use interface allows for simple multichannel management that saves hours on new channel expansion.

Store Icon Reference (with Color Variations) | Status |
| Indicate the products is completely synced and published on WooCommerce. | |
| Your products will change to “Edited", which means the data has been changed, but it hasn’t been pushed sync to your sale channel. | |
| Your listing is not yet synced or in a (temporary) processing state. | |
| Display errors in processing. These errors may be returned by each channel according to their listing rules. |
You can hover on each icon to get the name of your store.
List product individually
Make sure that you are in the Product page.
- Create your product listing with a title, variants, description, price, and other pertinent information.
If you are trying to build your product list on Merchize for the first time, please refer to this guide: Use Mockup Generator to Create Campaign of our Help Center.
- In the right panel, at Connected Platforms section, you will see your stores are displayed. Select the store that you wish to list by clicking the “Publish" button to the right.

- The product is ready to sell and is available to customers on the online store when the status turns to “Published".
- Support single listings with unlimited variants from Merchize into WooCommerce.
Note:
- When using the ‘Create Campaign‘ function to generate a Merchize product link with multiple product type attributes, Merchize will preserve the exact variations for each attribute as they were originally displayed and set up during the synchronization process with your Shopify store.
Example:
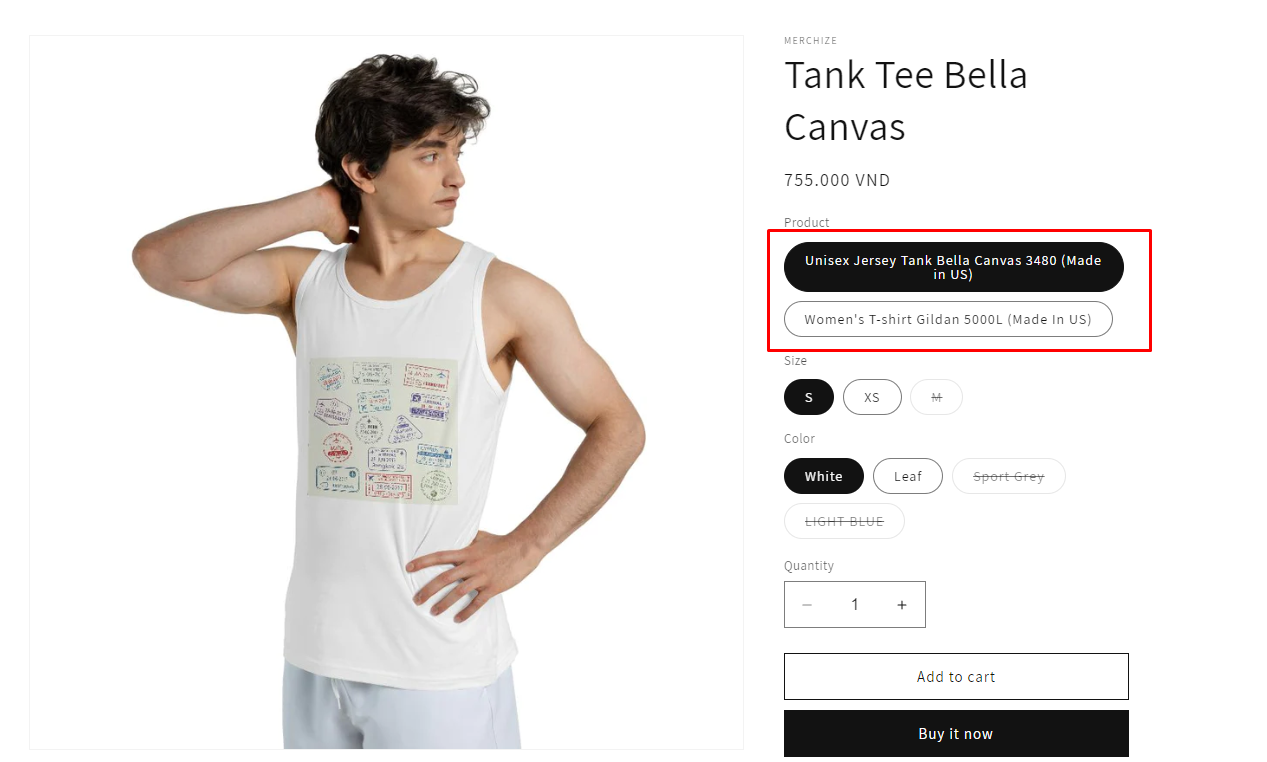
- Only variants with images will be synchronized to Woocommerce.
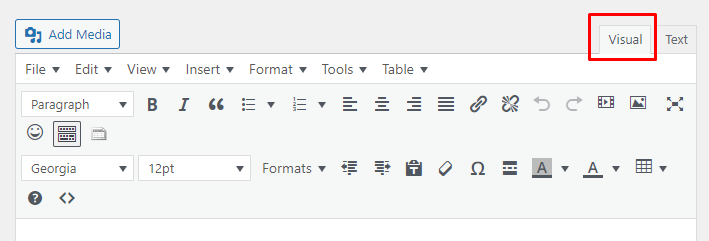
- After products are synchronized to Woocommerce, the product descriptions will be shown in HTML format. To switch to the regular format, select tab “Visual" tab on the top right of the menu.
List products in bulk
You can push listings in bulk by selecting multiple products at once using the checkbox on the left side of the product list column and then clicking the “Publish to Integrations" button in the dropdown “Action" menu.
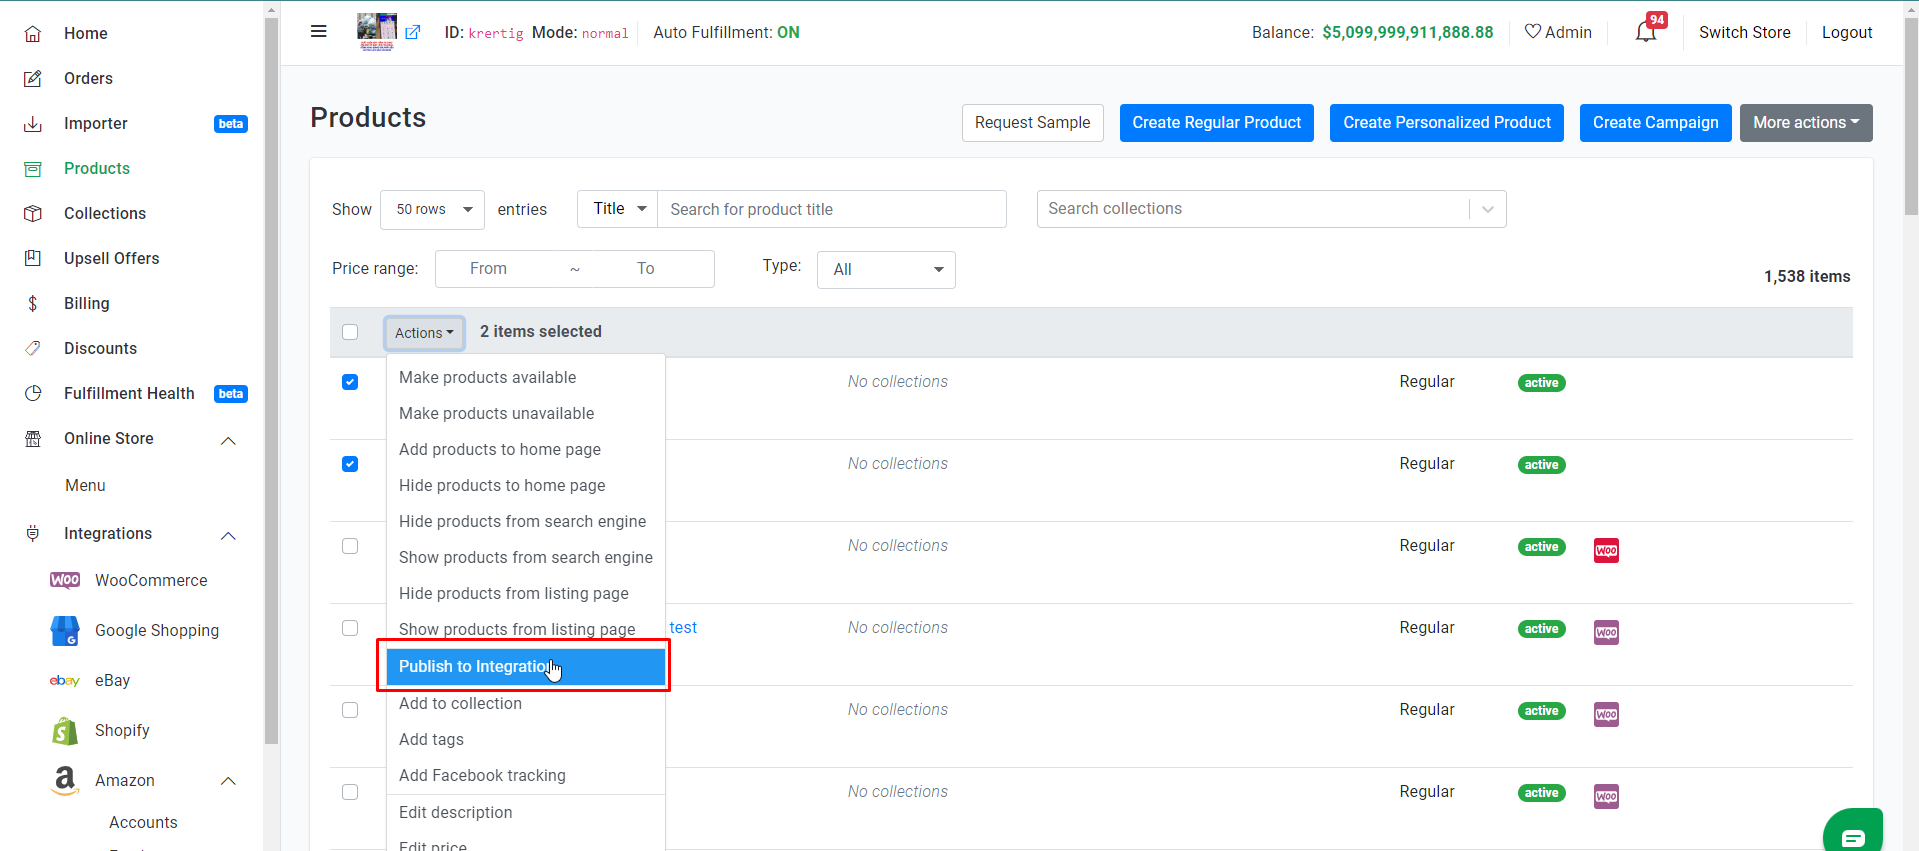
In the pop-up dialog, you will select integrated channel and stores you wish these products listed.
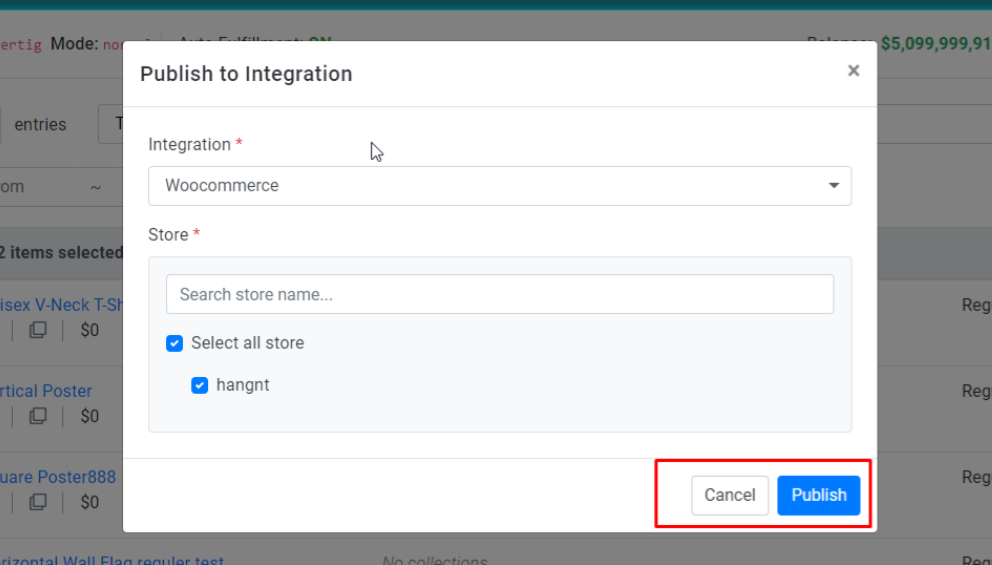
Now simply click “Publish“, and your bulk listing will go live on WooCommerce storefront.
You can "CANCEL" to close the window.
Note that processing times may vary depends on the number of listings you have chosen to publish at once. Edit & update your listings
In the product detail page, you can update your listing information (product title, images, description, price,..) manually.
You can also either change the description, or increase or decrease the prices by a percentage or a fixed amount once at a time (Remember, this feature is now only viable to all variants of one product or multiple specific products.)
- After you’ve made changes to your listing, then click “Save product" on the top or bottom right corner of page.
- The store logo icons will turn yellow, which means the data has been changed. Select the store that you wish to re-sync by clicking the “Update" button.
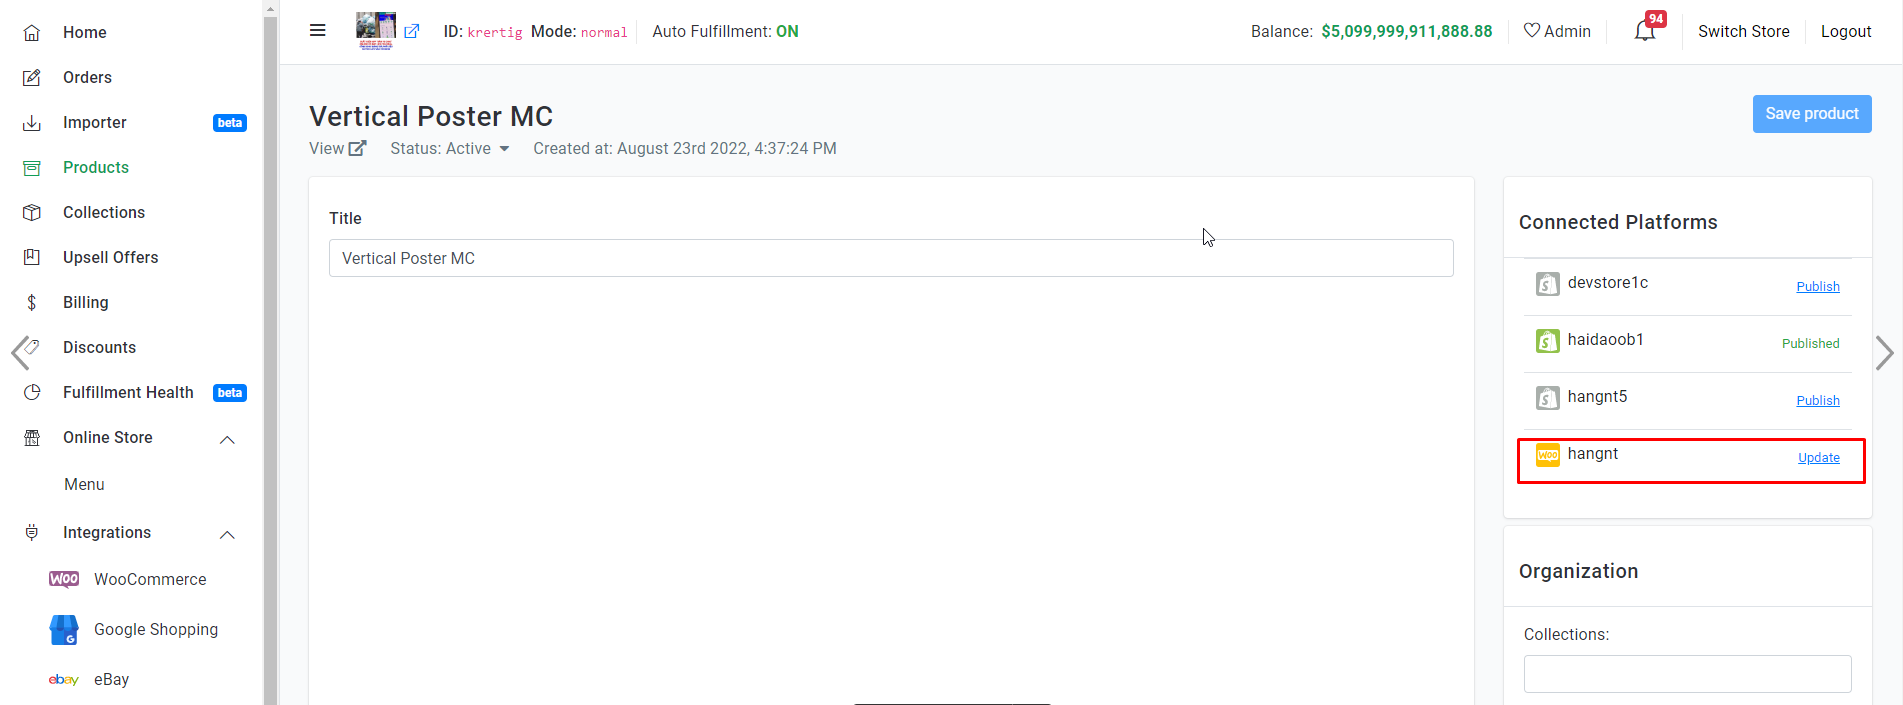
You will need to perform all product updates for WooCommerce in Merchize, and publish those changes to WooCommerce.
If you make changes to synchronized product from WooCommerce, once that product has order, this will generate different product on Merchize system. (To fulfill order, you need to re-upload artwork).
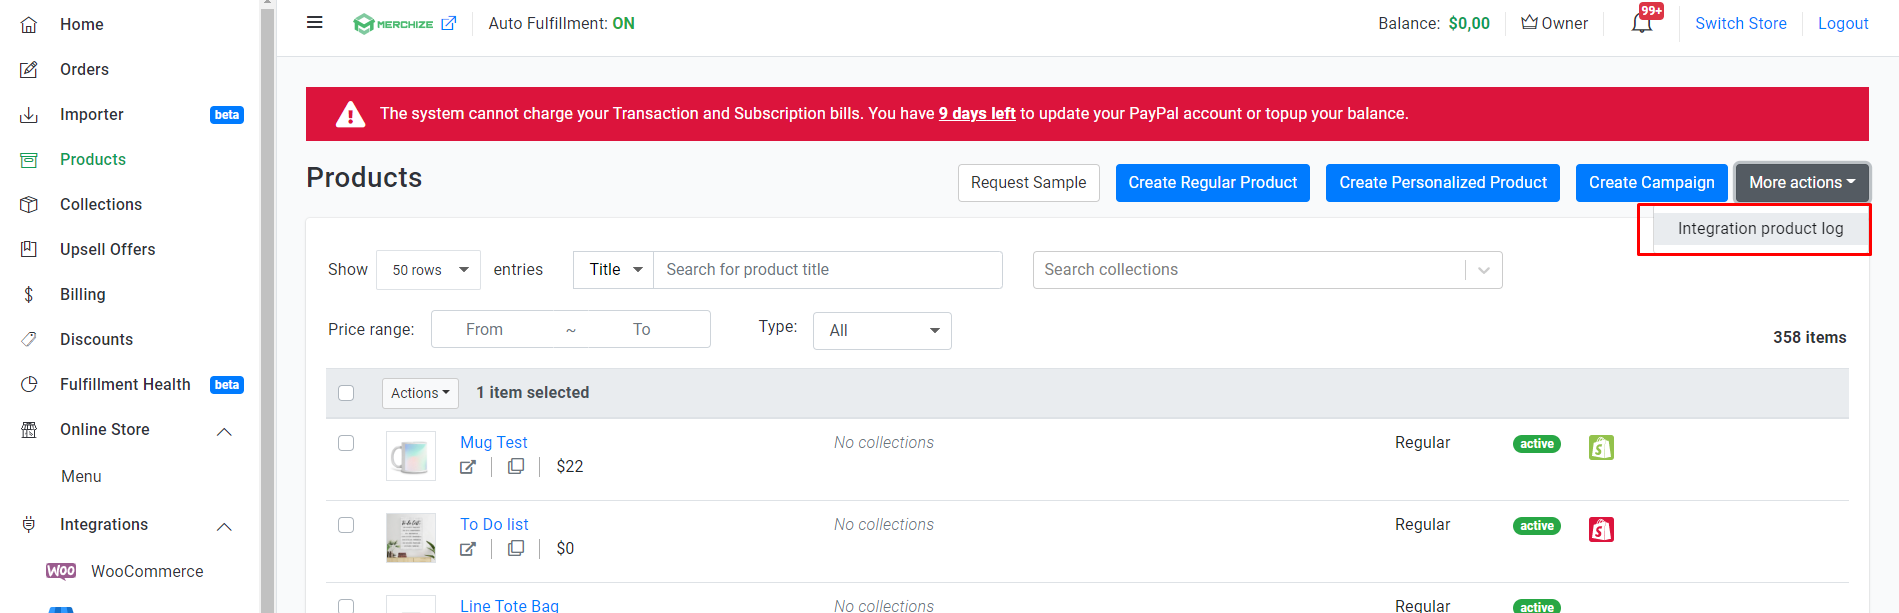
Product Listing Log
In the Product Section, click Integration product log under More Action button, as specified in the screenshot:
The Listing Logs page shows additional information on your product listings, including the listing activity log, active status & processing status on an individual listing.
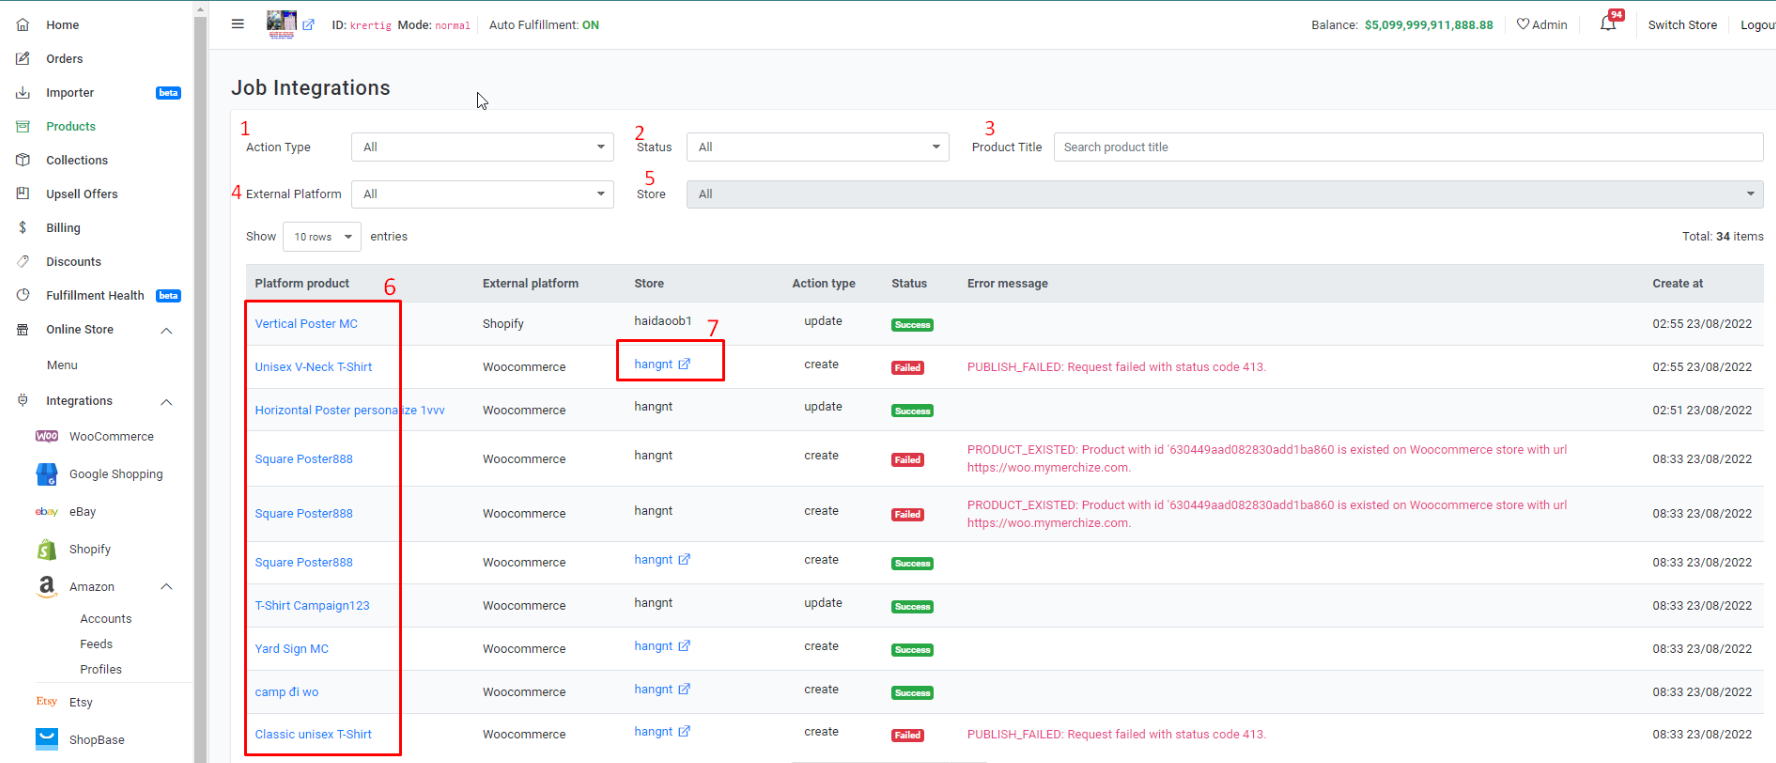
The workspace controls allow you to use filters to find data that shows for your listings.
You can filter on one or multiple fields in the following areas:
- Platform Product – The listing name linked to the Product Details Page.
- External Platform – Once you push listing to external channel, this section shows the associated platform for the listing.
- Store – The destination store of the synchronized listing.
- Action type – The specific action that applies to the listing.
- Status – The current state of the processing.
- Error Message: The cause and nature of processing errors.
- Created on: The date/time stamp when the listing was published to external platform.
For Woocommerce active listings, you are able to view product URL by clicking on the corresponding store name.
Fulfillment of WooCommerce orders
The orders on all linked products will be automatically synced to Merchize for seamless order management. You can fulfill entire or part of an order, add branding labels & other package customization. You can also quickly search, view and edit any order from all your received orders on multiple stores.
Merchize will process and return tracking automatically to your WooCommerce store. At that time, customers will also receive an email to notify Shopify’s tracking update.
All WooCommerce orders will have 2 tags in form: “WooCommerce” and “WooCommerce_your account name”. You can use these tags to identify which orders come from which WooCommerce account.
List your catalog across sale channels
Resources for More Information