Merchize Webhooks Guide
Adding Webhook integration to get real-time updates, get notified when a specific event occurs, creating an automated workflow, and more.
Get your POST URL from webhook service provider or your own webhook server
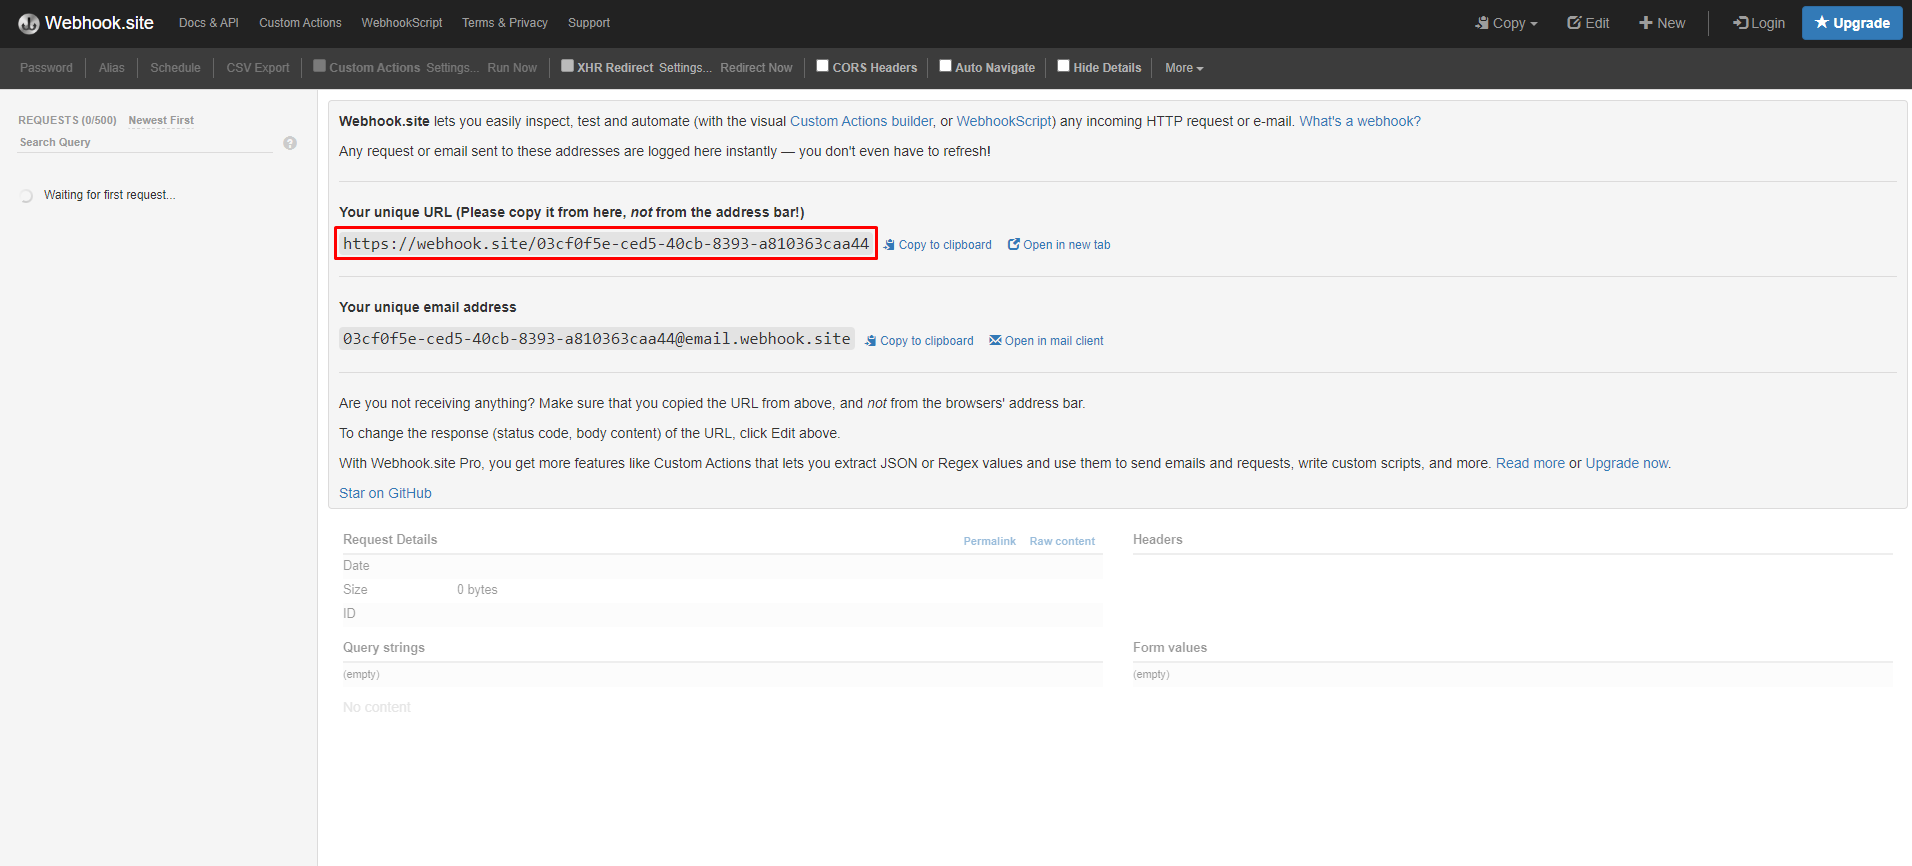
This example uses Webhook.site is an open-source and free service that generates a unique URL for you to receive webhooks without having to set up and maintain your own infrastructure.
When you arrive at Webhook.site, you’ll see a unique webhook URL you can use to receive webhooks.
Copy the URL displayed under Your unique URL.
Set up the webhook output in Merchize
Return to your Merchize dashboard.
Click Setting in the left nav bar, then click “Webhook”.
1. Create Secret Key
First, you have to create secret key.
Click “Add Secret Key”.
The system will generate a new secret key. This key serves as an essential component in verifying the authenticity and integrity of the event, thus contributing to the overall security and reliability of the process.
2. Configure the Webhook
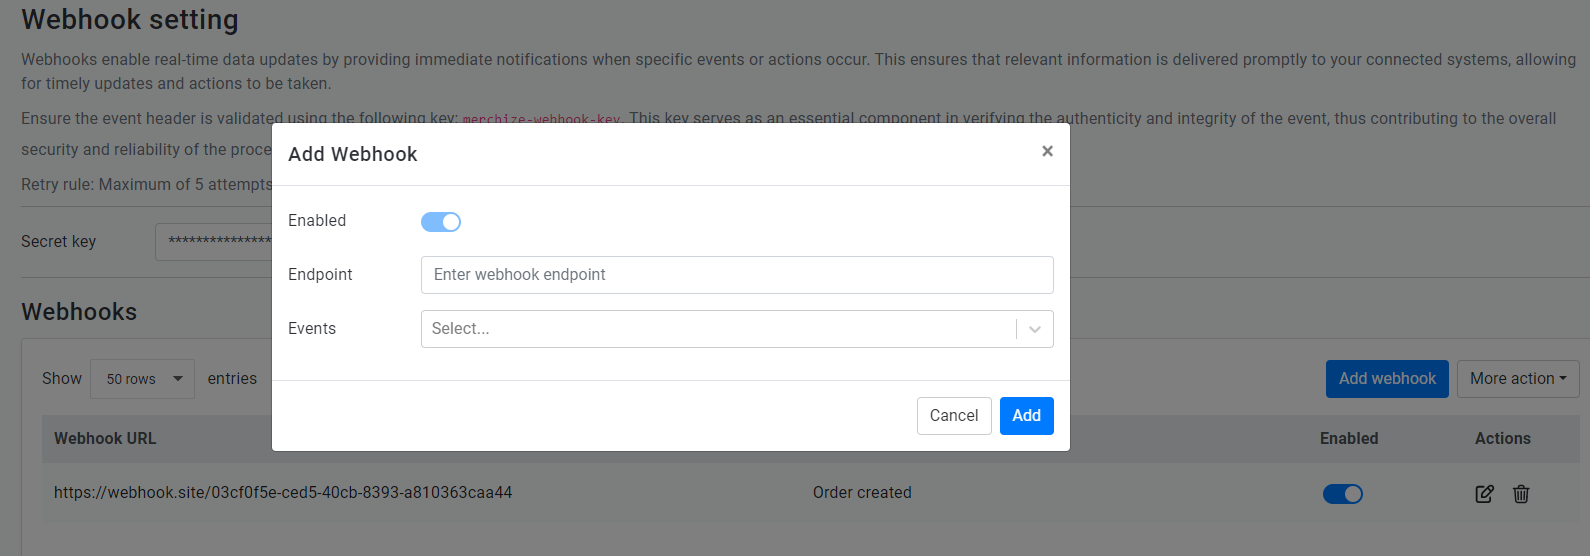
- Click Add Webhook.
- In the modal that appears, add data to these fields.
| Field | Setting |
| Endpoint | Paste the unique URL you copied from webhook.site |
| Events | Select the one or multiple events you want to be notified about:
ORDER.CREATED ORDER.PAYMENT.REFUND ORDER.CHANGED.TRACKING ORDER.CHANGED.SHIPMENT ORDER.PAYMENT.TRANSACTION_FEE ORDER.PAYMENT.FULFILLMENT_COST ORDER.PAYMENT.SURCHARGE ORDER.CHANGED.PROGRESS ORDER.PAYMENT.FULFILLMENT_COST_PAID ORDER.CHANGED.PROGRESS_STATUS
|
When finished, click Add. The created webhooks will be shown under the “Webhooks" section, you can toggle the webhook to be Active/Unactive or Delete the webhook.
Test Webhook requests
On the top right-hand corner of the webhook screen shown above, click More action > Webhook simulator. This will open a screen for you to enter the Webhook URL & select the event for which you want to send the test.
Then you’ll see a success message, along with the data sent to your webhook.
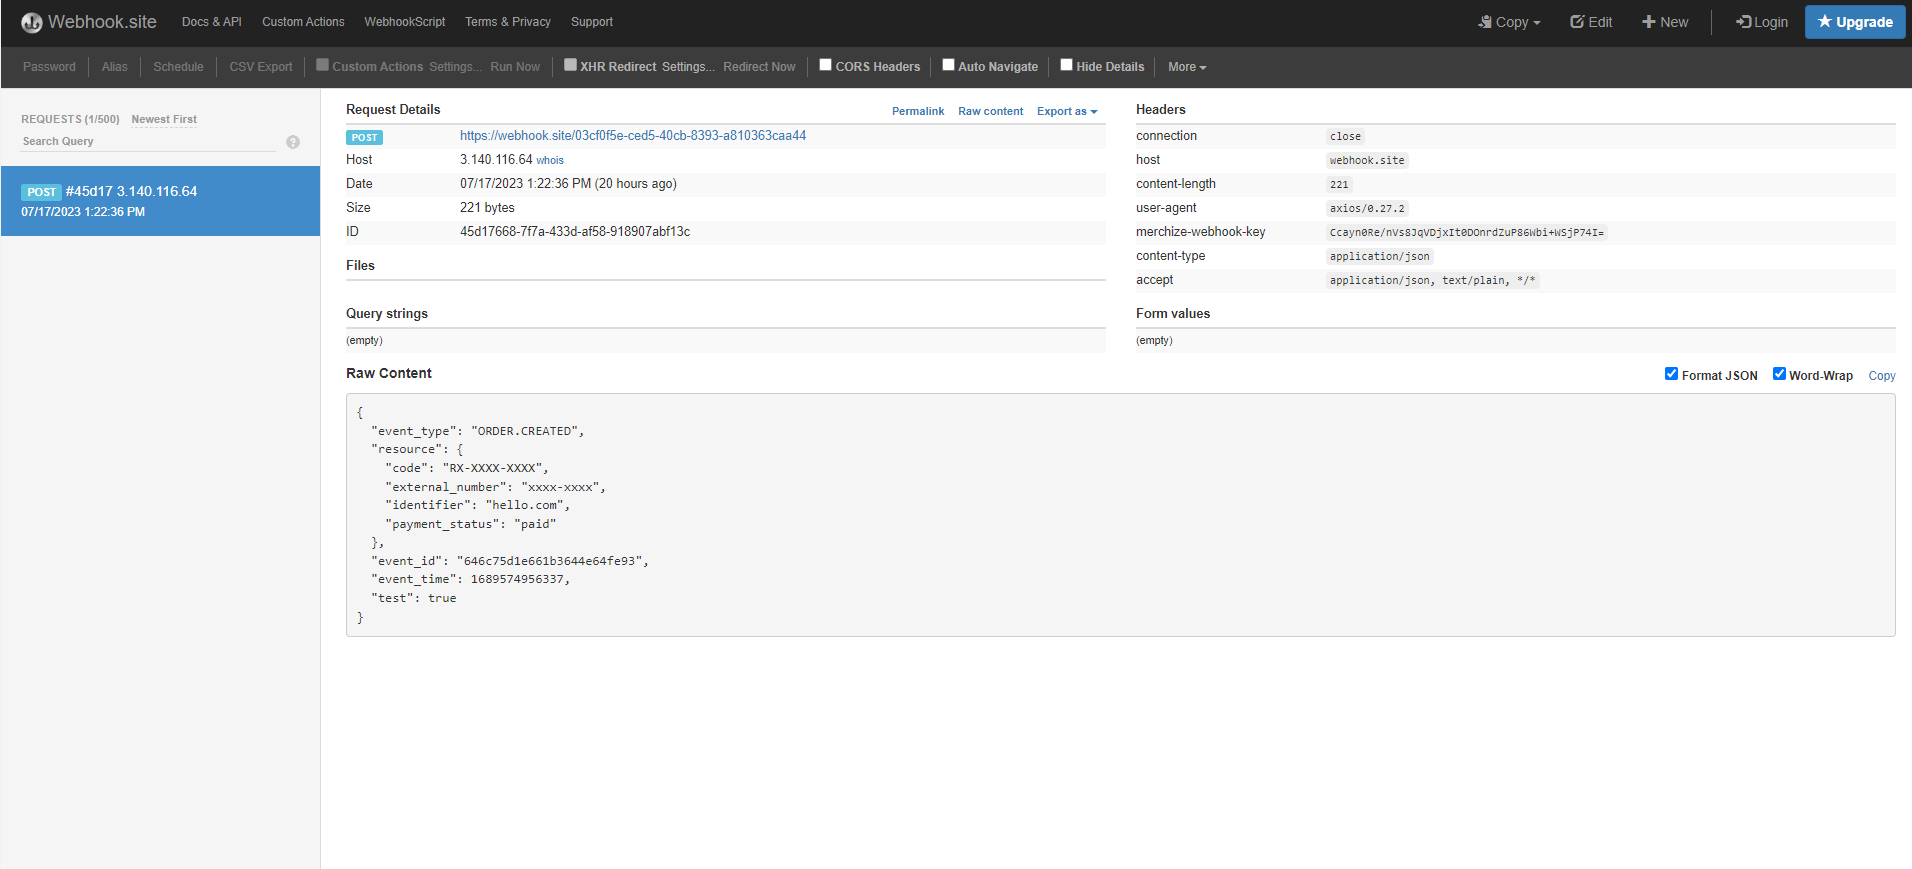
Check the response on Webhook.site
All webhooks sent to the webhook URL will be listed on the left panel. This allows you to switch between the requests and inspect their results quickly.
The right panel shows the webhook notification in JSON format.
Monitor the Webhook logs
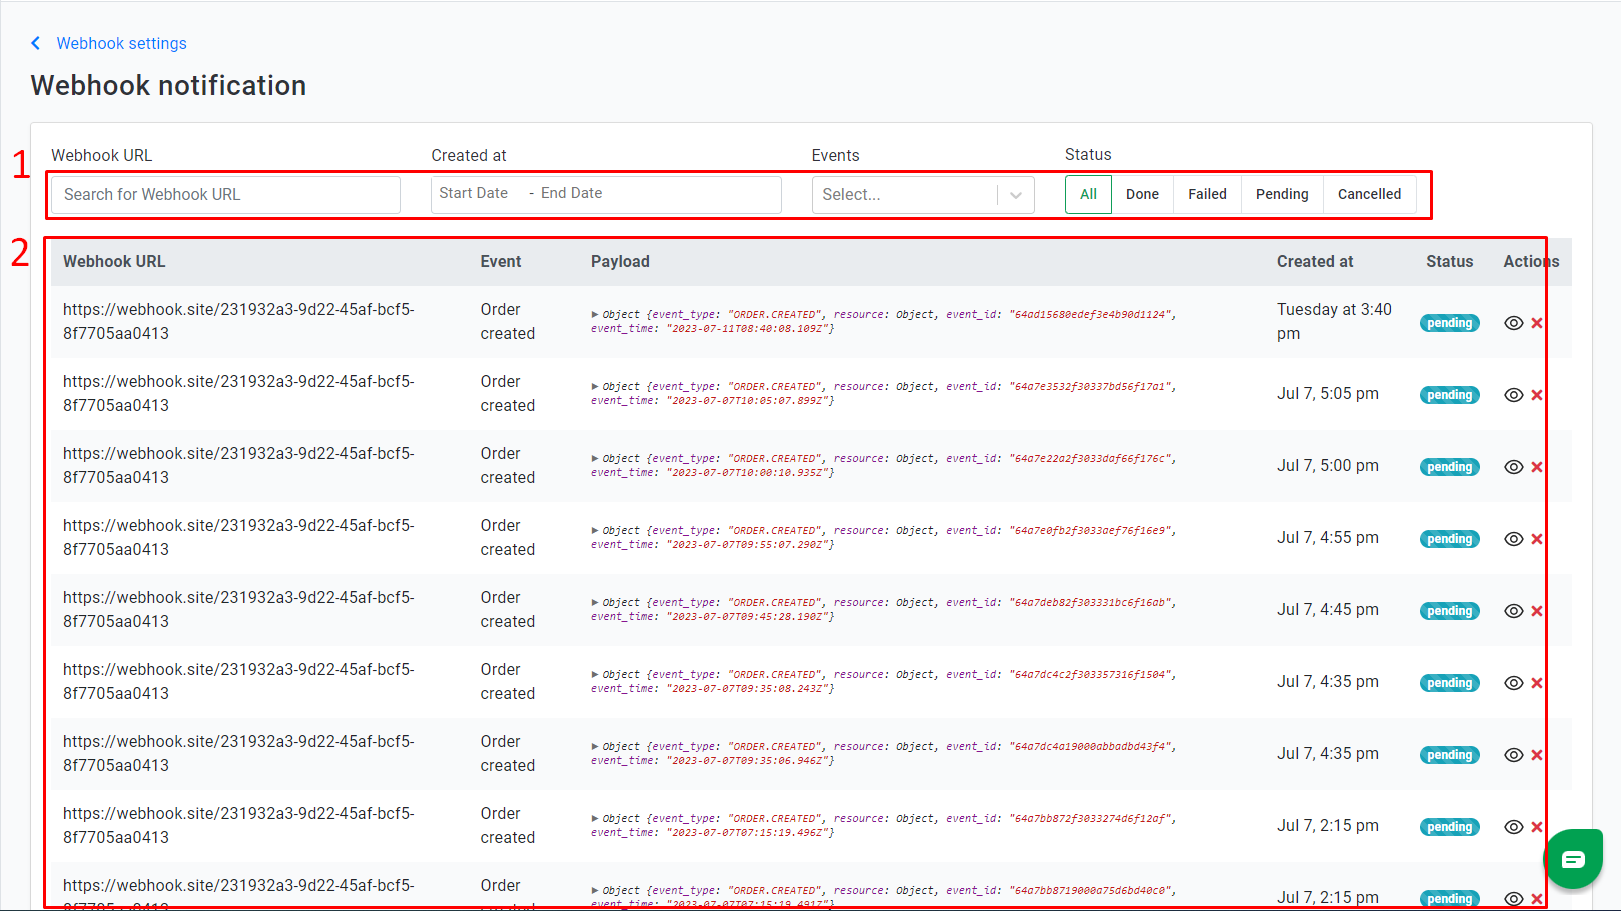
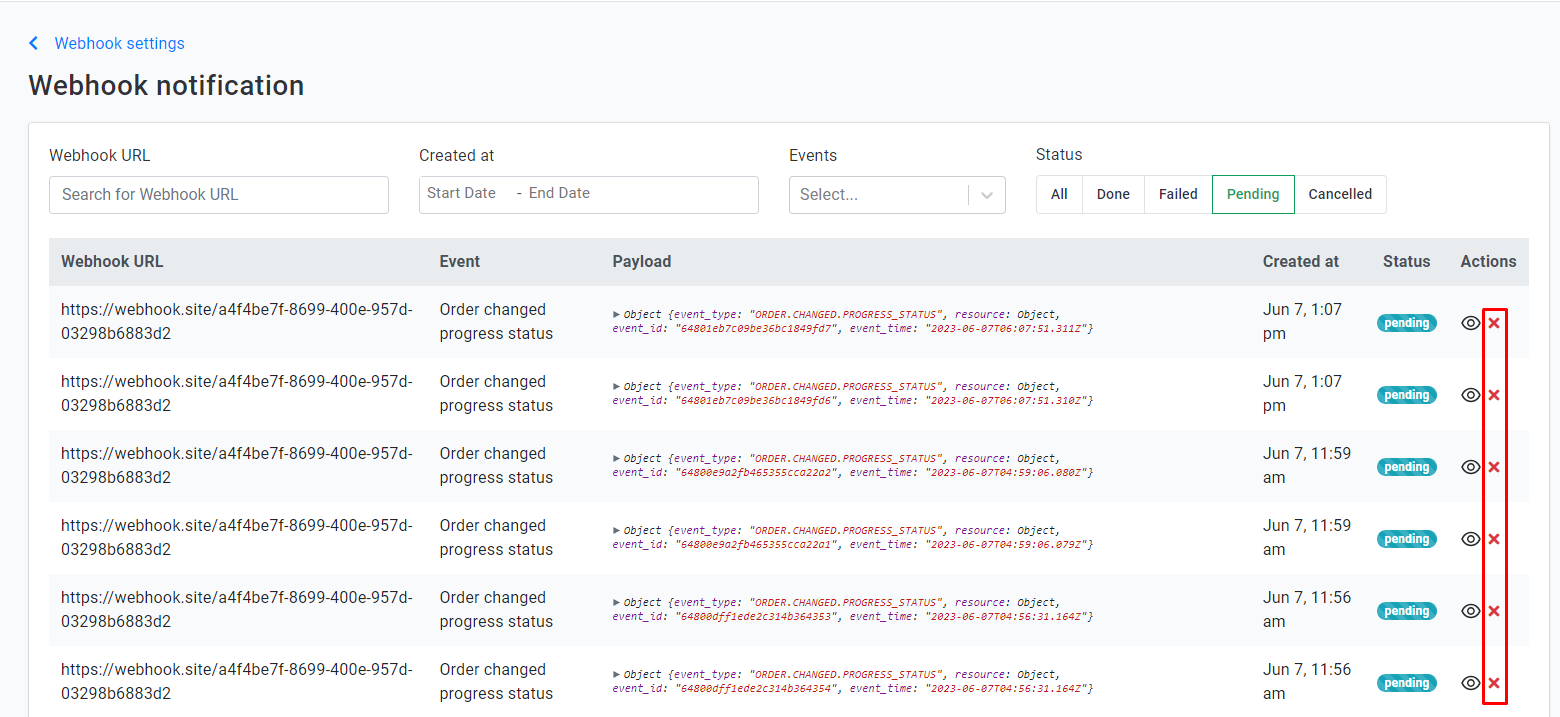
To track the delivery and performance of the custom alert notifications, click on the More Action button > choose Webhook notification.
When a webhook is triggered, the information about each delivery or attempted delivery is listed in the “Webhook notification“. Each time the webhook is triggered an entry will be added to the list.
The workspace controls also allow you to use filters to find data that shows for your delivered notifications.
View, retry, or delete notification Webhooks
To view a request sent, click the icon
To remove an event, click the icon (when it’s in Pending status)
To retry a failed/canceled event, click the icon
Webhook events and payloads
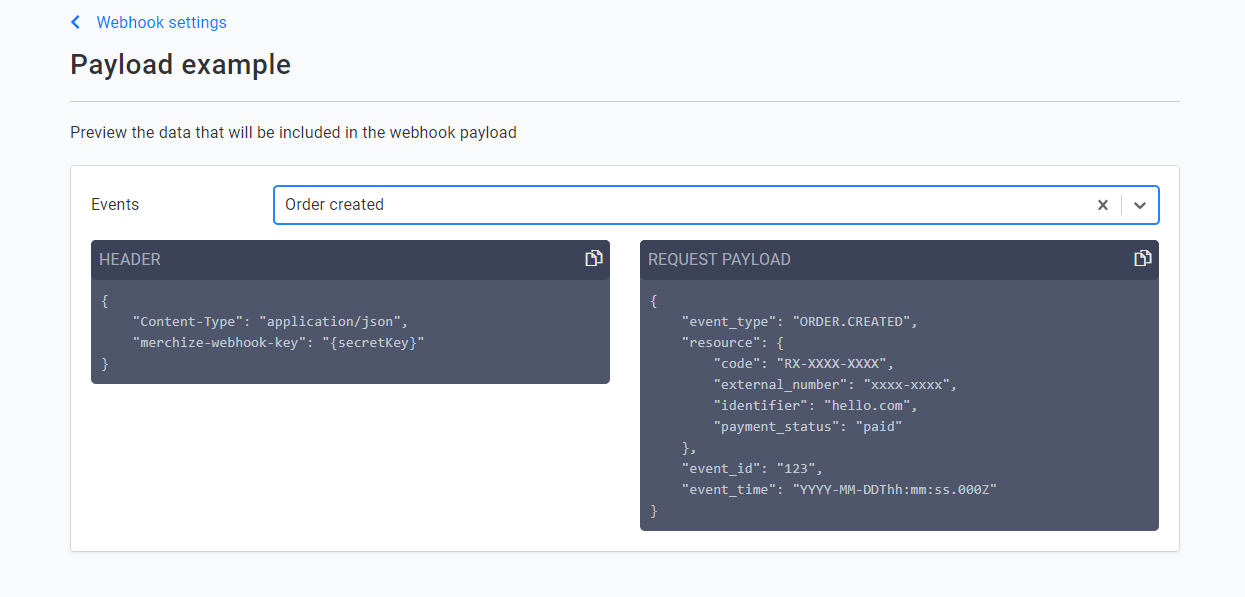
For details of the supported webhook events, how they are triggered and the payload for each webhook event, go to the webhook payloads page.
A “payload" containing information that the webhook handler will process.
