How to Use Merchize’s AI Library & Built-In Design Tools
Let’s create a design with Merchize’s built-in design tools.
Step 1: Choose design placement
1. Select placement: Pick the product segment (front, back, sleeve, etc.) you want to work on. Each placement is edited independently.
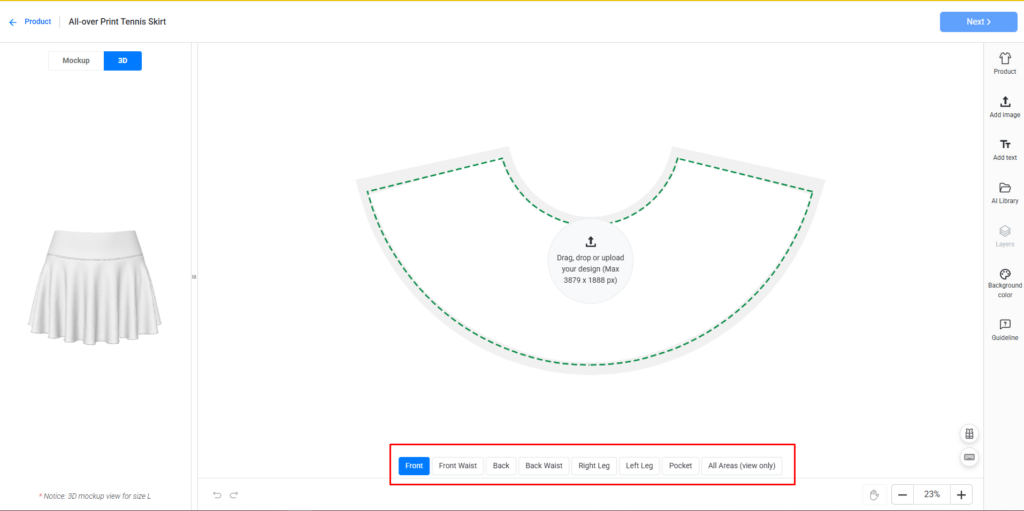
Tip: Use Apply to all areas to duplicate the design from one section to all other sections.
2. Navigation & view tools
-
- Zoom In / Zoom Out — focus on details or view the full layout.
- Hand / Drag tool — pan the canvas.
- Undo / Redo — step backward or forward through changes.
- 3D model / Mockup — Change between two preview modes: 3D Model or regular mockup image.
Tip: Drag the mouse to preview your design from different angles and sections and check how elements wrap and align across seams or curves.
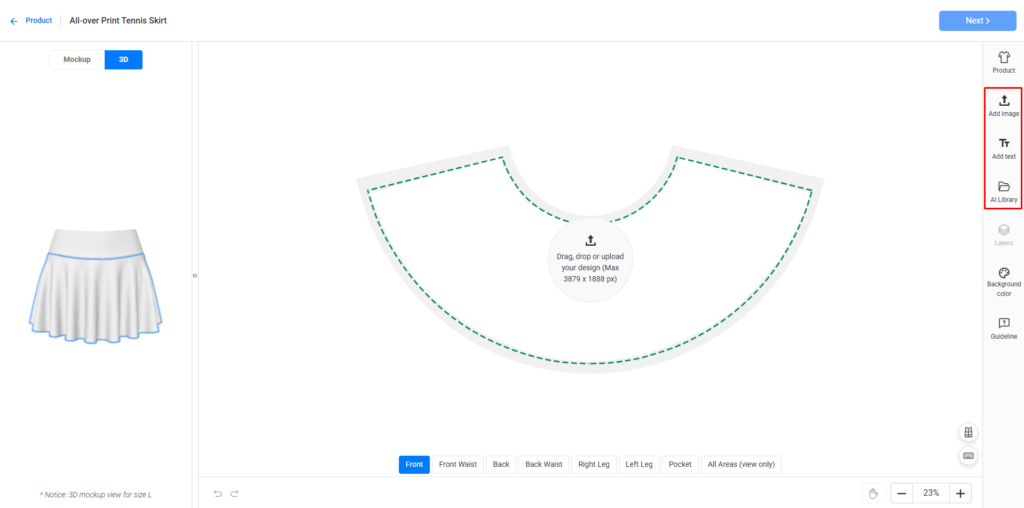
Step 2: Add elements to your workspace
To start, let’s load your design elements into the workspace.
- Add image: Add images/design elements from your library or devices to the design workspace
- Add text: Add custom text to the design
Note:
- Ensure your files adhere to the recommended dimensions and resolution.
- Accepted image file formats are JPG, JPEG, PNG, and SVG.
- The design library has a 10GB storage limit. If you’re close to or exceeding this limit, delete old or unnecessary files to make room for new uploads.
Besides these two options, you can also use the following feature to browse design resources to add to your design:
- AI Library: Browse Merchize’s AI Artwork library for free, high-quality, print-ready AI-generated designs.
Step 3: Transform your images
After loading your images, click on the image or design element you want to edit to reveal image editing tools:
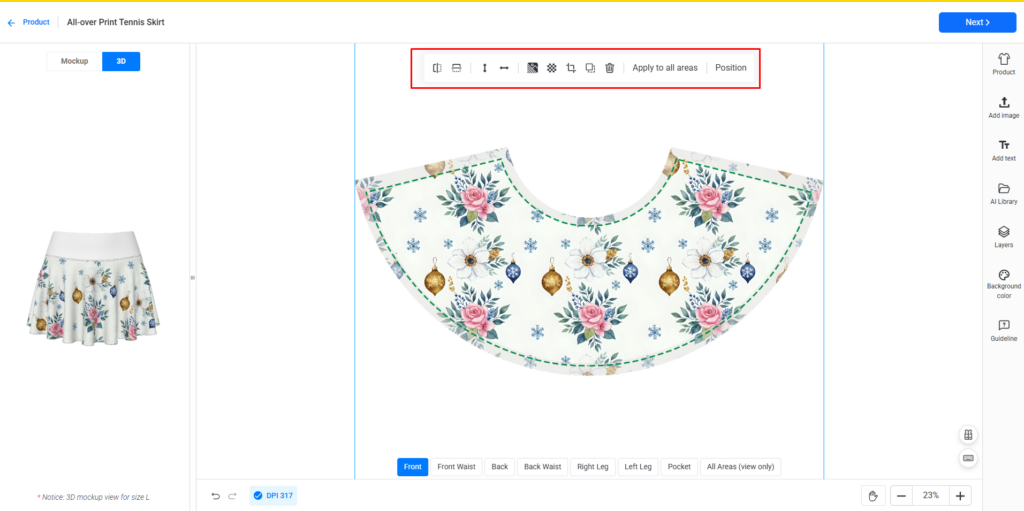
Adjust the size and position of images
- Resize / Scale — Drag corner handles or enter percentage values.
- Rotate — Drag the rotate handle to free-rotate or enter exact degrees.
- Fit to height/Fit to width: Automatically resize to match the product’s width or height.
- Position: Quickly access the layer panel and adjust layers forward, backward, or align them neatly.
Transform and enhance images
- Horizontal/Vertical flip: Mirror the image or text left-right or up-down.
- Crop: Trim unwanted parts
- Remove Background: Clean up your image instantly for a polished look
- Pattern: Quickly access the Pattern tool and create a design pattern from a single element
Step 3: Edit your text
To edit your text, click on the text to access the quick toolbar:
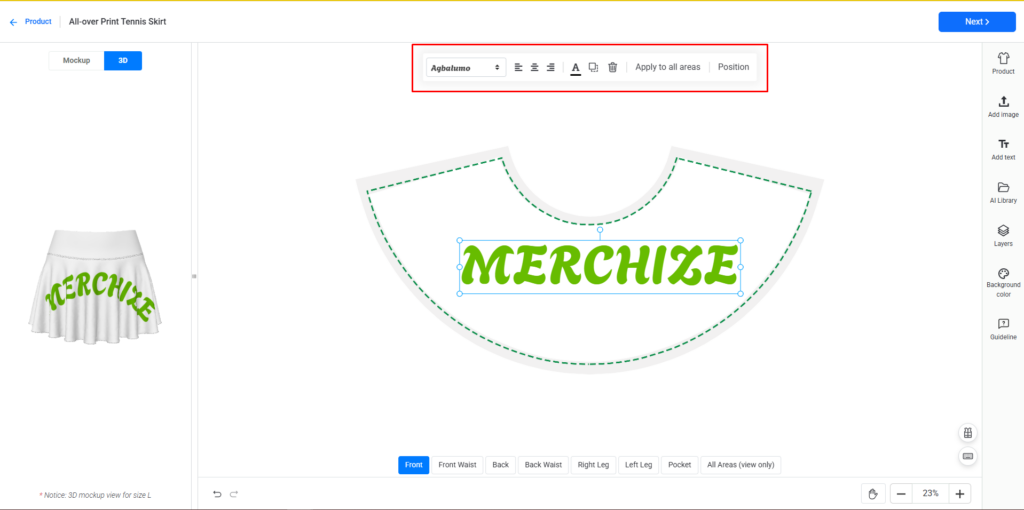
- Select Font: Select a font from our Font Library. You can search for font families or sort by language.
- Align text: Align text to left, center, or right (in accordance with the text box)
- Change font color: Select from the given palette or enter hex code to pick a color for the text.
To finetune your text, select the text > click Positions from the quick toolbar, or click Layers from the right-side bar:
- Add Font: Choose or upload a font from your device.
- Change text format: Choose among these four options: As typed, Uppercase, Lowercase, Capitalize
- Rotate text: Enter degrees to tilt your text.
- Adjust Font Size: Increase or decrease font size.
- Adjust text position: Fine-tune left and top positioning with numerical values.
- Align text (in accordance with the design template): Align text horizontally to the left, center, or right of the template. Align text vertically to the top, center, or bottom.
Step 3: Adjust your layers
On the right-side panel, click Layers.
On the Layers panel, you will see all the layers. Each image/text is treated as a layer.

With each layer, you can avail different editing tools:
- Adjust Dimensions (Width & Height): View and adjust the image’s width and height.
- Rotate: Enter degrees to adjust the image angle.
- Scale: Resize by entering a percentage of the original size.
- Position Precisely (Position left & Position top): Fine-tune placement with exact values for horizontal (Left) and vertical (Top) positions.
- Align Easily: Use quick buttons to align left, center, right, top, or bottom.
- Check DPI: Ensure the image resolution meets print quality requirements
- Create Pattern: With image elements, you can turn your design into repeating patterns for unique layouts. Open “More Effects” and turn on “Pattern” to create a pattern with this element. You can select a Pattern type and adjust horizontal and vertical spacing for your pattern.
Besides, you can also:
- Adjust layer order by dragging them up and down
- Lock layers
- Delete layers
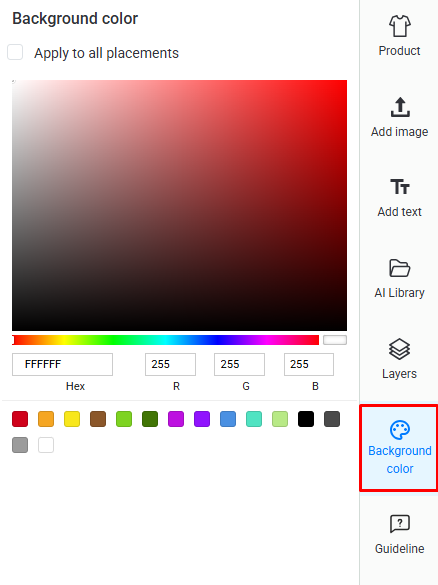
Step 4: Change the background color for your design
You can change the background color of your design by:
- Pick a color: Click anywhere on the large color box or drag the slider below to choose your shade.
- Use quick colors : Select from the preset color squares at the bottom for fast options.
- Enter exact color: Type in a Hex code or adjust the RGB values for precise control.
- Apply to all placements: Check the box if you want the background color to update across all areas of your design.
Step 5: Refine your designs
- Duplicate: Copy any element to save time when reusing designs.
- Remove: Delete elements you no longer want.
- Apply to all areas: Use the same design across all product sections.
- Save as template: Keep your design as a template for future use.
Note:
- Ensure that all important elements, such as text and key graphics, are placed within the white area (or Safe Print Area). This white area represents the smallest size. Design elements placed within this area will be fully displayed across all product sizes.
- Any design elements placed outside the white area (in the grey area or Bleed area) might be cut off in larger sizes during production.
- Extend the background and non-essential parts of the design to cover the entire gray “Bleed Area." This provides a full-coverage print effect, ensuring there are no blank edges on any size.
- Click the Guideline from the right-side bar to read the full Mockup Guideline.
That’s it! With Merchize’s built-in design tools, you can easily create professional, print-ready designs without needing external software. From uploading images and adding text to refining layers and backgrounds, everything you need is right at your fingertips.
👉 Ready to put your creativity into action? Start designing your next bestseller with Merchize today!