
How to Create New Products with Merchize
In this guide, you will learn how to create unique designs and products with Merchize in a few easy steps: pick a product, add your design, then review the details and publish.
Step 1: Select a product to design
- From your Merchize dashboard, go to Products.
- Click Create product. You will see the full Merchize catalog.
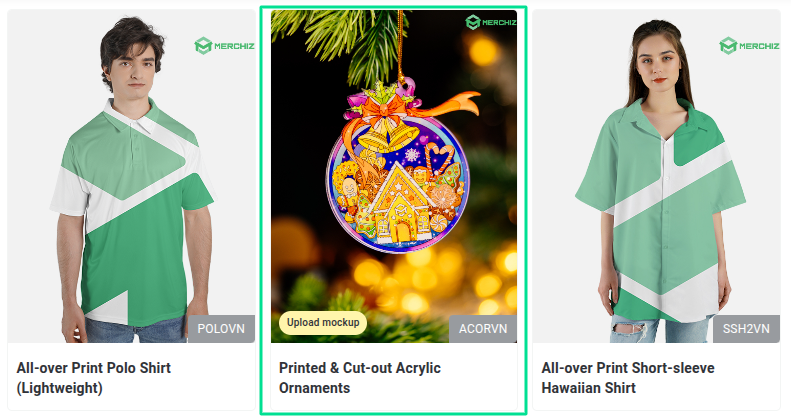
- Click a product card to select it. Use the search bar and filters to find products faster.
- Click Design to start designing.
Note: Look out for the “Upload mockup" tag
Some products in the catalog carry an Upload mockup tag. This means Merchize does not support Design Editor or Mockup Generator features for that product.
In other words, you can’t create your own design on Merchize’s website or automatically generate mockup images from our website.
For these products, you must create your design and mockup images using the provided PSD mockup and template files. See Step 2.2 for details.
Step 2: Create your design
What you see next depends on whether the product supports the Mockup Generator.
2.1. Products that support Mockup Generator
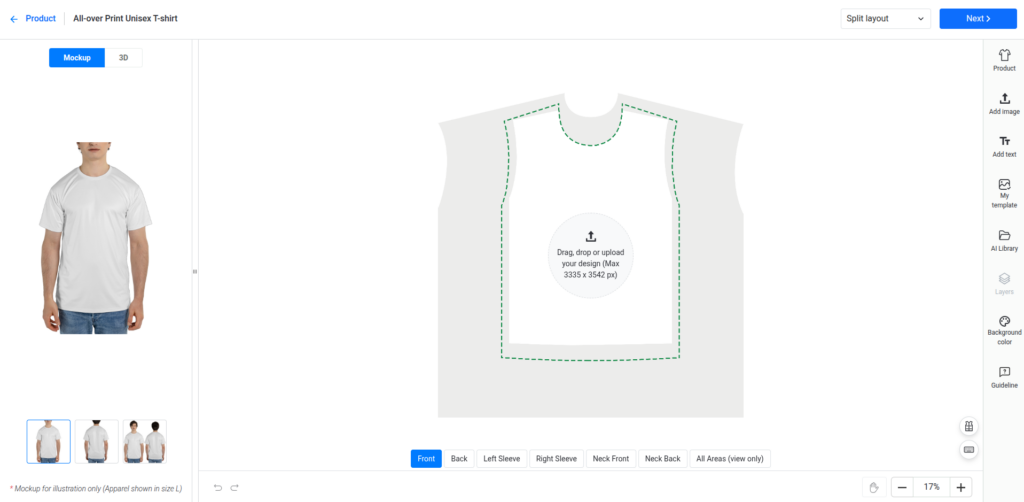
After you click Design, you will enter the Design editor.
1) Drag your artwork for each design area, or upload it from your computer.
2) Position and resize it as you like. Use the editing tools on the toolbar to refine and edit your design. Learn more about Merchize Design Editor tool here.
3) When your design is ready, click “Next” to continue to the product information page (see Step 3).
2.2. Products that don’t support Mockup Generator
For products tagged Upload mockup, Merchize prints directly from your provided file. Your design must be built on Merchize’s template; otherwise, it can’t be produced correctly.
1) Download the template
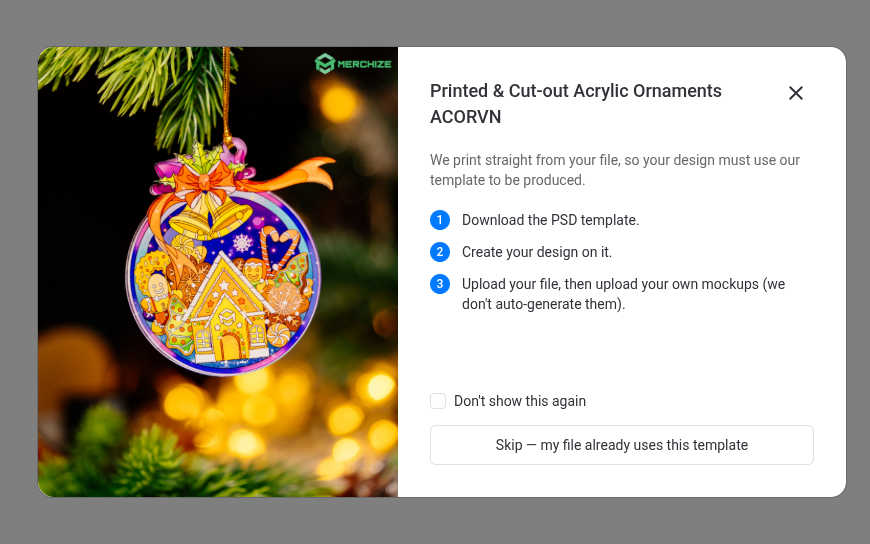
When you click Design on one of these products, a guide pop-up appears automatically. It walks you through three steps to create a design file.
Tick Don’t show this again if you don’t want to see the pop-up next time. Close the pop-up.
How to download the template
Option 1: On the Design workspace, click Download template to open the product’s template folder.
Option 2: If the Design workspace doesn’t display a link to download the template, you can get the template directly from our website. Go to merchize.com and search for the product. On the product page, click Download Mockup Template, or open the Mockup & Template tab and use the download link.
Tip: Photoshop works well for editing PSD files. Photopea is a free browser-based alternative.
2) Upload your finished design
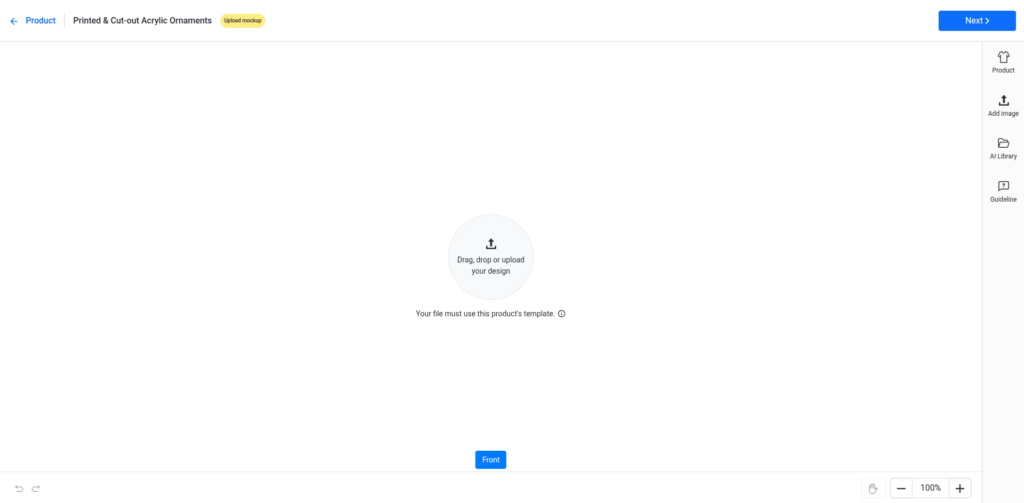
The editor for these products is simplified: there’s no editing toolbar, just an upload area.
Drag and drop your finished file into the upload area, or click Drag, drop or upload your design to choose a file. Then click Next.
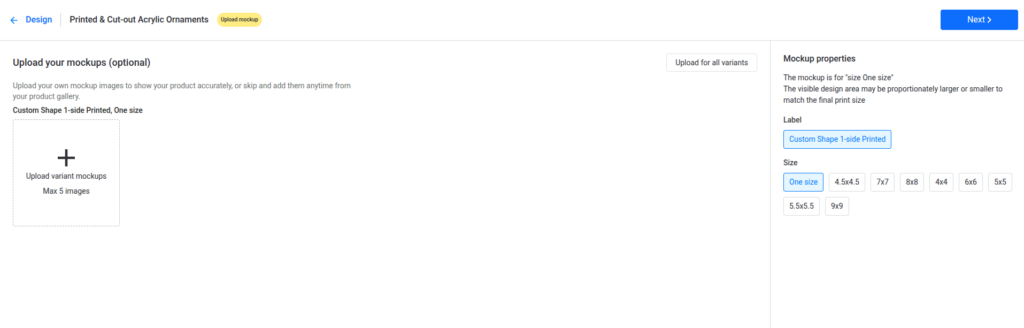
3) Upload your own mockups (optional)
After Next, you will reach the Upload your mockups screen. Mockups are the product photos shown to your customers and synced to your store. This step is optional, and you can add or change mockups later.
Click Create.
Step 3: Edit and publish your product
On the product information page, you can review everything before your product goes live.
3.1. Edit Product information
- Title: write a clear, searchable product name.
- Description: describe your product for customers.
- Size chart: add your own size chart images.
- Product gallery: upload or replace mockups.
3.2. Edit Variants and pricing
In this section, set your selling prices and check that each variant is mapped to the correct Merchize variant.
Your design is mapped to a variant in the Merchize catalog automatically, but the match may not be right. Wrong mapping can lead to the wrong item being produced, so please check carefully.
If a variant is mapped incorrectly:
1) Click Map or Edit Mapping
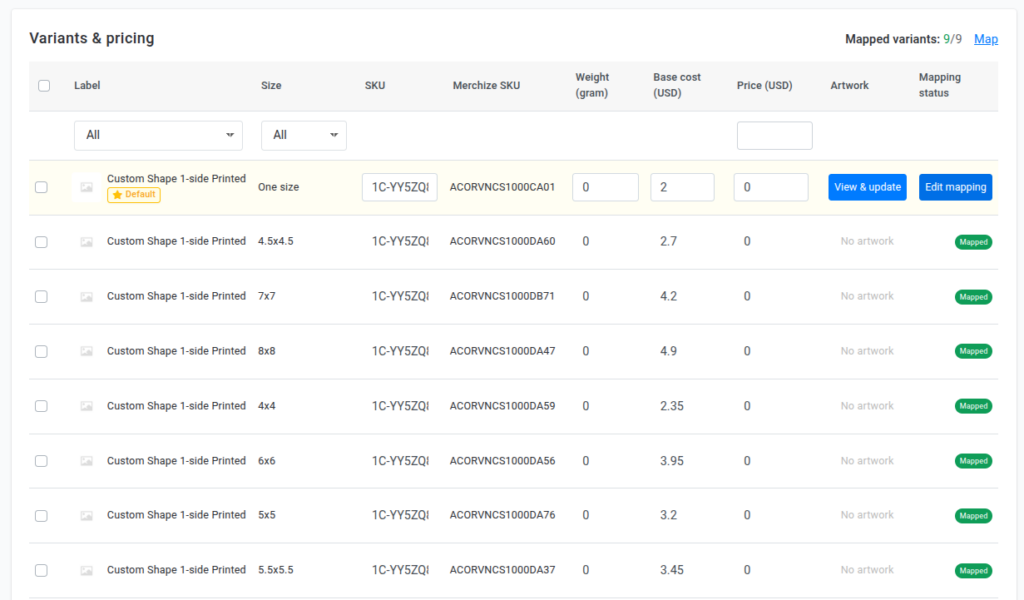
2) In the pop-up, click Remove mapping.
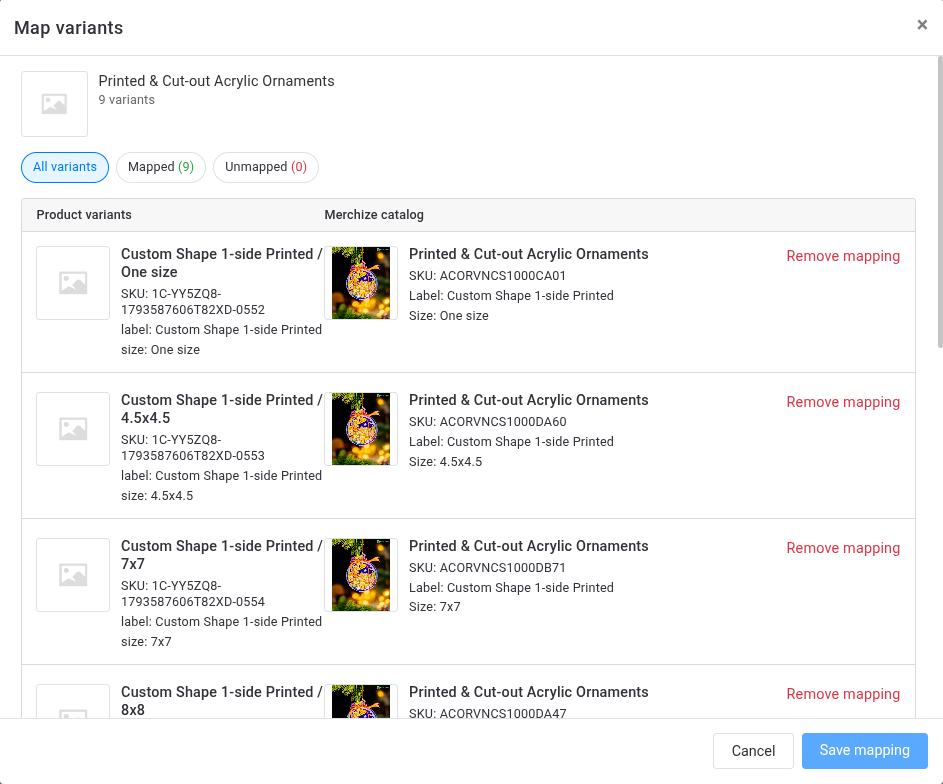
3) Enter the product name and select the correct option for each variant.
4) Click Save mapping to confirm.
3.3. Publish
When everything looks right, click Publish to send your product to your selling store(s).
Need help?
If you get stuck at any step, contact the Merchize Support team and share a screenshot of what you see. We’re happy to help.